|

|
A friend commissioned these gloves for her daughter recently, so I searched for the pattern everywhere. I could not find the one that I liked so this is my version.
Materials:
Black Yarn - light worsted weight
3.00 mm crochet hook
Scissors, needle
Notes:
Starting chain is multiples of 6
Take care not to twist the starting chain when joining.
Glove is worked in the round, joining at the end of each row with a sl st
Be sure to keep trying your glove on to make sure it fits and it is long enough
Special stitches used:
V-stitch: 2 double crochet in the same stitch
Crocodile Stitch: 5 double crochet, chain 1, 5 double crochet around posts of V- stitch. There is a very helpful tutorial here from Bhooked: www.youtube.com/watch?v=6BRKEfpIYmk
Steps and Procedure:
- Chain 36, slip stitch to beginning chain to make a large ring, be sure not to twist the chain! (Starting chain is multiples of 6, this makes a medium size glove)
R1: chain 3, DC in the same stitch, chain 1, skip 2 chains, 1 DC in the next, ch1, skip 2 chains, *2 DC in the next (V-Stitch made), ch1, sk2, 1 DC, ch1, sk2* continue from * to * around. Slip stitch to top of beginning ch3. (6 V stitch, 6 dc)
R2: (crocodile stitch row) chain 3, DC 4 around the post of the chain 3 from the previous round working in a downwards direction, chain 1, DC 5 around the post of the next DC in the V-stitch from the previous row going back up (crocodile stitch made), slip stitch into next DC, *crocodile stitch around next V-stitch (5DC, ch1, 5DC), slip stitch in DC*, repeat around (6 crocodile stitch, 6 slip stitch)
NOTE: On the final slip stitch slip through the beginning chain 3 from the first crocodile stitch and the DC, to anchor it to the round.
R3: Chain 3, DC in the same stitch, chain 1, *DC in the middle of the crocodile stitch between the two sides of the scale, chain 1, V-stitch in the sl st, ch1* repeat from * to * around, slip stitch to top of chain 3. (6 V-stitch, 6 DC)
R4: Repeat Row 2 (Crocodile stitch row)
R5: Repeat Row 3 (Foundation stitch row)
R6: Repeat R2 (CS Row)
R7: Repeat R3
R8: Repeat R2 (CS Row)
R9: Repeat R3
R10: Repeat R2 (CS Row)
You should now have 5 rows of crocodile stitch, test the fit!
R11: Ch3 and 2DC in same stitch, *3DC in middle of scale, 3 DC in Sl St* repeat x4. Chain 6 and skip the final crocodile stitch, this creates the thumb hole. Slip stitch to the first DC, not the starting chain, to join. (11 3DC, chain 6)
R12: Slip stitch to next space, chain 3, DC in same space (between DC cluster), *3 DC in next space* repeat x8, in chain 6 space do 3DC,ch1,3DC, DC in first space, join with a sl st to the top of the beginning ch3. (12 3DC clusters)
R13: sl st to next space, ch3, DC in same space, 2DC in next space, 3 DC in next space, *2DC in next 2 spaces, 3 DC in next* repeat x3, join with sl st in top of ch3. (8 2DC, 4 3DC)
R14: sl st to next space, ch3, DC in same space, *2DC in next space* repeat x11 (12 2DC)
R15: sl st to next space, ch3, DC in same space, skip next space, 3DC in next 3 spaces, sk next space, 3DC in next 3 spaces, skip next space, 3DC in next 2 spaces, 1DC in starting spacer, join to top of ch3. (9 3DC)
R16 – 23: slip stitch to next space, ch3, DC in same stitch, 3DC in each space around, 1DC in starting space, join to top of ch3. (9 3DC) – to make gloves longer, add more of these rows
R24: ch3, DC in same stitch and in each stitch around, join to top of ch3 (27 DC)
R25: ch3, FPDC in 1st stitch, BPDC in next stitch, repeat pattern around to create ribbed edge, making sure you end with FPDC

|

|

|

|
|

A friend commissioned these gloves for her sun recently. This was an easy project and a quick one to make. This was made for a 10 year old boy, so for a small hand.
Materials:
3.50 mm crochet hook
Blue, yellow, red yarn
Scissors, needle
Stitch marker
Steps and Procedure:
Making the cuff: working in rows
- With red yarn and 3.50 mm crochet hook
R1. Ch 21, and SC in the 2nd chain from the hook and down the chain line (20 SC), ch 1 and turn
R2. Make a row of SC ONLY in the Back loop (20 BLSC – Back loop SC), ch 1 and turn
R3-16 continue with the BLSC making 20 BLSC in every row, ch 1 and turn
- Change to yellow yarn
R17-22. Ch 1 and turn, continue with the 20 BLSC in these 6 rows, ch 1 and turn
- Change to red yarn
- connect the sides together and sl st through both sides to the first stitch
Making the glove:
Right Hand:
(now that the cuff part is made and the sides are sl st together, we can continue to make the main part of the glove)
- start from the top of the cuff, working in rounds (use the stitch marker)
R1. ch 1 and SC around the edge making 24 SC
R2. 4 SC – INC in the 5th stitch (repeat around) – 30 SC
R3-8. make 1 SC in every stitch around (30 SC)
R9. 23 SC, ch 2, skip 5 stitches, 2 SC (27 SC)
R10. Make 1 SC in every stitch around and in the chains (27 SC)
R11-12. Make 1 SC in every stitch around (27 SC)
R13. SC DEC – 12 SC – SC DEC – 11 SC (25 SC)
R14-19. Make 1 SC in every stitch around (25 SC)
- change to yellow yarn
R20. Make 1 SC in every stitch around (25 SC)
Making the RH thumb hole:
- With red yarn and 3.50 mm crochet hook
- Connect with the red yarn and make 3 rows of 12 SC
- Change to yellow yarn and make 1 row of 12 SC
Left Hand:
- start from the top of the cuff, working in rounds (use the stitch marker)
R1. ch 1 and SC around the edge making 24 SC
R2. 4 SC – INC in the 5th stitch (repeat around) – 30 SC
R3-8. make 1 SC in every stitch around (30 SC)
R9. SC 2 – ch 2 (skip 5 stitches) – SC 23 (27 SC)
R10. Make 1 SC in every stitch around and in the chains (27 SC)
R11-12. Make 1 SC in every stitch around (27 SC)
R13. SC DEC – 12 SC – SC DEC – 11 SC (25 SC)
R14-19. Make 1 SC in every stitch around (25 SC)
- change to yellow yarn
R20. Make 1 SC in every stitch around (25 SC)
Making the LH thumb hole:
- With red yarn and 3.50 mm crochet hook
- Connect with the red yarn and make 3 rows of 12 SC
- Change to yellow yarn and make 1 row of 12 SC
Making the Power Circles:
- with blue yarn and 3.50 mm crochet hook, use the stitch marker
1. make a Magic Ring and 6 SC
2. make 6 INC (12 SC)
3. INC – 1 SC (repeat around) (18 SC)
4. INC – 2 SC (repeat around) (24 SC)
- Change to yellow yarn
5. Make 1 SC in every stitch around (24 SC)
- sew the power circle to the center to the gloves

|
|
A friend commissioned fingerless gloves that had a "cable" through the middle.... I thought and thought, researched and searched, and finally came up with this pattern! I used a smaller hook for a more delicate look, and here it is....
Materials:
3.00 mm crochet hook
yarn of your choice
scissors, needle
Steps and Procedure:
1. Making the Left Hand
Chain 37
1: SC in 2nd chain from hook and in each chain across. Ch1, turn. (36 SC)
2: SC in next 13 stitches, FPHDC around next 2 stitches, SC in next stitch, FPHDC around next 4 stitches, SC in next stitch, FPHDC around next 2 stitches, SC in next 13 stitches, Ch1, turn.
3: SC in next 13 stitches, BPHDC around next 2 stitches, SC in next st, BPHDC around next 4 st, SC in next st, BPHDC around next 2 st, SC in next 13 st, ch1, turn.
4: SC in next 13 st, FPHDC around next 2 st, SC in next st, skip next 2 st, FPDC (yes, a DC, not a typo) around next 2 st, go back and FPDC around first skipped st, and next skipped st, SC in next st, FPHDC in next 2 st, SC in next 13 st, ch1, turn.
5: SC in next 13 st, BPHDC around next 2 st, SC in next st, BPHDC around next 4 st, SC in next st, BPHDC in next 2 st, SC in next 13 st, ch1, turn.
6: SC in next 13 st, FPHDC around next 2 st, SC in next st, FPHDC around next 4 st, SC in next st, FPHDC around next 2 st, SC in next 13 st, ch1, turn.
7: SC in next 13 HDC, BPHDC around next 2 st, SC in next st, BPHDC around next 4 st, SC in next st, BPHDC around next 2 st, SC in next 13 st, ch 1 turn.
8-11: Repeat rows 4-7
12-15: Repeat rows 4-7
16-19: Repeat rows 4-7
20-23: Repeat rows 4-7
24: SC in next 13 st, FPHDC around next 2 st, SC in next st, skip next 2 st, FPDC around next 2 st, go back and FPDC around first skipped st, and next skipped st, SC in next st, FPHDC in next 2 st, SC in next 13 st, ch1, turn.
- making the Left Hand Thumb hole (the increases in each row are marked bold and underlined)
25: SC in next 13 st, BPHDC around next 2 st, SC in next st, BPHDC around next 4 st, SC in next st, BPHDC around next 2 st, SC in next 6 st, 2 SC in each of next 2 st, SC in next 5 st. Ch1, turn.
26: SC in next 6 st, 2 SC in next st, SC in next 2 st, 2 SC in next st, SC in next 5 st, FPHDC around next 2 st, SC in next st, FPHDC around next 4 st, SC in next st, FPHDC around next 2 st, SC in next 13 st. Ch1, turn.
27: SC in next 13 st, BPHDC around next 2 st, SC in next st, BPHDC around next 4 st, SC in next st, BPHDC around next 2 st, SC in next 5 st, 2 SC in next st, SC in next 5 st, 2 SC in next st, SC in next 5 st. Ch1, turn.
28: SC in next 5 st, 2 SC in next st, SC in next 6 st, 2 SC in next st, SC in next 6 st, FPHDC in next 2 st, SC in next st, skip next 2 st, FPDC around next 2 st, go back and FPDC around 1st skipped st, and next skipped st, SC in next st, FPHDC around next 2 st, SC in next 13 st, Ch1, turn.
29: SC in next 13 st, BPHDC around next 2 st, SC in next st, BPHDC around next 4 st, SC in next st, BPHDC in next 2 st, SC in next 7 st, skip next 9 st, SC in next 6 st. Ch1, turn.
- Left Hand Thumb hole made.
30: SC in next 13 stitches, FPHDC around next 2 stitches, SC in next stitch, FPHDC around next 4 stitches, SC in next stitch, FPHDC around next 2 stitches, SC in next 13 stitches, Ch1, turn.
31: SC in next 13 stitches, BPHDC around next 2 stitches, SC in next st, BPHDC around next 4 st, SC in next st, BPHDC around next 2 st, SC in next 13 st, ch1, turn.
32-35: Repeat rows 4-7.
- turn to the wrong side and sl st down the center connecting the sides together
- turn to the right side and make a row of SC along the beginning chain
- make a row of the SC along the top of the mitten
- make 3 rows of SC at the thumb (13 SC in each row)
2. Making the Right Hand
Chain 37
1: SC in 2nd chain from hook and in each chain across. Ch1, turn. (36 SC)
2: SC in next 13 stitches, FPHDC around next 2 stitches, SC in next stitch, FPHDC around next 4 stitches, SC in next stitch, FPHDC around next 2 stitches, SC in next 13 stitches, Ch1, turn.
3: SC in next 13 stitches, BPHDC around next 2 stitches, SC in next st, BPHDC around next 4 st, SC in next st, BPHDC around next 2 st, SC in next 13 st, ch1, turn.
4: SC in next 13 st, FPHDC around next 2 st, SC in next st, skip next 2 st, FPDC (yes, a DC, not a typo) around next 2 st, go back and FPDC around first skipped st, and next skipped st, SC in next st, FPHDC in next 2 st, SC in next 13 st, ch1, turn.
5: SC in next 13 st, BPHDC around next 2 st, SC in next st, BPHDC around next 4 st, SC in next st, BPHDC in next 2 st, SC in next 13 st, ch1, turn.
6: SC in next 13 st, FPHDC around next 2 st, SC in next st, FPHDC around next 4 st, SC in next st, FPHDC around next 2 st, SC in next 13 st, ch1, turn.
7: SC in next 13 HDC, BPHDC around next 2 st, SC in next st, BPHDC around next 4 st, SC in next st, BPHDC around next 2 st, SC in next 13 st, ch 1 turn.
8-11: Repeat rows 4-7
12-15: Repeat rows 4-7
16-19: Repeat rows 4-7
20-23: Repeat rows 4-7
24: SC in next 13 st, FPHDC around next 2 st, SC in next st, skip next 2 st, FPDC around next 2 st, go back and FPDC around first skipped st, and next skipped st, SC in next st, FPHDC in next 2 st, SC in next 13 st, ch1, turn.
- making the Right Hand Thumb hole (the increases in each row are marked bold and underlined)
25: SC in next 5 st, 2 SC in each of next 2 st, SC in next 6 st, BPHDC around next 2 st, SC in next st, BPHDC around next 4 st, SC in next st, BPHDC around next 2 st, SC in next 13 st, Ch1, turn.
26: SC in next 13 st, FPHDC around next 2 st, SC in next st, FPHDC around next 4 st, SC in next st, FPHDC around next 2 st, SC in next 5 st, 2 SC in next st, SC in next 2 st, 2 SC in next st, SC in next 6 st, ch 1, turn.
27: SC in next 5 st, 2 SC in next st, SC in next 5 st, 2 SC in next st, SC in next 5 st, BPHDC around next 2 st, SC in next st, BPHDC around next 4 st, SC in next st, BPHDC around next 2 st, SC in next 13 st, ch1, turn.
28. SC in next 13 st, FPHDC in next 2 st, SC in next st, skip next 2 st, FPDC around next 2 st, go back and FPDC around 1st skipped st, and next skipped st, SC in next st, FPHDC around next 2 st, SC in next 6 st, 2 SC in next st, SC in next 6 st, 2 SC in next st, SC in next 5 st, Ch1, turn.
29: SC in next 6 st, skip next 9 st, SC in next 7 st, BPHDC around next 2 st, SC in next st, BPHDC around next 4 st, SC in next st, BPHDC in next 2 st, SC in next 13 st, Ch1, turn.
- Right Hand Thumb hole made.
30: SC in next 13 stitches, FPHDC around next 2 stitches, SC in next stitch, FPHDC around next 4 stitches, SC in next stitch, FPHDC around next 2 stitches, SC in next 13 stitches, Ch1, turn.
31: SC in next 13 stitches, BPHDC around next 2 stitches, SC in next st, BPHDC around next 4 st, SC in next st, BPHDC around next 2 st, SC in next 13 st, ch1, turn.
32-35: Repeat rows 4-7.
- turn to the wrong side and sl st down the center connecting the sides together
- turn to the right side and make a row of SC along the beginning chain
- make a row of the SC along the top of the mitten
- make 3 rows of SC at the thumb (13 SC in each row)

|

|
|

|
I have been wanting to make this Mermaid hat/scarf combo for a while now, and have finally had a chance recently to find the time to undergo this project. This was so very time consuming:( The project is not too complicated for a seasoned crocheter, so if you are a beginner crocheter I do not recommend this project. It does take up a lot of yarn, so surround yourself with at least 3 balls of yarn, find a quite place enjoy...
1. mermaid hat

Materials:
pink, purple, magenta yarn
3.50 and 4.00 mm crochet hook
Special Stitches:
Front post double crochet (FPDC): double crochet around a double crochet post from the previous round (hook is inserted behind post so as to push the post to the “front”)
Crocodile stitch (Crocodile st) – 4 fpdc around one dc post of a 2dc cluster, 4 fpdc around other dc post of 2dc cluster.
Steps and Procedure:
- Making the Brim of the hat
- with 3.50 mm crochet hook and purple yarn
1: Ch 9, SC across. Ch 1, turn. (8 sc)
2: In BLO, sc across, ch 1. (8 sc)
3-58: Continue making 1 SC in every stitch around (8 SC) until the brim is big enough for your head circumstance (make sure it is not too big, because it will stretch)
- Place both short ends of the brim together, and sl st across in BLO to join. Do not fasten off. Ch 1.
- Making the Body of the hat
- Working around top of brim
- with 4.00 mm crochet hook and purple yarn
1: Evenly sc 77. Join with sl st to first sc of rnd. (77 sc)
2: (making the foundation row) Ch 3 (counts as a dc, ch 1), sk 2 sts, 2 dc in next. *Ch 1, sk 2 sts, dc in next. Ch 1, sk 2 sts, 2 dc in next. Repeat around. Ch 1, join with sl st to 2nd ch of ch 3 from beg of rnd. (13 dc and 13 2dc clusters)
3: (making the crocodile st row) Ch 1, sc in same st (first dc). *In 2 dc cluster from round below, 4 fpdc around one dc of 2dc cluster; 4 fpdc around next dc post – crocodile stitch made. (Note: to make a crocodile stitch, you will need to turn your work the left to dc around the second post) Sc in next dc.* Rep around. Make the Crocodile st around last 2dc cluster. Join with sl st to first sc from beg of rnd. (13 crocodiles and 13 sc)
- change the yarn to magenta
4. (making the foundation row) Ch 2 (counts as a dc), dc in same st. Ch 1. *In center of next crocodile st from previous rnd, dc. Ch 1. In next sc from previous rnd, 2 dc. Ch 1. Repeat around. In center of next crocodile st from previous rnd, dc. Join with sl st to top of ch 2 from beg of rnd. (13 2dc clusters and 13 dc)
5: (making the Crocodile st row) Ch 1. *Crocodile st around 2dc cluster, sc in next dc from previous rnd.* Repeat around. Join with sl st to center of first crocodile st made. (13 crocodiles and 13 sc)
- change the yarn to pink
6: (making the foundation row) Ch 3 (counts as a dc, ch 1); in next sc, 2dc. Ch 1. *In center of next crocodile st from previous rnd, dc. Ch 1. In next sc from previous rnd, 2 dc. Ch 1.* Repeat around. Join with sl st to top of ch 2 from beg of rnd. (13 2dc clusters and 13 dc)
7. (making the crocodile stitch row) Ch 1, sc in same st (first dc). *In 2 dc cluster from round below, 4 fpdc around one dc of 2dc cluster; 4 fpdc around next dc post – crocodile stitch made. (Note: to make a crocodile stitch, you will need to turn your work the left to dc around the second post) Sc in next dc.* Repeat around. Make the Crocodile st around last 2dc cluster. Join with sl st to first sc from beg of rnd. (13 crocodiles and 13 sc)
8-26: Repeat Rounds 4-7 making sure you change the color patterns
27: (making the crocodile stitch row) Ch 1, sc in same st (first dc). *In 2 dc cluster from round below, 4 fpdc around one dc of 2dc cluster; 4 fpdc around next dc post – crocodile stitch made. (Note: to make a crocodile stitch, you will need to turn your work the left to dc around the second post) Sc in next dc.* Repeat around. Make the Crocodile st around last 2dc cluster. Join with sl st to first sc from beg of rnd. (13 crocodiles and 13 sc)
- change the color to magenta
28: (Decrease row) Ch 2, dc in same st, ch 1. Dc in center of next crocodile st from previous rnd. *Dc in next sc from previous rnd, and dc in next sc from previous rnd – first deceased/combined 2dc cluster made
Ch 1. Dc in center of next crocodile st from previous rnd, ch 1. 2 dc in next sc from previous rnd, ch 1. Dc in center of next crocodile st, ch 1.* Repeat around.
Dc in next sc from previous rnd, and dc in next sc from previous rnd – last decreased 2dc cluster.
Ch 1. Dc in center of next crocodile st from previous rnd, ch 1. Join with sl st to top of beg ch 2. (9 2dc clusters, 9 dc)
29: Ch 1, *crocodile st around 2 posts below. Sc in next dc from previous rnd below. Crocodile st around decreased posts from previous rnd below (see Fig 7). Sc in next dc from rnd below.* Rep around. Join with sl st to center of crocodile st from beg of rnd. (9 crocodile sts, 9sc)
- change the color to pink
30: Ch 3 (counts as a dc, ch 1), *dc in next sc from previous rnd, dc in the next sc from previous rnd – combined 2dc cluster made. Ch 1, dc in center of crocodile from previous rnd. 2 dc in sc from previous rnd. Ch 1, dc in center of crocodile st from previous rnd, ch 1* Rep around. Dc in next sc, dc in next sc after that – last combined 2dc cluster made, ch 1. Join with sl st to 2nd ch of ch 3 from beg of rnd.
31: Ch 1, sc in same st, ch 1. *Crocodile st around first decreased 2dc cluster from previous rnd – first decreased crocodile made. Sc in next dc from previous rnd. Crocodile st around next 2dc cluster from rnd below. Sc in next dc from rnd below.* Rep around. Crocodile around last decreased 2dc cluster. Join with sl st to second ch of beg ch 3. Fasten off, leaving a long tail.
- change to color to purple
32. (foundation row) ch 3 and a DC - DC Dec - DC - 2 DC - DC - DC Dec - DC - sl st
33. (crocodile st row) ch 1, SC - Crock st - SC - Crock st (over DEC from previous row) - SC - Crock st - SC - Crock st - SC, sl st to Crock st
- Closing top of hat
- With long tail threaded on needle, gather sts around yarn needle and pull through, gathering the hat sides closed (tie a knot to keep in place if necessary). Fasten off, carry yarn ends to inside of hat, and weave in ends.
- Making the Fin
- With 3.50 mm crochet hook and purple yarn
(All rows are worked in BLO)
- Ch 15.
1: Sc across, ch 1, turn (14 sc)
2: BLO Sc in 13 sts, leave rem sts unworked, ch 1, turn (13 sc)
3: Sc across. Ch 1, turn (13 sc)
4: Sc in 12 sts, leave rem sts unworked, ch 1, turn (12 sc)
5: Sc across. Ch 1, turn (12 sc)
6: Sc in 11 sts, leave rem sts unworked, ch 1, turn (11 sc)
7: Sc across. Ch 1, turn (11 sc)
8: Sc in 10 sts, leave rem sts unworked, ch 1, turn (10 sc)
9: Sc across. Ch 1, turn (10 sc)
10: Sc in 9 sts, leave rem sts unworked, ch 1, turn (9 sc)
11: Sc across. Ch 1, turn (9 sc)
12: Sc in next 8 sts, 2 sc in last, ch 1, turn (10 sc)
13: Sc across, ch 1, turn (10 sc)
14: Sc in next 9 sts, 2 sc in last, ch 1, turn (11 sc)
15: Sc across, ch 1, turn (11 sc)
16: Sc in next 10 sts, 2 sc in last, ch 1, turn (12 sc)
17: Sc across across, ch 1, turn (12 sc)
18: Sc in next 11 sts, 2 sc in last, ch 1, turn (13 sc)
19: Sc across, ch 1, turn (13 sc)
20: Sc in next 12 sts, 2 sc in last st, ch 1, turn (14 sc)
21: Sc across, ch 1 (14 sc)
- Sc evenly 6 sc across top of fin. Fasten off, leaving long tail for sewing.
- Sew fin to top of hat.
- this pattern would fit a 9-12 year old child, for a bigger hat make a longer round of SC at the very beginning (81 SC on top of the brim)
The pattern is based on craftykittycrochet.com/2018/11/17/mermaid-slouchy-hat-crochet-pattern/. For more detailed instructions check out the pics on the original post and pattern which I have tweaked and changed to fit my needs.
2. mermaid scarf

- have found a great youtube video tutorial to make this Mermaid Scarf. It uses 5 DC instead of 4 DC clusters for the crocodile stitch and a 2DC instead of the 1DC-2DC combo for the foundation row. Check it out, I have used it as a basis for my Mermaid Scarf pattern entirely!
Materials:
5.00 mm crochet hook
pink, magenta and purple yarn
Steps and Procedure:
- start with purple yarn and follow the instructions of the video
- change the color every 3rd row (at every foundation row)
- I have made 24 rows, 2 tassles and a fin which I have sewn onto the scarf
Here is the pattern:
www.youtube.com/watch?v=LsIbgdFztRQ
- after making the scarf following the above pattern, make a fin:
- Making the Fin
(All rows after foundation row are worked in BLO)
Ch 20.
1 – Sc in each st across. Ch 1, turn (19 sc)
2 – Sc in next 17 sts, sc2tog over last 2 sts. Ch 1, turn (18 sc)
3 – Sc2tog over next 2 sts, sc in next 16 sts. Ch 1, turn (17 sc)
4 – Sc in next 15 sts, sc2tog over last 2 sts. Ch 1, turn (16 sc)
5 – Sc2tog over next 2 sts, sc in next 14 sts. Ch 1, turn (15 sc)
6 – Sc in next 13 sts, sc2tog over last 2 sts. Ch 1, turn (14 sc)
7 – Sc2tog over next 2 sts, sc in next 12 sts. Ch 1, turn (13 sc)
8 – Sc in next 11 sts, sc2tog over last 2 sts. Ch 1, turn (12 sc)
9 – Sc2tog over next 2 sts, sc in next 10 sts. Ch 1, turn (11 sc)
10 – Sc in next 9 sts, sc2tog over last 2 sts. Ch 1, turn (10 sc)
11 – Sc in each st across. Ch 1, turn (10 sc)
12 – Sc in next 9 sts, 2 sc in last st. Ch 1, turn (11 sc)
13 – 2 sc in next st, sc in next 10 sts. Ch 1, turn (12 sc)
14 – Sc in next 11 sts, 2 sc in last st. Ch 1, turn (13 sc)
15 – 2 sc in next st, sc in next 12 sts. Ch 1, turn (14 sc)
16 – Sc in next 13 sts, 2 sc in last st. Ch 1, turn (15 sc)
17 – 2 sc in next st, sc in next 14 sts. Ch 1, turn (16 sc)
18 – Sc in next 15 sts, 2 sc in last st. Ch 1, turn (17 sc)
19 – 2 sc in next st, sc in next 16 sts. Ch 1, turn (18 sc)
20 – Sc in next 17 sts, 2 sc in last st. Ch 1, turn (19 sc)
21 – Sc in each st across (19 sc)
- SC evenly 8 sc across top of fin
Fasten off, leaving long tail for sewing to Scarf.
- make 2 tassels and sew them onto the both ends of the scarf
- sew the fin onto the last crocodile stitch at the end


|

|
|

|

I saw these Snowman fingerless gloves, and I had to make them for the Winter Concert fundraising I was involved in at my school last week. They are super easy to make and a perfect gift for a child. These gloves fit a small adult hand, so if you'd like them smaller use a smaller hook. Here it is, the pattern...
Materials:
4.50 mm crochet hook
white, black, orange yarn
scissors, needle
Steps and Procedure:
- Making the Right Hand Glove:
- ch 2 at the beginning of the round, DOES NOT count as a stitch
1. Chain 24, join to first chain to make a circle and chain 2. Be sure not to twist your chain.
2-9: DC in each stitch around, join to first DC, chain 2 (24 DC)
10: (making the thumb hole) DC in first 20 stitches, chain 4 and skip the last 4 stitches, join to first double crochet, chain 2
11: DC in each stitch around (including the 4 chains), join, chain 2
12: DC in each stitch around, join, chain 1
13: SC in each stitch around, join to first SC, fasten off and weave in ends.
- (optional) SC around the beginning chain on the beginning side of the glove
- Making the Left Hand Glove:
1. Chain 24, join to first chain to make a circle and chain 2. Be sure not to twist your chain.
2-9: DC in each stitch around, join to first DC, chain 2
10: (making the thumb hole) DC in first stitch, chain 4 and skip the next 4 stitches, 19 DC in remaining stitches in round, join to first double crochet, chain 2
11: DC in each stitch around (including the 4 chains), join, chain 2
12: DC in each stitch around, join, chain 1
13: SC in each stitch around, join to first SC, fasten off and weave in ends.
- (optional) SC around the beginning chain on the beginning side of the glove
- Making the Snowman Nose:
- with orange and 4.50 mm crochet hook
- Chain 5, SC in second chain from hook, HDC in next, DC in last 2, fasten off leaving long tail to stitch nose onto glove.
- Making the Snowman Eyes:
- with black yarn and 4.50 mm crochet hook
- Make a Magic Ring and 6 HDC inside the ring
- Assembly:
- sew the eyes on
- sew the carrot nose on
- embroider the smile
- embroiderer the white on the eyes
Thank you www.repeatcrafterme.com/2019/11/crochet-christmas-fingerless-gloves.html for the free pattern!
"Olaf" beanie

Oh, how happy I was to find this pattern for Olaf from Frozen hat! Olaf is by far my favorite character from the Frozen movie! In the original pattern this is an earflap hat, but I changed it into a beanie. Here are the details... Thank you to www.hopefulhoney.com/2014/09/frozen-olaf-inspired-hat-crochet-pattern.html for the original earflap hat pattern!
- this beanie fits the 7-10 year old child, so if you'd like a bigger beanie, I suggest making more increase rows at the beanie and finishing with the 72 HDC.
Materials:
4.00 mm and 4.50 mm crochet hook
white, black, grey, orange yarn
stuffing material
stitch marker, scissors, needle
Steps and Procedure:
- Making the Beanie
- using the white yarn and a 4.50 mm crochet hook
- use a stitch marker to mark your beginning of the round stitch, DO NOT sl st
1. Make a Magic Ring and 8 HDC inside the ring
2. Make an INC (2 HDC) in every stitch around (16 HDC)
3. Make 1 HDC in the 1st st, make 2 HDC in the next stitch (repeat around) (24 HDC)
4. Make 1 HDC in the next 2 stitches, make 2 HDC in the next stitch (32 HDC)
5. Make 1 HDC in the next 3 stitches, make 2 HDC in the next stitch (40 HDC)
6. Make 1 HDC in the next 4 stitches, make 2 HDC in the next stitch (48 HDC)
7. Make 1 HDC in the next 5 stitches, make 2 HDC in the next stitch (56 HDC)
8. Make 1 HDC in the next 6 stitches, make 2 HDC in the next stitch (64 HDC)
9-22. Make 1 HDC in every stitch around (64 HDC)
23. Make 1 SC in every stitch around (64 SC)
- fasten off, beanie made
- Making the Eyes
- with the white, 4.50 mm crochet hook, and a stitch marker
1. Make a Magic Ring and 8 HDC inside
2. Make an INC (2 HDC) in every stitch around (16 HDC)
3. Make an INC in the 1st stitch, and 1 HDC in the next stitch (repeat around) (24 HDC)
- change to grey yarn
4. Make an SC INC in the 1st stitch, and 1 SC in the next 2 stitches (repeat around) (32 SC)
- Making the Eye Pupil
- with black yarn and 4.50 mm crochet hook
- Make a Magic Ring and 8 HDC in the center of the ring
Fasten off, and weave in loose ends.
- Repeat eye pattern once more to make a pair.
- Taking your tapestry needle, sew the eye pupil to the white of the eye
- sew both eyes onto the front of your hat, making sure they’re evenly spaced out.
- Making the Eyebrows
- with the 4.00mm crochet hook and brown yarn
- make 15 Chains.
1. make 1 Slip Stitch into the third chain from your hook, and 1 Slip Stitch into the next 12 chains.
- Make 1 more for a pair of eyebrows.
- Sew both eyebrows onto the front of your hat, one above each eye.
- Making the Tooth
- with the 4.50 mm crochet hook and white yarn
- Attach the white yarn to the bottom front of the hat
1. Crochet 1 SC into the next 8 stitches across. Turn your work.
2 – 4~ Chain 1. Crochet 1 SC into the next 8 stitches.
- Make a row of SC around the tooth (16 SC)
- Making the Carrot Nose
- with 4.50 mm crochet hook, orange yarn, and stitch marker
1. Make a Magic Ring and make 6 SC inside the ring
2. Make 1 SC in every stitch around (6 SC)
3. Make a SC INC in every stitch around (12 SC)
4 – 6. Make 1 SC in every stitch around (12 SC)
7. Make an SC INC in the 1st st, and 1 SC in the next stitch (repeat around) (18 SC)
8 – 10. Make 1 SC in every stitch around (18 SC)
11.Make an SC INC in the 1st st, and 1 SC in the next 2 stitches (repeat around) (24 SC)
12 – 14. Make 1 SC in every stitch around (24 SC)
15. Make 1 SC DEC, then 1 SC into the next 2 stitches (repeat around) (18 SC)
16. Make 1 SC in every stitch around (18 SC)
- stuff the carrot nose and sew onto the face
- Making the Twigs/Hair
Small Twig
- with the 4.00 mm crochet hook and brown yarn
- make a Slip Knot, then 13 Chains.
1. Make 1 Slip Stitch into the third chain from your hook, make 1 Slip Stitch into the next 10 chains.
Fasten off, and weave in loose ends.
(make 2 small twigs)
Large Twig
- with the 4.00 mm crochet hook and brown yarn
- make a Slip Knot, then 17 Chains.
1. Make 1 Slip Stitch into the third chain from your hook, make 1 Slip Stitch into the next 14 chains.
- sew all three twigs to the very top of your hat
- Assembly
1. make the beanie
2. make the tooth
3. make the eyes and sew them on the beanie
4. make the eyebrows and sew them above the eyes
5. make the nose, stuff the nose and sew in between the eyes
6. make hair and sew on top of the beanie
7. embroider the smile with black yarn
8. embroider the white on the black pupils
9. sl st around the base of the beanie and around the tooth with grey yarn

|
|

Here it is, one of my favorite beanies to make this winter season - Rudolph, the Red nose Reindeer! Who does not like dear ol' Rudolph!
Get your hooks ready, your yarn spun and let's get the show on the row!...
Materials:
4.50 mm crochet hook
3 colors for reindeer face, ears and antlers (brown, dark brown, honey)
white, black for eyes
red for nose
pollyfill for stuffing the antlers
Steps and Procedure:
- this beanie would fit 7-10 year old child
- with brown and 4.50 mm crochet hook
- Making the Beanie
1. Make a Magic Ring, chain 1, 9 HDC in ring, join, chain 1
2: Work 2 HDC into each st around, join, chain 1 (18 HDC)
3: 2 HDC in first stitch, HDC in next, Repeat around, join, chain 1 (27 HDC)
4: 2 HDC in first stitch, HDC in next 2, Repeat around, join, chain 1 (36 HDC)
5: 2 HDC in first stitch, HDC in next 3, Repeat around, join, chain 1 (45 HDC)
6: 2 HDC in first stitch, HDC in next 4, Repeat around, join, chain 1 (54 HDC)
7: HDC around, join, chain 1 (54 HDC
8: 2 HDC in first stitch, HDC in next 8, Repeat around (60 HDC)
9: 2 HDC in first stitch, HDC in next 29, Repeat around, join, chain 1 (62 HDC)
10 -18: HDC in each stitch around, join, chain 1 (62 HDC)
- Making the Snout
- change to honey to make the spout and use 4.50 mm crochet hook
1: SC around in new color, join, chain 1 (62 SC)
2-4 : 27 SC - 8 DC - 27 SC around (be sure that the 8 DC are centered in the front because this is the start of the Reindeer snout), join to first SC.
- Flip the snout up and sew it onto the bottom center of the beanie
- Making the Ears
- with 3.50 mm crochet hook for the inner ear and 4.50 mm crochet hook for the outer ear (use 2 different colors)
1. Chain 5, SC in 2nd chain from hook and the rest of the way down chain, chain 1, turn.
2: SC across, chain 1, turn.
3: 2 SC in first stitch, sc in next 2, 2 SC in last stitch, chain 1, turn.
4-5: SC across, chain 1, turn. (6 SC)
6: SC decrease, SC in next 2, SC Decrease
7: SC across
8: 2 SC decreases
9: SC decrease
- Chain 1 and SC around edges, fasten off and weave in ends.
(make 2 outer ears and 2 inner ears, put them together and sl st the inner ear inside the outer ear)
- Making the Antlers
- with 4.50 mm crochet hook and dark brown yarn
1. Make a Magic ring, chain 1 and make 9 SC inside magic ring, pull tight and continue to crochet in rounds
2-14: SC in each stitch around (9 SC)
- You can make this part longer if needed by continuing to SC in rounds.
- Fasten off leaving long tail to sew onto hat. Stuff with stuffing material
- Make a second piece just like the first but stop after 5 rounds.
- Sew the smaller antler onto the side of the bigger antler and then sew them both onto the top of the beanie
- Making the Eyes
- with white and 4.50 mm crochet hook
1. Make a Magic ring, make 10 HDC in ring, join to first HDC, chain 1.
2. Make an INC HDC in every stitch around (20 HDC), ch 1
3: HDC in first 10 stitches, 2 DC in next 4 stitches, 2 TC in next 2 stitches, 2 DC in next 2 stitches, 2 HDC in last 2 stitches, join. (30)
- Fasten off leaving long tail to sew onto face, make 2 eyes.
- Making the Eyeballs
- with black yarn and 4.50 mm crochet hook
- Make a Magic ring, chain 1 and make 10 HDC in ring, join to first HDC.
- Fasten off leaving long tail to sew onto the white part of the eye.
- Making the Red Nose:
- with red yarn and 4.50 mm crochet hook
- Make a Magic Ring and 10 HDC inside
- Make an INC HDC in every stitch around (20 HDC)
- sew onto the middle of the folded snout
- fold the snout slightly and sew onto the center of the face
- sew the red nose in the center of the snout
- fill the antlers with the stuffing material and sew onto the top of the beanie
- sew the inner ear onto the outer ear and sew onto the top of the beanie
- sew the eyes on the face
|

|

It is a magical winter time! What is the magical winter time without hats and beanies?! So, here is my most recent beanie - Penguin Beanie. Thank you to Sarah from www.repeatcrafterme.com/2012/12/crochet-penguin-hat-pattern.html whose "Penguin earflap hat" served as a basis for my beanie. Enjoy the pattern!
Materials:
4.50 mm crochet hook
black, white, pink, purple yarn
scissors, needle
Steps and Procedure:
- this beanie would fit 7-10 year old child
- Making the Beanie
- with black yarn and 4.50 mm crochet hook
1. Make a Magic ring, 11 DC in magic ring, join to first DC, chain 2
2: 2 DC in each around, join, chain 2 (22 DC)
3: 2 DC in first, DC in next, repeat around, join, chain 2 (33 DC)
4: 2 DC in first, DC in next 2, repeat around, join, chain 2 (44 DC)
5: 2 DC in first, DC in next 10, repeat around, join, chain 2 (48 DC)
6: 2 DC in first, DC in next 11, join, chain 2 (52 DC)
7: 2 DC in first, DC in next 12, join, chain 2 (56 DC)
8: 2 DC in first, DC in next 13, join, chain 2 (60 DC)
9: 2 DC in first, DC in next 14, join, chain 2 (64 DC)
10-15: DC in each around, join, chain 2 (64 DC)
16. with black yarn SC in each stitch around, join (64 SC)
- Making the Penguin Face:
- with white yarn and 4.50 mm crochet hook
1. Chain 16, HDC in second chain from hook and rest of way down chain, chain 1, turn
2. 2 HDC in first stitch, 13 HDC across, 2 HDC in last stitch, chain 1, turn (17 HDC)
3 -10: HDC across, ch 1, turn (17 SC)
- continue with rows if you'd like a longer beanie
11: SC in first 2 stitches, 3 HDC, 7 SC, 3 HDC, 2 SC, chain 1, turn
12: HDC in first 2 stitches, 3 DC, 2 HDC, 3 SC, 2 HDC, 3 DC, 2 HDC, ch 1, turn
13: SC in first 2, 4 DC, 5 SC, 4 DC,2 SC
14. SC around the face, making sure you make 4 sl st in the top center of the face
- Making the Penguin Beak:
- with orange yarn and 4.50 mm crochet hook
- Chain 5, SC in second chain from hook, HDC, DC , TC,
- fasten off leaving tail to sew onto center of face
- Making the Bow:
- with color of your choice and 4.50 mm crochet hook
1. Chain 10, SC in second chain from hook and the rest of the way down chain, chain 1, turn
2 – 4: SC across, chain 1, turn
5. continue to SC around the edges, fasten off and weave in ends.
- Wrap yarn around the middle of the bow, tie off tightly and sew onto the beanie
- Making the Eyes:
- with black and 4.50 mm crochet hook
- Make a Magic Ring, ch 2 and make 8 DC inside the ring (make 2 eyes)
- sew the face onto the front of the beanie
- make another row of 64 SC with the white yarn around the brim of the beanie (optional)
- sew the eyes, beak and the bow onto the face
- embroider the white line onto the eyes
- embroider the eye lashes if it is a "girl" penguin
"Cherry Blossom"
beanie and cowl set

A friend commissioned a beanie and a cowl recently. She did not commission a particular pattern or/and design so I was free to play around with different stitches. The only thing my friend wanted was for the beanie and cowl to be thick and sturdy. So, I thought and thought, and finally came up with the pattern after hours of playing around with it. So, what can be more sturdy then a Single Crochet and a Slip Stitch... Try Back Loop SC and Front Loop SC with a combo of a Slip Stitch brim... Here is the pattern...
Materials:
7.00 and 8.00 mm crochet hook
three strands of worsted weight yarn (I chose pink, light pink and grey)
stitch marker, needle, scissors
Steps and Procedure:
1. Making the brim of the Beanie
1. with 7.00 mm crochet hook and three strands of yarn ch 6
2. sl st down the chain line starting with the 2nd chain (5 sl st), ch 1 and turn
3.- 86. make 1 sl st in every stitch but only in the Back Loops, ch 1 and turn
- I made 86 rows of sl st, check periodically if it fits your head. Make sure that it is snug, because it will stretch.
- put the two short sides of the brim together and sl st them together (5 sl st)
1a. Making the body of the Beanie
- change to 8.00 mm crochet hook
1. ch 1 and make 1 SC in every row around the brim of the beanie and 1 SC at the row where you connected the 2 shorter sides (44 SC), sl st to the 1st SC made
2. SC in the same stitch, Front Loop SC in the next st, Back Loop SC in the next stitch. Continue repeating FLSC and BLSC until the end of the row, finishing with the FLSC (use he stitch marker to mart the start of your rounds) (1 SC at the joining edge, 43 FLSC/BLSC)
3-20. continue with the SC in the 1st st of the round, and FLSC-BLSC stitch combo
- fasten off after the beanie is long enough, I stopped at round 20
- flip the beanie on the wrong side and draw the yarn through the ending SC stitches tightening the ending and closing the hole
- close the hole tightly
- make a pom pom and sew it onto the top of the beanie
2. Making the Cowl
- with the 8.00 mm crochet hook and 3 strands of worsted weight yarn
1. ch 66, SC down the chain line, sl st to the 1st ch made
2. ch 1 and make Front Loop SC in the 1st stitch and Back Loop SC in the next stitch (continue until you have made all 66 SC, ending with the BLSC
3-25. continue with the FLSC and BLSC pattern using the stitch marker to mark the start of your round
- continue until your cowl is long enough, I stopped at R25
- sl st to the 1st SC made and weave in the ends
- my beanie was 25 cm long (without the pompom) and my cowl was 33 cm wide and 27 cm long

|

|

|
chemo hat # 1
Recently I have joined an Association "Women's Vision" and have made three chemo hats for ladies who are fighting cancer. This was my first time crocheting for a charity organization, and it certainly will not be last. So, here is the pattern to the Chemo Hat #1 I have made following the pattern from this website: mbstitches.com/2018/04/06/crochet-star-cloche-hat-a-knots-of-love-chemo-cap/
Thank you Maria for the free pattern!
- Notes: next time, I will do the BPSC instead of the FPSC as suggested in the pattern
Materials:
4.00 mm crochet hook
Light blue, light green yarn
Stitch marker
Needle, scissors
Steps and Procedure:
- with the light blue and 4.00 mm crochet hook
- Make a Magic Ring and work in continuous rounds – do not join with the sl st
R1: 6 SC in ring. (6)
R2: 2 SC (INC) in each st. (12)
R3: INC, SC 1 (repeat around) (18)
R4: INC, SC 2 (repeat around) (24)
R5: INC, SC 3 (repeat around) (30)
R6: INC, SC 4 (repeat around) (36)
R7: INC, SC 5 (repeat around)(42)
R8: INC, SC 6 (repeat around) (48)
R9: INC, SC 7 (repeat around) (54)
R10: INC, SC 8 (repeat around) (60)
R11: INC, SC 9 (repeat around) (66)
R12: INC, SC 10 (repeat around) (72)
R13: INC, SC 11 (repeat around) (78)
R14: INC, SC 12 (repeat around) (84)
R15-17: SC 84 around
R18: DEC, 19 SC, DEC, 19 SC, DEC, 19 SC, DEC, 19 SC (80)
R19-24: SC 80 around (join in with the sl st)
- change to light green (Band)
R1, 2: FPSC around
R3: Star Stitch around and turn. Join. (40 stars)
R4: second row of Star Stitch. (use HDC as your second row, not the SC as in the video). Join.
R5: Star Stitch around and turn. Join.
R6: second row of Star Stitch. (use HDC as your second row, not the SC as in the video). Join.
R7: FPSC around. join. (80)
R8: FPSC around. join. (80)
For Star Stitch pattern check out the videos:
1. www.youtube.com/watch?v=RgAnrYebgPE
2. www.youtube.com/watch?v=7L5q2mpAxnQ
- change to light blue (Brim)
R9, 10: 80 SC
R11: INC, 9 SC (repeat around) (89)
R12-13: ch 1. Sc around. Fasten off. (89)
- Flower (light green)
- Ch 64
R1: SC in 8th st from hook
Ch 4, skip 3 st and SC in 4th st on the base chain.
- Continue this pattern to the end, turn.
R2: sl st into 1st ch space. *Ch 2, 2 DC, ch 2, sl st in 2nd st from hook (this will create a point!), 3 DC into chain space. Sl st into next SC, sl st into chain space.* Repeat from * to * for 15 petals.
- Coil the petals in the flower tightly and stitch the back so that the petal chain stays in a coil. Sew onto cap at the exact section where the star stitches are joined so you can hide the seam on the hat.

|

|

|
chemo hat #2
Following on with my chemo hats, here is the second one I have made. A big thank you to Ashlea from hearthookhome.com/beret-chemo-crochet-pattern/ whose pattern I have used as a basis of my hat. So, here it is, the pattern.....
Materials:
yarn of your choice (I used worsted weight - dirty pink color)
3.00 mm and 4.00 mm crochet hook
scissors, sewing needle
Specials stitches:
Forked Half Double Crochet (Fkhdc) = Yo, insert hook into designated space, pull up a loop (3 loops on hook), yo, pull up a loop in SAME space (5 loops on hook). Yo pull through 3 loops, yo pull through last 3 loops on hook.
Forked Half Double Crochet Decrease (Fkhdc2tog) = Yo, insert hook into designated space, pull up a loop (3 loops on hook), yo, pull up a loop in NEXT space (5 loops on hook). Yo pull through 3 loops, yo pull through last 3 loops on hook.
Steps and Procedure:
- with 4.00 mm crochet hook and dirty pink yarn
R1: Make a Magic Circle, ch1, make 10 fkhdc in a circle. Join to top of first fkhdc with sl st. (10)
R2: Ch1, 2 fkhdc in each st around. Join to top of first fkhdc with sl st. (20)
R3: Ch1, 1 fkhdc in next, 2 fkhdc in next (repeat around). Join to top of first fkhdc with sl st. (30)
R4: Ch1, 1 fkhdc in next 2 sts, 2 fkhdc in next (repeat around). Join to top of first fkhdc with sl st. (40)
R5: Ch1, 1 fkhdc in next 3 sts, 2 fkhdc in next (repeat around). Join to top of first fkhdc with sl st. (50)
R6: Ch1, 1 fkhdc in next 4 sts, 2 fkhdc in next (repeat around). Join to top of first fkhdc with sl st. (60)
R7: Ch1, 1 fkhdc in next 5 sts, 2 fkhdc in next (repeat around). Join to top of first fkhdc with sl st. (70)
R8: Ch1, 1 fkhdc in next 6 sts, 2 fkhdc in next (repeat around). Join to top of first fkhdc with sl st. (80)
R9: Ch1, 1 fkhdc in next 7 sts, 2 fkhdc in next (repeat around). Join to top of first fkhdc with sl st. (90)
R10: Ch1, 1 fkhdc in next 8 sts, 2 fkhdc in next (repeat around). Join to top of first fkhdc with sl st. (100)
R11, 12: Ch1, fkhdc in each st around. Join to top of first fkhdc with sl st. (100)
- If you would like the hat more slouchy, add more rows here. Add just two more rows for a little more slouch, add four or more for super slouch.
R13: Ch1, 1 fkhdc in next 8 sts, fkhdc2tog (repeat around). Join to top of first fkhdc with sl st. (90)
R14: Ch1, 1 fkhdc in next 7 sts, fkhdc2tog (repeat around). Join to top of first fkhdc with sl st. (80)
R15: Ch1, 1 fkhdc in next 6 sts, fkhdc2tog (repeat around). Join to top of first fkhdc with sl st. (70)
- change to 3.00 mm crochet hook
R16: Ch 1, SCdec, 34 SC, SCdec, 34 SC (68)
R17 - 24: Ch1, Back Loop SC around (68)
Sl sl in next 3 sts and weave in all ends.
FLOWER:
- with 4.00 mm crochet hook
- make a Magic Ring
R1: (Sc in ring, ch 3) 6 times; join with slip st in first ch-3 space
R2: Ch 1, 5 SC in each ch-3 space around; join with slip st in first SC (6 petals).
R3: Working behind the petals of R2, (slip st around post of next SC of R1, ch 3) 6 times; join with slip st in first ch-3 space.
R4: Ch 1, (SC, HDC, 3 DC, HDC, SC) in each ch-3 space around; join with slip st in first sc (6 petals).
R5: sl st to ch 3 space, and work behind petals of R4, ch 5, (skip next SC of Round 4, slip st around post of next SC of R4, ch 5) 5 times; join with slip st in first ch-5 space.
R6: Ch 1, (SC, HDC, 5 DC, HDC, SC) in each ch-5 space around; join with slip st in first sc (6 petals).
- Fasten off, and sew onto the hat
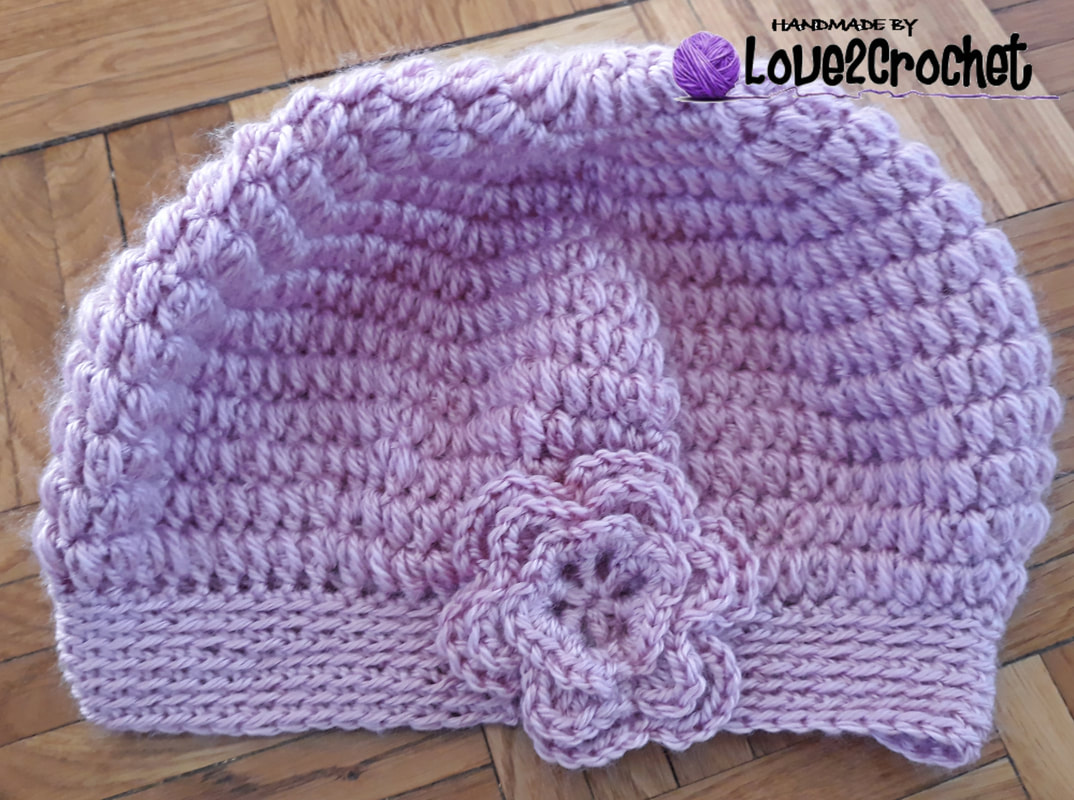
|

|

|

|
chemo hat #3
So, here it is, the third and the final pattern of my Chemo Hat series. A big thank you to Kim from crochetkim.com/elegant-hat/ for the free pattern which I have used as a basis of my pattern.
Special stitches:
rev sc (reverse single crochet): Work single crochet in opposite direction by inserting hook in next stitch (to the right if right-handed,
and to the left if left-handed), yarn over and draw up a loop, yarn over and draw through both loops on hook.
Materials:
4.00 mm crochet hook
worsted wight yarn
scissors, sewing needle
stitch marker
Steps and Procedure:
- make a Magic Ring
R1: Make 4 SC inside the ring
R2: Make 2 SC in each SC around (8).
R3: Make 2 SC in each SC around (16).
R4: (SC in next, 2 SC in next) 8 times (24).
R5: (SC in next 2, 2 SC in next) 8 times (32).
R6: SC in next, 2 SC in next, (SC in next 7, 2 SC in next) 3 times, SC in next 6 (36).
R7: SC in next 4, 2 SC in next, (SC in next 8, 2 SC in next) 3 times, SC in next 4 (40).
R8: SC in next, 2 SC in next, (SC in next 4, 2 SC in next) 7 times, SC in last 3 (48).
R9: SC in next 5, 2 SC in next, (SC in next 11, 2 SC in next) 3 times, SC in next 6 (52).
R10: SC in next 2, 2 SC in next, (SC in next 12, 2 SC in next) 3 times, SC in next 10 (56).
R11: SC in next 4, 2 SC in next, (sc in next 6, 2 SC in next) 7 times, SC in next 2 (64).
R12: SC in next, 2 SC in next, (SC in next 7, 2 SC in next) 7 times, SC in next 6 (72).
R13: SC in next 5, 2 SC in next, (SC in next 8, 2 SC in next) 7 times, SC in next 3 (80).
R14–30: SC in each stitch around.
Sl st in next st.
Band Base
Note: The band base rounds are joined with sl st at the end of each round.
R31–34: Ch 1, working in back loops only, sc in each sc around; join with sl st in first sc.
R35: Ch 1, sc in each sc around; join with sl st in first sc.
Brim
Note: Resume working in continuous rounds. Do not join at the end of rounds.
R36: SC in next 2, 2 SC in next SC, (SC in next 9, 2 SC in next) 7 times, SC in next 7 (88).
R37: SC in next 5, 2 SC in next, (SC in next 10, 2 SC in next) 7 times, SC in next 5 (96)
R38: SC in next 6, 2 SC in next, (SC in next 11, 2 SC in next) 8 times, SC in next 6 (104)
R39-44: SC in each stitch around (104 SC)
R45: Reverse SC in every stitch around (104 Rev SC)
Sl st in next st. Fasten off.
Band
With Right Side facing, join yarn with sl st in free front loop of any SC in R30, ch 1, rev SC in each free front loop around; join with sl st
in first SC. Repeat this process, working rev SC in free front loops of R31, 32, and 33.
Bow
Ch 4.
R1: SC in 2nd ch from hook and in each remaining ch across, turn —3 sc.
R2: Ch 1, SC in first sc, 2 sc in next sc, sc in last sc, turn—4 sc.
R3: Ch 1, sc in first sc, 2 sc in next 2 sc, sc in last sc, turn—6 sc.
R4: Ch 1, sc in each sc across, turn.
R5: Ch 1, sc in first sc, [sk next sc, sc in next sc] twice, sc in last sc, turn—4 sc.
R6: Ch 1, sc in first sc, sk next sc, sc in next 2 sc, turn—3 sc.
R7: Ch 1, insert hook in first sc and draw up a loop (2 loops on hook), sk next sc, insert hook in last sc and draw up a loop (3 loops
on hook), yarn over and draw through all loops on hook.
Fasten off.
With Right Side facing, and working across opposite side of foundation ch, join yarn with sl st in first ch, ch 1, sc in each ch across—3 sc.
Repeat R2–7 for other end of bow. Fasten off.
Bow Center
Ch 6; join with sl st in first ch to form a ring, taking care not to twist ch.
R1: Ch 1, sc in each ch around; join with sl st in first sc, do not turn—6 sc.
R2: Ch 1, sc in each sc around; join with sl st in first sc.
Fasten off.
- Finishing
Insert bow into bow center. Sew bow to side of band. Using yarn needle, weave in all ends.

|
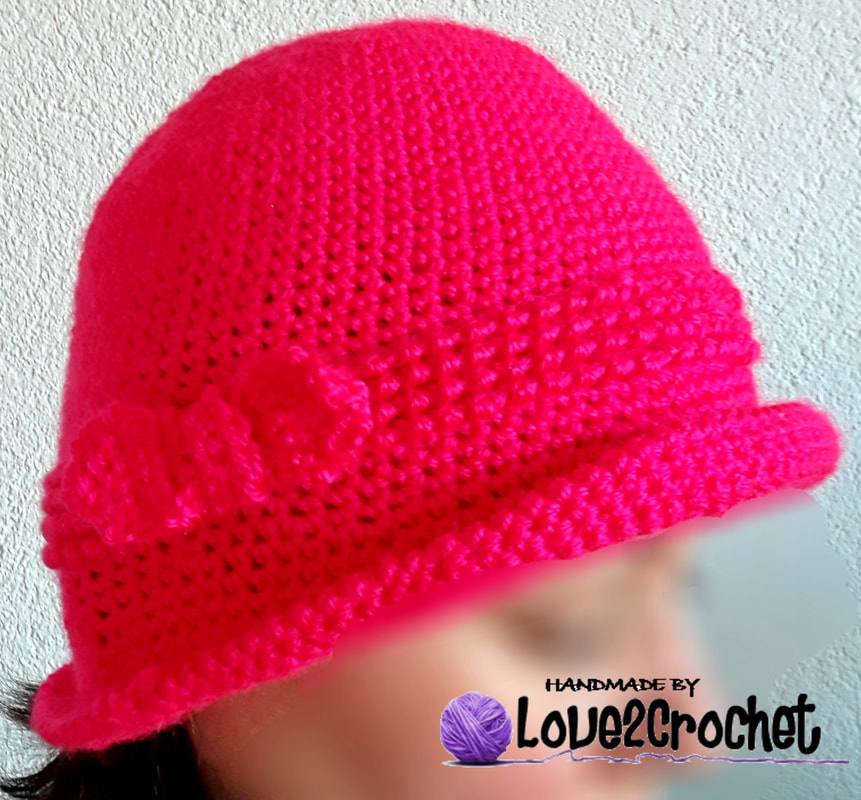
|

|
Unicorn hooded scarf with pockets
A friend commissioned this Unicorn hooded scarf with pockets the other day. This has been a project I wanted to tackle even before I was asked to make one, so this was a perfect opportunity to get my creative juices flowing.
I have found this great website, that I have used as a basis and an inspiration for my project.
www.ladybehindthecurtain.com/unicorn-hooded-scarf-pockets-crochet-pattern/
I made the Hoodie to be thicker than the one in the link, and I made a horn bigger. And, I had one little preschooler a very happy customer:) This was a simple project, the only thing that took a lot was knotting the unicorn mane onto the hat. But, it was so worth the trouble! Here is the pattern and the instructions....
Materials:
3.5 mm, 5.00 mm, 6.00 mm crochet hook
beige, pink, blue, purple yarn
scissors, needle
- made to fit a 3-5 year old child
Steps and Procedure:
1. Hoodie:
- with double strands of beige yarn and 5.00 crochet hook, ch 40
R1. HDC in 2nd chain and down the chain line (38 HDC), ch 1 and turn
R2. HDC in 1st st, 2 HDC in 2nd st (repeat around), don not make an INC in the last st, but end with 1 HDC (56 HDC in total), ch 1 and turn
R3-R22. HDC in every stitch down the line (56 HDC), ch 1 and turn
- you should have a rectangle now that is 20 cm long (I made this for a preschooler so I stopped at R22 and 20 cm length)
- turn the rectangle to the side and make 1 SC in the same st and in each st on the side (22 SC), making 2 SC in the the last corner stitch
- again, turn to the side and continue making 1 SC in the the ch line, make 2 SC in both corner stitches (38 SC, with 2 SC in corner makes 40 SC)
- again, turn to the side and continue making 1 SC on the other side of the hoodie (22 SC), make 2 SC in the last st, and sl st the first SC made
- fold in half (shorter sides together) and make 20 SC (through both sides) to connect the sides, fasten off
2. Scarf
- with double strands of beige yarn and 5.00 mm crochet hook, ch 21
R1. HDC in the second ch and down the chain line (20 HDC), ch 1 and turn
R2-R132. continue making 1 HDC in each stitch (20 HDC), ch 1 and turn
- my scarf was now 141 cm long, so I decided to stop
- the length of the scarf will depend on the length of the arms of the person you are making it for
- SC down the both sides of the scarf, making sure you make 2 SC in each corner
- fold the scarf at R12 and sl st the shorter sides together on both ends
- sl st the hoodie to the middle of the scarf, fasten off and weave in the yarn ends
- using the triple strands of yarn (blue, pink, purple) and a 6.00 mm crochet hook, make a row of SC down the edges of the scarf and a hoodie including the pocket edges
3. Ears
- with beige yarn and 3.5 mm crochet hook
- make 4 ears following this pattern:
Chain 5, HDC in 2nd chain from hook and in remaining chains, ch 1, turn (4 HDC)
Row 2: 2 HDC in first stitch, HDC in next two, 2 HDC in last stitch, ch 1, turn (6 HDC)
Row 3-5: HDC in each stitch across, ch 1, turn (6 HDC)
Row 6: HDC Decrease, HDC in next two, HD decrease, ch 1, turn
Row 7: HDC in each stitch across, ch 1, turn (4 HDC)
Row 8: Make 2 HDC decreases
- make 2 ears and connect them together by make SC through both ears.
Fasten off leaving long tail to sew onto hat.
4. Horn
- using blue yarn and 3.50 mm crochet hook
Magic Ring, chain 1 and make 4 SC inside ring, do not join, continue to SC in rounds. Use a stitch marker.
R2: SC in each stitch around (4 SC)
R3: 2 SC in first stitch, SC in next, repeat around (6 SC)
R4: SC in each stitch around (6 SC)
R5: 2 SC in first stitch, SC in next 2, repeat around (8 SC)
R6: SC in each stitch around (8 SC)
R7: 2 SC in first stitch, SC in next 3, repeat around (10 SC)
R8: SC in each stitch around (10 SC)
R9: 2 SC in first stitch, SC in next 4, repeat around (12 SC)
R10: SC in each stitch around (12 SC)
R11: 2 SC in first stitch, SC in next 5, repeat around (14 SC)
R12: SC in each stitch around (14 SC)
R13: 2 SC in first stitch, SC in next 6, repeat around (16 SC)
R14: SC in each stitch around (16 SC)
R15: 2 SC in first stitch, SC in next 7, repeat around (18 SC)
R16: SC in each stitch around (18 SC)
R17: 2 SC in first stitch, SC in next 8, repeat around (20 SC)
R18: SC in each stitch around (20 SC)
R19: 2 SC in first stitch, SC in next 9, repeat around (22 SC)
R20: SC in each stitch around (22 SC)
R21: 2 SC in first stitch, SC in next 10, repeat around (24 SC)
R22: SC in each stitch around (24 SC)
R23: 2 SC in first stitch, SC in next 11, repeat around (26 SC)
R24: SC in each stitch around (26 SC)
R25: 2 SC in first stitch, SC in next 12, repeat around (28 SC)
R26: SC in each stitch around (28 SC)
R27: 2 SC in first stitch, SC in next 13, repeat around (30 SC)
R28, R29: SC in each stitch around (30 SC)
Fasten off leaving a long tail to sew onto hat. Stuff with stuffing material and with your tapestry needle, sew horn onto hat
4. Unicorn Mane
- cut out blue, pink, purple yarn for the hair (20 cm long stripes)
- start with the area around the horn and make knots all around the horn and the ears
- I also went through the stitches at the seam on the back of the hoodie (where I slip stitched the sides together)
snowman beanie

This beanie is the second beanie that I have decided to make for my students to wear for the Winter Concert this year. My little Preschoolers were singing a song about a Snowman, and I thought it might be more than fitting to make them all a Snowman hat to wear at the performance. I made a few in different colors, and my kiddos looked so cute wearing them. The pattern and the original idea is from RepeatCrafterMe, but I decided to change it slightly, and to make a beanie out of it, not a ear-flap hat as in the pattern.
This is the original link:www.repeatcrafterme.com/2016/01/crochet-snowman-hat.html
And here is my version of the pattern.....
Materials:
green (pink, blue), white, orange yarn
4.00 mm and 4.50 mm crochet hook
googly eyes/glue gun
needle, scissors
Steps and Procedure:
- Beanie:
- fits a Toddler/Preschooler
- with green yarn (or any color you want for the pom-pom hat portion) and 4.50 mm crochet hook
- the ch2 at the beginning of each round does not count as a stitch
1. Magic ring, chain 2 and make 11 DC in magic ring, join to first DC, chain 2
2: 2 DC in each around, join, chain 2 (22 DC)
3: 2 DC in first, DC in next, repeat around, join, chain 2 (33 DC)
4: 2 DC in first, DC in next 2, repeat around, join, chain 2 (44 DC)
5: 2 DC in first, DC in next 10, repeat around, join, chain 2 (48 DC)
6: 2 DC in first, DC in next 11, join, chain 2 (52 DC)
7: 2 DC in first, DC in next 12, join, chain 2 (56 DC)
8-9: FPDC in first, BPDC in next, repeat around, join, chain 2 (56 DC)
- change color to white yarn
10-15: DC in each around, join, chain 2 (56 DC)
16: SC in each st around, sl st to 1st SC made (56 SC)
- fasten off, sew in the ends
- Carrot Nose:
- with orange yarn and 4.00 mm crochet hook
- Chain 6, Slip Stitch in second chain from hook, SC, HDC, DC, DC, ch 1 and turn
- continue to make 1 SC in the next 5 st, ch 2, sl st in 2nd ch, continue to make 1 SC in the next 5 st on the other side of the nose, until you reach the 1st st made
- embroider the smile
- sew on the carrot nose
- glue the googly eyes on
- make a pom pom and sew onto the top of the beanie

|
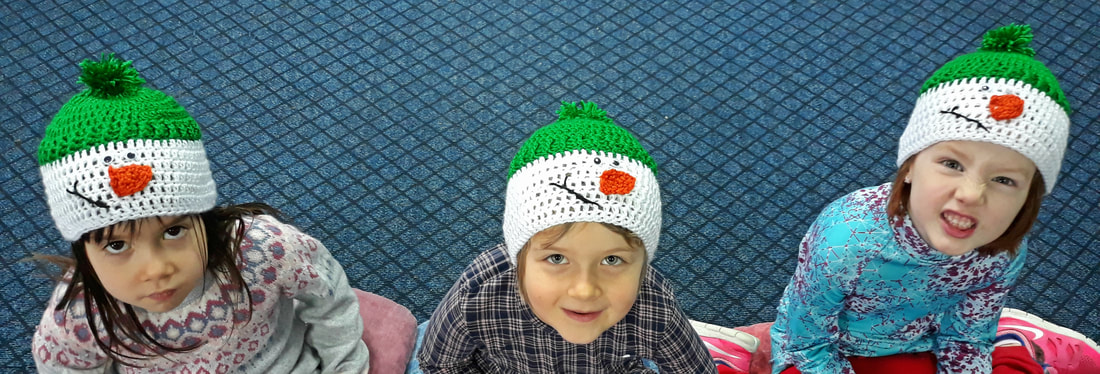

|

|
grinch hat #2

I have been super busy crocheting hats for the Winter Fair. I decided to revisit the Grinch hat I had made for a friend recently. So, I decided to make a smaller version that could fit a 5-10 year-old kid. This was a super fast, cute project, and the hats were a huge hit at the Fair. Here are the instructions:
Materials:
4.00 mm crochet hook
black, green, white, yellow yarn
needle, scissors
Steps and Procedures:
- fits 5-10 year old child
- with 4.00 mm crochet hook and green yarn
1. Make a Magic ring, 11 DC in magic ring, join to first DC, chain 2
2: 2 DC in each st around, join, chain 2 (22 DC)
3: 2 DC in first, DC in next, repeat around, join, chain 2 (33 DC)
4: 2 DC in first, DC in next 2, repeat around, join, chain 2 (44 DC)
5: 2 DC in first, DC in next 10, repeat around, join, chain 2 (48 DC)
6: 2 DC in first, DC in next 11, join, chain 2 (52 DC)
7: 2 DC in first, DC in next 12, join, chain 2 (56 DC)
8: 2 DC in first, DC in next 13, join, chain 2 (60 DC)
9-13: Make 1 DC in every stitch around (60 DC)
14: Make 1 SC in every stitch around (60 SC)
Grinch Eyes:
- with 4.00 mm crochet hook and yellow yarn
1. Make a Magic Ring and 8 DC inside the ring (do not close the ring completely), ch 2 and turn
2. Make a DC in each stitch (8 DC) and 2 DC in the last stitch (10 DC total), ch 1 and turn
3. change color to black, and SC in every stitch and make 2 SC in the last stitch (12 SC)
- cut off, fasten off and leave a long tail for sewing onto the hat
- make 2 eyes
Center of the eye:
- with 4.00 mm crochet hook and black yarn
- Make a Magic Ring and make 8 SC inside the ring
- close the Magic ring and cut off, leaving a long tail for sewing onto the eye
- make 2 eye circles
Nose:
- with 4.00 mm crochet hook and black yarn
- chain 4, SC in the 2nd chain from the hook, SC the next ch, 3 SC in the last chain
- (working on the other side of the chain) make 1 SC in each of the stitches of this side of the chain
Assembly:
- Sew the center of the eye to the eye, and embroider the white line for the eye "sparkle"
- Sew the eyes and nose onto the beanie
- Embroider the "eye liner" on the lower edge of each eye for a better definition
- Embroider the eyebrows and a grin
- Make a pop pom and sew it to the top of the beanie
crochet "Snowman with a top hat" beanie

This was the cutest Christmas beanie. I instantly fell in love with this adorable Snowman and his/her top hat! So, I decided to make two beanies for the Winter Fair that I was invited to be a part of. I made them both to fit a child, but as you know you can easily adjust the INC row to make it bigger or smaller. The original pattern and the idea is from www.repeatcrafterme.com/2012/10/crochet-snowman-hat-pattern.html?m=1
So, here is my version....
Materials:
4.50 mm crochet hook
black, white, pink, blue yarn
needle, scissors
Steps and Procedures:
- fits 5-10 year old child
- with 4.50 mm crochet hook and white yarn
1. Make a Magic ring, 11 DC in magic ring, join to first DC, chain 2
2: 2 DC in each st around, join, chain 2 (22 DC)
3: 2 DC in first, DC in next, repeat around, join, chain 2 (33 DC)
4: 2 DC in first, DC in next 2, repeat around, join, chain 2 (44 DC)
5: 2 DC in first, DC in next 10, repeat around, join, chain 2 (48 DC)
6: 2 DC in first, DC in next 11, join, chain 2 (52 DC)
7: 2 DC in first, DC in next 12, join, chain 2 (56 DC)
8 (*): 2 DC in first, DC in next 13, join, chain 2 (60 DC)
9-15: DC in each around, join, chain 2 (60 DC)
16: SC2tog - 28 SC - SC2tog- 28 SC, join, ch 1 (58 SC)
- with contrast color (pink, blue)
17: HDC in every stitch around, join with sl st (58 HDC)
Snowman Top Hat:
- with 4.50 mm crochet hook and black yarn
1. Make a Magic ring, SC 10, join, ch 1
2: 2 SC in each stitch around, join, ch 1 (20 SC)
3: 2 SC in first stitch, SC in next, around, join, ch 1 (30 SC)
4: In back loops only, SC around, join, ch 1 (30 SC)
5: Now working in both loops, SC in next 8, SC decrease, repeat around, join, ch 1
6: SC around, join, ch 1 (27 SC)
7: SC in next 7, SC decrease, repeat around, join, ch 1.
8: SC around, join, ch 1 (24 SC)
9: SC in next 6, SC decrease, repeat around, join, ch 1
10: SC around, join, ch 1 (21 SC)
11: In front loops only, SC around, join, ch 1 (21 SC)
12 (*): Now working in both loops, 2 SC in each around, join, fasten off and weave in ends (42 SC)
- stuff with stuffing material and make a row of SC at the place where the rim meets the body of the top hat
(optional step to close the bottom of the top hat:
I have decided to make a cover for the bottom of the top hat (brim), so that I could easily stuff the hat and sew it onto the beanie. So here it is:
- with 4.50 mm crochet hook and black yarn
1. Make a Magic ring, SC 10, join, ch 1
2: 2 SC in each stitch around, join, ch 1 (20 SC)
3: 2 SC in first stitch, SC in next, around, join, ch 1 (30 SC)
4. Make 1 SC in each stitch around, join, ch 1 (30 SC)
5. Make 2SC in the next st, make 1 SC in the next 2 st (repeat 4 times), make 2SC in the next st, make 2SC in the next st, make 1 SC in the next 2 st (repeat 5 times), make 2 SC in the next st, make 2 SC in the next st (42 SC)
6. Make 1 SC in every stitch around (42)
- sl st to the the bottom of the top hat to the row 12 (*) of the hat (the brim) creating the top hat that is fully closed and stuffed with the stuffing material
- sew on the top of the beanie at an angle. Sew hat on at the point where brim begins.
- Carrot Nose:
- with orange yarn and 4.00 mm crochet hook
- Chain 6, Slip Stitch in second chain from hook, SC, HDC, DC, DC, ch 1 and turn
- continue to make 1 SC in the next 5 st, ch 2, sl st in 2nd ch, continue to make 1 SC in the next 5 st on the other side of the nose, until you reach the 1st st made
- Embroider the smile onto the beanie to finish off the look
- Glue the googly eyes onto the beanie
Crochet ornament hat

I have been asked to display my crochet items at a Winter Fair in my school, so I have decided to make a few of these quick hats. I have made them to fit a 5-10 year-old child, but you can continue with the increases after step 8 (*) to make a bigger hat. The original pattern is from RepeatCrafterMe, and I completely give credit to this awesome lady! Her patterns are awesome! I did change the pattern a bit, and here is my version.
Materials:
4.50 mm crochet hook
green, red, gray, white yarn
needle, scissors
Steps and Procedures:
- fits 5-10 year old child
- with 4.50 mm crochet hook and red/green yarn
1. Make a Magic ring, 11 DC in magic ring, join to first DC, chain 2
2: 2 DC in each st around, join, chain 2 (22 DC)
3: 2 DC in first, DC in next, repeat around, join, chain 2 (33 DC)
4: 2 DC in first, DC in next 2, repeat around, join, chain 2 (44 DC)
5: 2 DC in first, DC in next 10, repeat around, join, chain 2 (48 DC)
6: 2 DC in first, DC in next 11, join, chain 2 (52 DC)
7: 2 DC in first, DC in next 12, join, chain 2 (56 DC)
8 (*): 2 DC in first, DC in next 13, join, chain 2 (60 DC)
9-13: DC in each around, join, chain 2 (60 DC)
14-16: SC in each around, join, fasten off, weave in ends (60 SC)
Ornament Top:
- With gray yarn and 4.00 mm crochet hook
1. Magic ring, chain 1 and make 10 SC in ring, join, chain 1
2: 2 SC in each stitch around, join, chain 1 (20 SC)
3: In back loops only, SC in each stitch around, join, chain 1 (20 SC)
4: Now working in both loops, SC in each stitch around, join, chain 1 (20 SC)
5: In back loops only, SC Decrease, SC in next, repeat around (14 SC)
stuff lightly
6: SC Decrease until closed.
- Fasten off, leaving a long tail to sew onto the top of the hat.
- To make the loop on top: sl st with grey yarn to the top of the ornament top, Chain 10, sl st to the next st of the top of the ornament top to make a circle
I have made 4 snowflakes using 3.00 mm crochet hook and white yarn and have used a glue gun to glue them to the hats. I have used this tutorial: www.beginner-crochet-patterns.com/snowflake-crochet-pattern.html

|
|

Being a Music teacher at my school, I am responsible for Christmas concerts and for preparing the kiddos for performances. This year I decided to make my 6-year-olds Elf hats to go along the "Groovin' Elf" song they are singing for the Concert. They thought it was the best thing ever, especially when I brought in the hats for them to try them on! Oh, what a joy! My kiddos were the most adorable elves I have ever seen! Anyways, the original pattern is from makeanddocrew.com/free-crochet-elf-hat-pattern-with-ears/
I have changed a pattern a lot, but this is not my original idea, so I am giving the credit to Jess from Make & Do Crew. Thank you!
And here are the instructions....
Materials:
4.00 and 4.5 mm crochet hook
white, green, red, pink yarn
needle, scissors
stitch marker if needed
Steps and Procedures:
- this hat should fit a 3-7 year old child
ch 2 at the beginning of the round does not count as a stitch
- with 4.5 mm crochet hook and green yarn
- Make a magic ring
1. Ch 2, 6 DC in ring, sl st to 2nd ch at beginning of round to join. (6 DC)
2. Ch 2, DC in each st, sl st to 2nd ch at beginning of round to join. (6 DC)
3. Ch 2, (2 DC in 1st st, DC in next st) repeat around, sl st to 2nd ch at beginning of round to join. (9 DC)
4. Ch 2, DC in each st, sl st to 2nd ch at beginning of round to join. (9 DC)
- change to white yarn
5: Ch 2, DC in each st, sl st to 2nd ch at beginning of round to join. (9 DC)
6: Ch 2, (2 DC in 1st st, DC in next 2 st) repeat around, sl st to 2nd ch at beginning of round to join. (12 DC)
7: Ch 2, DC in each st, sl st to 2nd ch at beginning of round to join. (12 DC)
- change to green yarn
8: Ch 2, (2 DC in next st, DC in next 3 st) repeat around, sl st to 2nd ch at beginning of round to join. (15 DC)
9: Ch 2, DC in each st, sl st to 2nd ch at beginning of round to join. (15 DC)
10: Ch 2, (2 DC in next st, DC in next 4 st) repeat around, sl st to 2nd ch at beginning of round to join. (18 DC)
- change to white yarn
11: Ch 2, DC in each st, sl st to 2nd ch at beginning of round to join. (18 DC)
12: Ch 2, (2 DC in next st, DC in next 5 st), repeat around, sl st to 2nd ch at beginning of round to join. (21 DC)
13: Ch 2, DC in each st, sl st to 2nd ch at beginning of round to join. (21 DC)
- change to green yarn
14 Ch 2, (2 DC in next st, DC in next 6 st) repeat around, sl st to 2nd ch at beginning of round to join. (24 DC)
15: Ch 2, (2 DC in next st, DC in next 3 st) repeat around, sl st to 2nd ch at beginning of round to join. (30 DC)
16: Ch 2, (2 DC in next st, DC in next 4 st), repeat around, sl st to 2nd ch at beginning of round to join (36 DC)
- change to white yarn
17: Ch 2, (2 DC in next st, DC in next 5 st), repeat around, sl st to 2nd ch at beginning of round to join (42 DC)
18. Ch 2, (2 DC in next st, DC in next 6 st), repeat around, sl st to 2nd ch at beginning of round to join (48 DC)
19. Ch 2, (2 DC in next st, DC in next 7 st), repeat around, sl st to 2nd ch at beginning of round to join (54 DC)
20-22: Ch 2, DC in every stitch around, sl st to 2nd ch at beginning of round to join (54 DC)
- with double strands of red yarn
23-26: Ch 2, DC in every stitch around, sl st to 2nd ch at beginning of round to join (54 DC)
27: Ch 1, SC in every stitch around, sl st to ch1 at beginning of round to join (54 SC)
Ears: (make 2)
- with pink yarn and 4.00 mm crochet hook
Make a magic ring
1: Ch 1, 6 SC in ring; turn. (6 SC)
2: Ch 1, (2 SC in next st, SC in next st) repeat; turn. (9 SC)
3: Ch 1, (2 SC in next st, SC in next 2 st) repeat; turn. (12 SC)
4: Ch 1, (2 SC in next st, SC in next 3 st) repeat; turn. (15 SC)
5: Ch 1, (2 SC in next st, SC in next 4 st) repeat; turn. (18 SC)
6: Ch 1, (2 SC in next st, SC in next 5 st) repeat; turn. (21 SC)
7: Ch 1, DC in first st, SC in next st, sl st in next 12 st, SC in next st, (2 DC, TRC, DC) in next st, SC in next st, sl st in next 4 st; turn.
8: Ch 1, sl st in next 6 sts, (2 DC, TRC) in next st, 3 sl st down the side of TRC made, sl st in each st to end of row.
- Fasten off, leaving a long tail to sew onto the sides of the hat
9: Inner Ear Ridge: Attach pink yarn to Row 4, mid ear, above lobe. Make 9 SC along the curve of Row 4. Fasten off.
Repeat for second ear, except work Inner Ear Ridge on the wrong side of ear, creating a mirror image of first ear.
- Make a pom pom and sew it onto the tip of the hat
crochet Bee beanie
I have been involved in a "Save the Bees" project in my school recently and a fellow teacher has asked me to make a Bee beanie for him to wear as a incentive and a reminder for the students. I though it was a great idea and have whipped up a beanie/hat in an hour. This is a super easy project and it turned out super cute. So here are the instructions and the pattern...
Materials:
4.o0 mm crochet hook
yellow and black yarn
stuffing material
scissors, needle
googly eyes (optional)
Steps and Procedures:
Size: child
- ch 2 at the beginning of each Round DOES NOT count as a stitch
- with yellow yarn
R1: Make a Magic Ring, ch 2 and make 11 DC, join to 1st DC, ch 2
R2: Make 2 DC in each stitch around (22 DC), join, ch 2
- change to black yarn
R3: Make 2 DC in first stitch, 1 DC in the next (Repeat), join, ch 2 (33 DC)
- change to yellow yarn
R4: Make 2 DC in first stitch, 1 DC in the next 2 stitches (Repeat), join, ch 2 (44 DC)
R5: Make 2 DC in first stitch, 1 DC in the next 10 stitches (Repeat), join, ch 2 (48 DC)
- change to black yarn
R6: Make 2 DC in first stitch, 1 DC in the next 11 stitches (Repeat), join, ch 2 (52 DC)
- change to yellow yarn
R7: Make 2 DC in first stitch, 1 DC in the next 12 stitches (Repeat), join, ch 2 (56 DC)
R8: Make 1 DC in each stitch around, join, ch2 (56)
- change to black yarn
R9: Make 1 DC in each stitch around, join, ch2 (56)
- change to yellow yarn
R10,11: Make 1 DC in each stitch around, join, ch2 (56)
- change to black yarn
R12: Make 1 DC in each stitch around, join, ch2 (56)
- change to yellow yarn
R13,14: Make 1 DC in each stitch around, join, ch2 (56)
- change to black yarn
R15: Make 1 DC in each stitch around, join, ch2 (56)
-fasten off and weave in the ends
Bee Antenna: (make 2)
- with 4.5 mm crochet hook and black yarn (use a stitch marker, do not sl st or join)
1. Make a Magic Ring and 6 SC inside the ring
2. Make 2 SC in 1st st, make 1 SC in next st and repeat around (9 SC)
2. Make 2 SC in 1st stitch, make 1 SC in next 2 stitches and repeat around (12 SC)
3. Make 1 SC in each stitch around (12 SC)
4. Make 2SCtog, make 1 SC in next 2 stitches, repeat around (9 SC)
5. Make 2SCtog, make 1 SC in next stitch, repeat around (6 SC)
6-11: Make 1 SC in every stitch around (6 SC)
- leave a long tail for sewing the antenna onto the top of the hat
- stuff the antennas to make them stand upright
- use the hot glue gun to glue the googly eyes at the center of a beanie (optional)

|
|

|

|
|

These Penguin mittens are designed for the kids, but I am sure that there are adults amongst us who find them adorable and would be willing to wear them. I have made these mittens for a 8-year old neighbor, and she thought they are the best thing ever! Bottom line, this is the reason why I got into crocheting and making crocheted items - to give them away and to make someone happy, like my little neighbor.
This is not my pattern, and here is the original link:
www.lionbrand.com/crochet-pattern-penguin-mittens.html
I have followed the pattern completely, and it is one of the best patterns I have had a privilege to use, so clearly written and explained, it literally took me an hour to make these mittens. I did use the glue gun to glue the googly eyes onto the face, and I did glue on the scarf (just so it does not come undone and become a hassle).
So, this is how my Penguin mittens turned out.....
"Brain" beanie revisited

I have had a "brain" beanie commissioned again. This time I decided to revisit it and to make a few changes. This time I used double strands of yarn, and I used fabric glue to glue the brain coils onto the beanie instead of sewing them on. The pattern in super easy, and the only thing that is long and boring is crocheting the brain coil tubes - oh my, so long..... But, here it is - the Brain Beanie revisited....
Materials:
6.00 mm crochet hook
double strands of pink yarn
scissors, needle
Steps and Procedures:
Size: teen-adult
- using a double stranded yarn
- ch 2 at the beginning of each Round DOES NOT count as a stitch
Brain Beanie:
- with pink yarn
R1: Make a Magic Ring, ch 2 and make 11 DC, join to 1st DC, ch 2
R2: Make 2 DC in each stitch around (22 DC), join, ch 2
R3: Make 2 DC in first stitch, 1 DC in the next (Repeat), join, ch 2 (33 DC)
R4: Make 2 DC in first stitch, 1 DC in the next 2 stitches (Repeat), join, ch 2 (44 DC)
R5: Make 2 DC in first stitch, 1 DC in the next 10 stitches (Repeat), join, ch 2 (48 DC)
R6: Make 2 DC in first stitch, 1 DC in the next 11 stitches (Repeat), join, ch 2 (52 DC)
R7-12: Make 1 DC in each stitch around, join, ch 2 (52 DC)
R13: Make 1 SC in each stitch around, join (52 SC)
Brain Coil Tube (I cord):
- with a 5.00 mm crochet hook and single strands of pink yarn
1. Make a Magic Ring, and 7 SC
2. continue making a SC in each round (7 SC) until the I cord is long enough (mine were both 2 meters long)
- make 2 I cords and glue each to one side of the brain beanie to resemble the brain coils

|

|

|
"Santa belt" beanie

It is Christmas time in my part of the world, and it is the time for gift giving. I have had an opportunity to display my crocheted creations at a Winter Fair at my school, and have made this beanie just for the occasion. The beanie is easily made, super fast and so cute. Here is the pattern...
Materials:
4.50 mm crochet hook
red, black, yellow, white yarn
scissors, needle
Steps and Procedures:
Size: child
- ch 2 at the beginning of each Round DOES NOT count as a stitch
- Making a Santa Beanie
- with red yarn
R1: Make a Magic Ring, ch 2 and make 11 DC, join to 1st DC, ch 2
R2: Make 2 DC in each stitch around (22 DC), join, ch 2
R3: Make 2 DC in first stitch, 1 DC in the next (Repeat), join, ch 2 (33 DC)
R4: Make 2 DC in first stitch, 1 DC in the next 2 stitches (Repeat), join, ch 2 (44 DC)
R5: Make 2 DC in first stitch, 1 DC in the next 10 stitches (Repeat), join, ch 2 (48 DC)
R6: Make 2 DC in first stitch, 1 DC in the next 11 stitches (Repeat), join, ch 2 (52 DC)
(if you'd like to make a bigger beanie just continue increasing (INC+12 DC - 56 DC - child, INC+13 DC -60 DC- teen, INC+14 DC-64 DC-adult)
R7-9: Make 1 DC in each stitch around, join, ch 2 (52 DC)
- with black yarn
R10-11: Make 1 DC in each stitch around, join, ch 2 (52 DC)
- with red yarn
R12-14: Make 1 DC in each stitch around, join, ch 2 (52 DC)
- with white yarn
R13: Make 1 DC in each stitch around, join, ch 2 (52 DC)
Making a Belt Buckle:
- with yellow yarn and 4.00 mm crochet hook
- ch 15
- start crocheting from the 2nd stitch from the hook, making a SC in next 2 stitches, and 3 SC in the 4th stitch from the hook
- make a SC in next 3 st, make 3 SC in the next stitch
- make a SC in next 2 stitches, make 3 SC in the next stitch
- make a SC in next 3 st, make 3 SC in the next stitch
- cut the yarn, and sew the beginning of the chain to the end of the chain making a rectangle shape
- sew the rectangle (buckle) to the middle of the hat (on the 2 rows of the black stripe)
- Make a pom pom using the white yarn and sew it to the top of the hat
the "minnie mouse" ear-flap hat revisited
I have had a Minnie Mouse hat commissioned the other day. I love making character hats for kids, and this commissioned project was a perfect opportunity for me to get my "crochet fix“. I have already made this hat in a combo with a scarf, and have decided to revisit the project. This time I have used the double stranded yarn. The double stranded yarn makes the project thicker and more durable.
Materials:
4.00, 5.00 and 8.00 mm crochet hook
double strands of each pink, black, white yarn
scissors, needle
Steps and Procedures:
Size: toddler
- using a double stranded yarn
- ch 2 at the beginning of each Round DOES NOT count as a stitch
- with black yarn and 5.00 mm crochet hook
R1: Make a Magic Ring, ch 2 and make 11 DC, join to 1st DC, ch 2
R2: Make 2 DC in each stitch around (22 DC), join, ch 2
R3: Make 2 DC in first stitch, 1 DC in the next (Repeat), join, ch 2 (33 DC)
R4: Make 2 DC in first stitch, 1 DC in the next 2 stitches (Repeat), join, ch 2 (44 DC)
R5: Make 2 DC in first stitch, 1 DC in the next 10 stitches (Repeat), join, ch 2 (48 DC)
R6-9: Make 1 DC in each stitch around, join, ch 2 (48 DC)
- change to pink yarn and 5.00 mm crochet hook
R10 to 13: Make 1 DC in each stitch around, join (48 DC)
Ear Flap # 1:
- continue to crochet in the next round, with double strands of pink yarn and 5.00 mm crochet hook:
1. SC in next 10, chain 1, turn
2: SC decrease, SC in next 6, SC decrease, chain 1, turn
3: SC across (8 SC)
4: SC decrease, SC in next 4, SC decrease, chain 1, turn
5: SC across (6 SC)
6: SC decrease, SC in next 2, SC decrease, chain 1, turn
7: SC across (4 SC)
8: Make 2 SC decreases, chain 1, turn
9: SC decrease, fasten off, weave in ends
Ear Flap #2:
- Leave 14 stitches unworked across the front of the hat and join in the 15th stitch. Repeat the instructions for Ear Flap #1
- using 5.00 mm crochet hook and double strands of white yarn, SC around the bottom edge of the hat, including the ends of each Ear Flap row
Braided Tassels
- with 8.00 mm crochet hook
Taking your black, white and pink yarn, cut 6 strands of yarn (2 of every color), each 30 inches long. Sl st to the edge of the ear flap and ch 20 with all three colors to make a braid as short or long as you like, (mine was 8 inches). Tie a knot at the end, and cut of any excess yarn. Repeat for the right ear-flap.
Ears:
- using single strands of black yarn and 4.00 mm crochet hook
- Make a Magic Ring
R1: Make 6 hdc in the Magic Ring
R2: Make 2 hdc in each stitch around (12)
R3: Make 2 hdc in the first stitch and 1 hdc in the next stitch (repeat around) - (18)
R4: Make 2 hdc in the first stitch and 1 hdc in the next 2 (repeat around) - (24)
R5: Make 2 hdc in the first stitch and 1 hdc in the next 3 (repeat around) - (30)
- make 4 ears and slip stitch 2 together
- sew the ears into the hat
Bow:
- with 5.00 mm crochet hook and double strands of pink yarn, ch 42.
R1: skip 2 chains from your hook, then crochet hdc all across the chain (40 HDC)
R2 – 5: Chain 2, half double crochet into every stitch across (40 hdc)
When you’ve completed all the rows, connect the two ends of the bow band together to create a rectangle and Slip Stitch the shorter sides together. Once you’ve slip stitched the ends together, flip the slip stitched part to the inside and fasten your yarn off. Leave a long enough tail to wrap around your bow. Start of by slowly yet tightly wrapping the yarn around the center of the bow. When you’ve finished wrapping, knot it to the back of the bow. Then taking your wool/tapestry needle, work the bow onto the top of your hat, right in the middle, between the ears. Fasten off, and weave in loose ends.
White circles for the bow:
- using 3.00 mm hook, and white yarn
- make a Magic Ring, and make 6 sc inside the ring
- make 6 white circles/dots
- sew the white dots onto the bow

|

|
the "Grinch" beanie
It is beginning to look like Fall/Winter in my part of the world. The days are getting shorter, colder, windier. It will be almost time to think about Christmas crochet projects, which I love immensely!
I have a friend who absolutely despises the "modernization" and "commercialization" of Christmas and all that it implies. In our little "circle of trust" we lovingly call our friend - the Grinch, as he likes to refer to himself as the Grinch during Christmas and Winter season. This dear friend moved away recently, and this will be the first Christmas that we will not be seeing him. But, I have come up with the idea of making him a Grinch beanie to tell him I am thinking of him. So, here is the pattern.....
Materials:
4.50 mm crochet hook
green, yellow, black, and a bit of white yarn
scissors, sewing needle
stitch marker
Steps and Procedures:
Basic Beanie: (fits adult male)
- with 4.50 mm crochet hook and green yarn
R1: Make a Magic Ring, and 8 DC (use a stitch marker to mark the 1st stitch of every round)
R2: Make 2 DC (16)
R3: Make 2 DC, DC in next stitch (repeat around) (24)
R4: Make 2 DC, DC in next 2 stitches (repeat around) (32)
R5: Make 2 DC, DC in next 3 stitches (repeat around) (40)
R6: Make 2 DC, DC in next 4 stitches (repeat around) (48)
R7: Make 2 DC, DC in next 5 stitches (repeat around) (56)
R8: Make 2 DC, DC in next 6 stitches (repeat around) (64)
R9: Make 2 DC, DC in next 7 stitches (repeat around) (72)
R10 to 22: DC in each stitch around (72)
R23: SC in each stitch around (72)
Eyes:
- with 4.50 mm crochet hook and yellow yarn
1. Make a Magic Ring and 8 DC inside the ring (do not close the ring completely), ch 2 and turn
2. Make a DC in each stitch (8 DC) and 2 DC in the last stitch (10 DC total), ch 1 and turn
3. change color to black, and SC in every stitch and make 2 SC in the last stitch (12 SC)
- cut off, fasten off and leave a long tail for sewing onto the hat
- make 2 eyes
Center of the eye:
- with 4.5 mm crochet hook and black yarn
- Make a Magic Ring and make 8 SC inside the ring
- close the Magic ring and cut off, leaving a long tail for sewing onto the eye
- make 2 eye circles
Nose:
- with 4.5 mm crochet hook and black yarn
- chain 4, SC in the 2nd chain from the hook, SC the next ch, 3 SC in the last chain
- (working on the other side of the chain) make 1 SC in each of the stitches of this side of the chain
Assembly:
- Sew the center of the eye to the eye, and embroider the white line for the eye "sparkle"
- Sew the eyes and nose onto the beanie
- Embroider the "eye liner" on the lower edge of each eye for a better definition
- Embroider the eyebrows and a grin
- Make a pop pom and sew it to the top of the beanie
This Grinch Beanie will be traveling to Georgia (ex Soviet Union, not the US State) very soon. Mine turned out great, I hope my friend will like it as much as I do:)

|


|
"scalloped hat and a scarf" set
It is beginning to look like Fall in my part of the world here..... The mornings and evenings are getting super chilly..... So, you know what time it is - time to crochet a hat and a scarf set! Yay! I have been saving this awesome variegated yarn just for this occasion and cannot wait to share this pattern with you all! So, here it is....
Materials:
6.00 mm crochet hook
yarn of your choice
yarn needle, scissors
Steps and Procedure:
1. Scalloped Scarf
- Ch 26.
R1: SC in 2nd chain from hook, *skip 2 chains, 5 DC in next chain (Big Scallop made), skip 2 chains, SC in next chain; repeat from *; turn. (4 scallops)
R2: Ch 5 (counts as first DC + ch2), *skip 2 stitches, SC in 3rd DC (top of scallop of previous row), ch 2, skip 2 stitches, DC in SC (from previous row), ch 2; repeat from * across, ending with DC in last SC (of the previous row); turn.
R3: Ch 1, SC in DC, *skip 2 stitches, 5 DC in SC, skip 2 stitches, SC in DC; repeat from *across, ending with SC in 3rd chain of last ch5.
R4-52: Alternated and repeat R2-3 until Scarf measures 166 cm. Fasten off; weave in ends.
- Make 4 tassels and sew to each corner of the scarf
2. Scalloped Slouchy Beanie
- Making a Brim:
R1: with Color 1 – ch 9, SC in 2nd chain from the hook and down the chain line (8 SC), ch 1 and turn
R2: make 1 SC in each stitch in the Back Loop only, ch 1 and turn (8 SC)
R3-56: continue making 1 SC in each stitch in the Back Loop only (8 SC), ch 1 and turn
- sl stitch the shorter sides together - connecting and making the base/brim of the hat
- now that you have the “circle”, change the yarn to Color 2
- Making the Main part of the hat:
R1: ch 1, make 1 SC in each stitch around the top of the brim (56 SC), sl st to the 1st SC made
R2: * SC, skip 1 stitch, 3 DC in next stitch (small Scallop made), skip 1 stitch, SC in next stitch, skip 1 stitch, 3 DC in the next stitch (repeat from *) finishing with a SC in last stitch, sl st to the 1st SC made. (14 scallops)
R3: Ch 3, *skip 1 stitch, SC in 2nd DC (top of scallop of previous row), ch 2, skip 1 stitch, DC in SC (from previous row), ch 2; (repeat from *), ending with DC in last SC (of the previous row), sl st to top of ch3
R4: Ch 1, SC in DC, *skip 2 stitches, 3 DC in SC, skip 2 stitches, SC in DC; repeat from *across, ending with SC in last stitch made
R5-15: Alternated and repeat R2-3 until the preferred length of the beanie. I like my beanie to be slouchy, so I made it long.
- cut off the long piece of yarn and sew through the edges of the top. Pull the yarn tight to close the top of the beanie.
This was a relatively quick project and I have enjoyed making it immensely! Hope you enjoy it as well.

|

|

|

|

|
|

I wanted to make a “gag-gift” hat for a friend for his birthday. I found the picture of this super funny chicken amigurumi hat that I wanted to try to make. So I researched and found these awesome websites with free chicken hat patterns, that I kind of combined, changed, modified and made to suit my needs. These are the original websites I used as inspiration:
www.ravelry.com/patterns/library/mutze-huhn-auf-leinwand
amigurumi.today/amigurumi-funny-rooster-crochet-pattern/
This was a challenging project, but well worth making. The earflap hat itself took only an hour to make, but making the chicken details and sewing them on took a lot of time. So, if you are up to some challenge, and would like to make to make a hat that would be a fun and funny gift hat for someone in your life, this is a project for you….. So, here is the complete pattern:
Materials:
4.50 mm crochet hook (for the hat and chicken legs)
3.00 mm crochet hook (for the smaller chicken details)
White, black, yellow, orange, red worsted weight yarn
Scissors, sewing needle
Stitch marker (optional, but useful when crocheting smaller items)
Steps and Procedures:
1. Making the Hat: (with white yarn)
- using 4.5 mm crochet hook
- Make a magic ring
- ch 2 at the beginning DOES NOT count as a stitch
Round 1: ch 2, make 5 hdc in magic ring, sl st to top of ch 2 (5 HDC)
R2: ch2, 2 hdc in same st, then 2 hdc in each of the next 4 sts, join with sl st. (10 HDC)
R3: ch2, 2 hdc in same st, then 2 hdc in each st all around, join with sl st (20 HDC)
R4: ch2, then *1 hdc in next st, 2 hdc in next st *, join with sl st. (30 HDC)
R5: ch2, then *1 hdc in each of the next 2 sts, 2 hdc in next st *, join with sl st. (40 HDC)
R6: ch2, then *1 hdc in each of the next 3 sts, 2 hdc in next st *, join with sl st. (50 HDC)
R7: ch2, then *1 hdc in each of the next 4 sts, 2 hdc in next st *, join with sl st. (60 HDC)
R8: ch2, then *1 hdc in each of the next 5 sts, 2 hdc in next st *, join with sl st. (70 HDC)
R9-19: ch 2, 1 HDC in each stitch around, join with sl st. (70 HDC)
2. Making the Earflaps: (with white yarn)
Continue without fastening off the yarn, but continue and crochet on.
Row 1: ch2, HDC in same stitch, and make 1 hdc in each of the next 14 sts. (15 HDC), ch 2 and turn
R2: Make a HDC decrease, and make 1 hdc in each of the next 11 sts and work 1 HDC decrease in the last 2 sts of row, ch 2 and turn (13 HDC)
R3: Make a HDC decrease, and make 1 hdc in each of the next 9 sts and work 1 HDC decrease in the last 2 sts of row, ch 2 and turn (11 HDC)
R4: Make a HDC decrease, and make 1 hdc in each of the next 7 sts and work 1 HDC decrease in the last 2 sts of row, ch 2 and turn (9 HDC)
R5: Make a HDC decrease, and make 1 hdc in each of the next 5 sts and work 1 HDC decrease in the last 2 sts of row, ch 2 and turn (7 HDC)
R6: Make a HDC decrease, and make 1 hdc in each of the next 3 sts and work 1 HDC decrease in the last 2 sts of row, ch 2 and turn (5 HDC)
R7: Make a HDC decrease, and make 1 hdc in each of the next 1 sts and work 1 HDC decrease in the last 2 sts of row, ch 2 and turn (3 HDC)
R8: Make a HDC decrease and make a HDC in the remaining stitch (2 HDC) fasten off
Count 13 sts over and join the yarn in the 14th st, ch 1 and continue to work the second earflap just like the first.
3. Head: (with white yarn)
- using 4.5 mm crochet hook
- do not join with the sl st, use a stitch marker
- Make a magic ring
R1: 6 sc in magic ring. (6 SC)
R2: 2 sc in each st. (12 SC)
R3: *1 sc in next st, 2 sc in next st * 6 times. (18 SC)
R4: *1 sc in each of next 2 sts, 2 sc in next st * 6 times. (24 SC)
R5–8: 1 sc in each of all 24 sts around. (24 SC)
R9: *1 sc in each of next 2 sts, 1 dec in next st * 6 times. (18 SC)
R10 – 14: 1 sc in all 18 sts around. (18 SC)
- begin stuffing the head
R15: *1 sc in each of the next 5 sts, 2 sc in next st * 3 times. (21 SC)
R16: *1 sc in each of the next 6 sts, 2 sc in next st * 3 times. (24 SC)
R17: *1 sc in each of the next 7 sts, 2 sc in next st * 3 times. (27 SC)
R18: *1 sc in each of the next 8 sts 2 sc in next st * 3 times. (30 SC)
R19: 18 SC - 4 HDC - 4 DC - 4 HDC
R20: 22 SC - 8 HDC
- stuff completely and sew onto the hat making sure that the 4 DC in the R19 are centered below the chicken’s face and will be placed at the front center of the hat
4. Comb: (with red yarn)
- using 3.00 mm crochet hook
R1: make a MR and make 6 SC
R2: make 6 increases (12 SC)
R3-7: make 1 SC around (12 SC)
R8: (make 1 SC in the next 2 st – make a decrease) repeat around (9 SC)
R9: make 1 SC around (9 SC)
R10: (make 1 SC in the next st – make a decrease) repeat around (6 SC)
- make 2 more combs using the same pattern
- after you have made the 3rd one, do not cut the yarn but continue crocheting
Row 11: take the 3rd comb and flatten the detail so you are crocheting both layers together, make 3 SC in the 3rd comb
- connect the 2nd comb and also crochet 1 SC doubling the sts by flattening the sides together (3 SC)
- connect the 1st comb and crochet 1 SC doubling the sts by flattening the sides together (3 SC)
- you should have 9 SC in this row, ch 1 and turn
R12: make 1 SC in each of the st (9 SC)
- leave a long tail for sewing the comb on top of the chicken’s head
5. Eyes: (with white yarn)
- using 3.00 mm crochet hook
R1: Make a Magic Ring and make 4 SC inside the MR (4 SC)
R2: Make an increase in each stitch around (8 SC)
R3: (1 SC in first stitch, increase in 2nd) repeat around (12 SC)
R4, R5: SC in all 12 st (12 SC)
- Make 2 eye balls
- Cut the yarn and leave a long tail for sewing onto the head
6. Pupils: (with black yarn)
- using 3.00 mm crochet hook
- Make a magic ring, and 6 SC inside the magic ring, fasten off, leaving enough tail for sewing.
- Make another pupil
- Sew the pupils onto the eye balls.
7. Beak: (with yellow yarn)
- using 3.00 mm crochet hook
R1: make a MR and make 6 SC
R2: (SC in the next st, make 1 inc) repeat around (9 SC)
R3: (SC in the next 2 st, make 1 inc) repeat around (12 SC)
R4: (SC in the next 3 st, make 1 inc) repeat around (15 SC)
R5, R6: SC in each st (15 SC)
- leave a long yarn for sewing onto the head bellow the eyes
- stuff with stuffing material
8. Waddle: (with red yarn)
- using 3.00 mm crochet hook
R1: make a MR and make 6 SC
R2: make 2 SC in each st around (12 SC)
R3-7: make 1 SC around (12 SC)
R8: (make 1 SC in the next 2 st – make a decrease) repeat around (9 SC)
R9: make 1 SC around (9 SC)
R10: (make 1 SC in the next st – make a decrease) repeat around (6 SC)
- make another waddle using the same pattern
- after you have made 2, sew them together and sew them under the beak on the chicken’s head
9. Wings (with white yarn)
- using 4.5 mm crochet hook
R1: Make a Magic Ring and make 6 SC inside the MR
R2: Make 2 SC in each st around (12 SC)
R3-5: Make 1 SC around (12 SC)
R6: Make 1 SC in the next 4 st – make a decrease (repeat around) (10 SC)
R7: Make 1 SC around (10 SC)
R8: Make 1 SC in the next 3 st – make a decrease (repeat around) (8 SC)
R9: Make 1 SC around (8 SC)
- Make 2 more parts following the same pattern (3 total)
- After finishing the 3rd part, do not cut the yarn, but continue crocheting in the 3rd part:
R10: SC in the next 4 st
- join the 2nd detail and make 1 SC in the next 4 st
- join the 3rd detail and make 1 SC in all 8 st
- join the 2nd detail and make 1 SC in the remaining 4 st
- join the 1st detail and make 1 SC in the remaining 4 st
- this gives you a total of 24 SC
R11: SC in all 24 st
R12: SC in next 10-decrease (repeat around) (22 SC)
R13: SC in next 9-decrease (repeat around) (20 SC)
R14: SC in next 8-decrease (repeat around) (18 SC)
R15: SC in next st-decrease (repeat around) (12 SC)
R16: SC in all st around (12 SC)
R17: 6 decreases (6 SC)
R18: 3 decreases (3 SC)
- cut the yarn leaving a long tail for sewing onto the hat
- make one more wing for a total of 2
10. Tail Feathers: (using white yarn)
- using 4.5 mm crochet hook
R1: Make a Magic Ring and make 6 SC inside the MR
R2: Make 2 SC in each st around (12 SC)
R3-5: Make 1 SC around (12 SC)
R6: Make 1 SC in the next 4 st – make a decrease (repeat around) (10 SC)
R7: Make 1 SC around (10 SC)
R8: Make 1 SC in the next 3 st – make a decrease (repeat around) (8 SC)
R9: Make 1 SC around (8 SC)
- Make 2 more parts following the same pattern (3 total)
- After finishing the 3rd part, do not cut the yarn, but continue crocheting in the 3rd part:
R10: SC in the next 4 st
- join the 2nd detail and make 1 SC in the next 4 st
- join the 3rd detail and make 1 SC in all 8 st
- join the 2nd detail and make 1 SC in the remaining 4 st
- join the 1st detail and make 1 SC in the remaining 4 st
- this gives you a total of 24 SC
R11: SC in all 24 st
- continue with the booty…..
11. Booty: (with white yarn)
- using 4.5 mm crochet hook
R12: 1 sc in each st. (24 SC)
R13: *1 sc in each of next 11 sts, 2 sc in next st * 2 times. (26 SC)
R14: 1 sc in each st. (26 SC)
R15: *1 sc in each of next 12 sts, 2 sc in next st * 2 times. (28 SC)
R16: 1 sc in each st around. (28 SC)
R17: *1 sc in each of next 13 sts, 2 sc in next st * 2 times. (30 SC)
R18: 1 sc in each st. (30 SC)
R19: *1 sc in each of next 5 sts, 2 sc in next st * 5 times. (35 SC)
R20: 1 sc in each st around. (35 SC)
R21: *1 sc in each of next 6 sts 2 sc in next st * 5 times. (40 SC)
R22: 1 sc in each st around. (40 SC)
R23: *1 sc in each of next 4 sts, 2 sc in next st * 8 times. (48 SC)
R24: *1 sc in each of next 7 sts, 2 sc in next st * 6 times. (54 SC)
- Fasten off, leaving a long tail for sewing
- Stuff both the tail feathers and the booty with stuffing material
- Sew booty to the back of the hat, beginning approximately in Rounds 3 or 4 of the back of the hat.
12. Legs and Feet: (with orange yarn)
- Using 4.5 mm crochet hook
Start with the middle toe:
R1: Make a Magic Ring and make 6 SC inside the MR
R2-6: Make 1 SC in each stitch around (6 SC)
1st and 3rd Toe:
R1: Make a Magic Ring and make 6 SC inside the MR
R2-5: Make 1 SC in each stitch around (6 SC)
- After making the 3rd toe, do not cut the yarn and continue with joining the toes together.
R6: (in the same, 3rd toe) make 1 SC in the next 3 stitches
(connect the middle – longest toe) make 1 SC in the next 3 st
(connect the 1st toe) make 1 SC in each st all the way around (6 SC)
(connect to the other side of the middle – biggest toe) make 1 SC in the remaining 3 st
(connecting to the other side of the 3rd toe, the one you started with) make 1 SC in the remaining 3 st
- this gives you a total of 18 SC
R7: make a SC Decrease and 7 SC (repeat around) (16 SC)
R8: make a SC Decrease and 6 SC (repeat around) (14 SC)
R9: make a SC Decrease and 5 SC (repeat around) (12 SC)
R10: make a SC Decrease and 4 SC (repeat around) (10 SC)
R11: make a SC Decrease and 3 SC (repeat around) (8 SC)
- continue with making the legs:
R12-60: make 1 SC in each 8 st around (8 SC)
R61: Make a decrease in 1st st and 2 SC in 2nd stitch (repeat around) (4 SC)
R62: Make 2 Decreases (2 SC)
- leave a long tail for sewing onto each earflap as chicken legs
So, there you have it – the complete pattern for the Funny Chicken Earflap Hat. Enjoy it, make it, be proud of it:)

|

|
lace FINGERLESS gloves

I got commissioned to make fingerless gloves/mittens recently. A friend sent a photo and said - I want this!:) Since I could not find any free patterns online that resembled the pictures of the gloves I had, I decided to make make my own pattern and here it is... These gloves fit a medium size hand, but it all depends on how long you ch sequence is at the very beginning.
Materials:
thin yarn of your choice
2.00 mm crochet hook
needle, scissors
Steps and Procedures:
- Chain 36, slip stitch to the 1st ch to form a circle
- HDC in the 1st st and in each ch from the round. (35 HDC), sl to the 1st HDC
R1: Ch 2, (counts as a DC) and DC into that same st that you just sl stitch into, Ch 1. *sk 2 sts, and in the 3rd st do (2 dc, ch 1)* repeat all the way around from * until last stitch. sl st into your ch 2 from the beginning of this round. (you should have 12 clusters of 2DC+ch1)
R2: sl stitch again into the ch-1 space from the previous row. ch 2 (counts as first dc) and dc into the ch space. Ch 1. *do (2 dc, ch 1) in each ch 1 space around, then sl st into top of your ch 2 space. (you should have 12 clusters of 2DC+ch1)
R3 and R4: Repeat previous row - R2
R5: ch 2 and HDC in same space and make 1 HDC in each DC made in the previous round INCLUDING the ch 1 space (35 HDC)
R6 and R7: ch 2 and HDC in each stitch around (35 HDC)
R8: repeat R1 (12 clusters of "2DC+ch1")
R9 (increase round): sl stitch again into the ch-1 space from the previous row. ch 2 (counts as first dc) and dc into the ch space. Ch 1. Now in the same st, do 2dc, and ch 1, then *do (2 dc, ch 1) in each ch 1 space around then sl st into top of your ch 2 space. (you should have 13 clusters of 2DC+ch1)
R10: sl stitch again into the ch-1 space from the previous row. ch 2 (counts as first dc) and dc into the ch space. Ch 1. *do (2 dc, ch 1) in each ch 1 space around then sl st into top of your ch 2 space. (you should have 13 clusters of 2DC+ch1)
R11: (increase round) sl stitch again into the ch-1 space from the previous row. ch 2 (counts as first dc) and dc into the ch space. Ch 1. Now in the same st, do 2dc, and ch 1, then *do (2 dc, ch 1) in each ch 1 space around then sl st into top of your ch 2 space. (you should have 14 clusters of 2DC+ch1)
R12: sl stitch again into the ch-1 space from the previous row. ch 2 (counts as first dc) and dc into the ch space. Ch 1. *do (2 dc, ch 1) in each ch 1 space around then sl st into top of your ch-2 space. (you should have 14 clusters of 2DC+ch1)
R13: (making a thumb hole row) sl stitch again into the ch-1 space from the previous row. ch 2 (counts as first dc) and dc into the ch space. Ch 1. *do (2 dc, ch 1) in each ch 1 space around until there are 3 ch-1 spaces left. Skip those 3 ch-1 spaces and sl st into top of your ch 2 space you made at the beginning of this row, making a thumb hole. You should now have 12 clusters of 2DC+ch1.
R14: sl stitch again into the ch-1 space from the previous row. ch 2 (counts as first dc) and dc into the ch space. Ch 1. *do (2 dc, ch 1) in each ch 1 space around then sl st into top of your ch 2 space. (you should have 12 clusters of 2DC+ch1)
R15 and R16: repeat previous R14 (you should have 12 clusters of 2DC+ch1)
R17: sl st to top of ch 2. ch 1. SC in same space and make 1 SC in each DC made in the previous round SKIPPING the ch 1 space (24 SC)
R18: ch 1, SC in same stitch, *skip 2 SC, in next stitch make (2DC - ch 3, slip stitch in top of ch 3 - 2 DC), repeat from *, until you have made 7 clusters of 2DC - ch 3. Slip stitch to top of 1st DC you made in this final row
Enjoy your lace gloves and proudly display them.

|

|

|
cable stitch beanie with a pompom
Wow! This was a big project. Usually it takes me 2-3 hours to make a hat, but this project was a big undertaking for a hat - it actually took me 7 hours. I have never done a cable stitch, and this was definitely a learning experience for me. As a first time cable stitch maker, I think this hat looks great. I followed the pattern from this website:
luqyandmary.blogspot.ba/2017/02/crochet-cable-beanie-written-pattern.html?m=1
Materials:
4.00 mm crochet hook
2 different colored yarns (I used grey and a variegated bluish yarn)
stitch marker is a must
Notes:
- I have never used FPDTRC stitch so this was a learning experience for me as well. When you see it in the pattern it is NOT a typo as I first thought:)
- I have also made a ch 2 at the beginning of each round, and DID NOT count it as a stitch
- I will post the original pattern here, please note that I have made the brim with only ch 77 (it fit my head the best)
- you must make a beginning chain to be multiples of 11
- Arm yourself with the stitch marker, a printed copy of the pattern, and a pencil since you will need it for a successful completion of the project.
Steps and Procedures:
- This is the youtube video that might help you learn the cable stitch:
www.youtube.com/watch?v=sWkigB7nvk0&feature=youtu.be
- Follow the link for the complete pattern:
luqyandmary.blogspot.ba/2017/02/crochet-cable-beanie-written-pattern.html?m=1
luqyandmary.blogspot.ba/2017/02/crochet-cable-beanie-written-pattern.html?m=1
Materials:
4.00 mm crochet hook
2 different colored yarns (I used grey and a variegated bluish yarn)
stitch marker is a must
Notes:
- I have never used FPDTRC stitch so this was a learning experience for me as well. When you see it in the pattern it is NOT a typo as I first thought:)
- I have also made a ch 2 at the beginning of each round, and DID NOT count it as a stitch
- I will post the original pattern here, please note that I have made the brim with only ch 77 (it fit my head the best)
- you must make a beginning chain to be multiples of 11
- Arm yourself with the stitch marker, a printed copy of the pattern, and a pencil since you will need it for a successful completion of the project.
Steps and Procedures:
- This is the youtube video that might help you learn the cable stitch:
www.youtube.com/watch?v=sWkigB7nvk0&feature=youtu.be
- Follow the link for the complete pattern:
luqyandmary.blogspot.ba/2017/02/crochet-cable-beanie-written-pattern.html?m=1

|

|

|

|
slouchy beanie
I have been super busy crocheting these past few weekends for commissioned work. I have made my "pride and joy" Cat Hooded Blanket, and most recently the Cat Hat #2 project has taken up my free weekend time. So, this weekend I have decided to make things for myself. Since it it has been super cold, snowy and wintery here in my part of the world I have decided to make these super cute and comfortable hats/beanies. The first one I made on Friday night (during an evening marathon of the Game of Thrones, which I have been obsessing about) is this Slouchy Beanie. I followed the pattern of this awesome lady from www.cookiesnobcrochet.com/home/3-ml-slouchy-beanie
Her pattern calls for larger hook, but I have used the 4.00 mm crochet hook. She also does the ch 1 at the beginning of each round, I chose not to and used a stitch marker. Next time, I would use a one color yarn for the pretty pattern to be seen, and would have chained less then 84 sc as she indicates at the beginning. Here is the pattern with my changes:
Materials:
1 skein of yarn of your choice (I used this variegated yarn 4 ply)
4.00 mm crochet hook
Tapestry needle
stitch markers
Steps and Procedures:
Brim:
- using the 4.00 mm crochet hook
Ch 8
R1: hdc in the 2nd ch from the hook and in each st across, turn (7)
R2: ch 1, hdc across in the 3rd loop (see note above), turn (7)
Repeat row 2 until the brim is your desired length. Make it as long as you need to fit comfortably on your head, but please keep in mind that the brim will stretch a tiny bit with use over time.
- Fasten off, leaving a long tail of yarn for sewing. Place the two short ends of the brim together and sl st them together.
Body of the hat:
- using the 4.00 mm crochet hook
- use a stitch marker, no sl st and/or ch1 at the start of every round
R1: Work 84 sc evenly across the top of the brim, with the right side facing out.
R2-3: sc across (84)
R4: hdc across in flo (84)
R5-7: hdc across in 3rd loop (84)
R8: sc across in 3rd loop (84)
R9: dc across (84)
R10: (sc in 1st, fpdc in 2nd stitch) repeat around (84)
R11: sc around (84)
R12: (sc in 1st, fpdc in 2nd stitch) repeat around (84)
Note: The fpdc from round 12 should be worked into the fpdc from round 10
R13: sc around (84)
R14-23: Repeat rounds 4-13
R24-28: Repeat rounds 4-8
R29: sc around (84)
R30-34: hdc around (84)
- turn the hat inside out for closing:
The closing at the top of this hat is done like this: keeping the loop on your hook fold the top of the hat in half, with the hook in the center. Ss into the stitch opposite your hook, creating a figure 8-type shape. Pinch the far end of the "figure 8" to the center and ss into it; repeat on the other end of the "figure 8". This will create a shape that resembles an "x" (with four arms). Ss into the center point of each "arm." Continue to ss into the opposite ends of loops formed until the top of the hat is closed. I have additionally threaded a long piece of yarn back and forth through the top round of the hat and then pulled tight to close.
- turn the hat to the right side and you are ready to wear it:)
Notes: Next time, I will....
1. use the same 4.00 mm hook
2. will try to do sl st and ch 1 as indicated in the original pattern
3. shorten the indicated R30-34 of HDC since the hat is too-slouchy for my taste
4. make a smaller beginning chain (less then 84 as indicated in the original pattern)

|

|

|
Crochet crocodile stitch gloves
I have been wanting to make these gloves for a while now but never got around to do it. I have recently found this amazing Youtube tutorial where this lady explains and guides through the whole process of making the gloves. This is the link:
www.youtube.com/watch?v=ltmdwXnFUSc
Thank you Kiki Crochet for the pattern:)
I will let you watch and follow the pattern since it is done so very beautifully just follow it from beginning to the end and you'll complete your gloves in no time.
Materials:
4.00 crochet hook
yarn of your choice (I used 4 ply variegated yarn)
Notes:
The pattern can be found on Kiki Crochet Youtube link.
- I chained 32 (in the pattern she says 36 but it just depends on the size of your hand/palm)
- I made 7 rows of crocodile stitch
- each row of crocodile stitch had 5 shells (shell=5DC+ch1+5DC)
- I made 6 rows of "granny squares"
- each row of "granny squares" had 10 2DC-clusters
- at the end I did 1 row of SC+piccot stitch
For more explanation and the actual pattern watch the video tutorial:
www.youtube.com/watch?v=ltmdwXnFUSc
www.youtube.com/watch?v=ltmdwXnFUSc
Thank you Kiki Crochet for the pattern:)
I will let you watch and follow the pattern since it is done so very beautifully just follow it from beginning to the end and you'll complete your gloves in no time.
Materials:
4.00 crochet hook
yarn of your choice (I used 4 ply variegated yarn)
Notes:
The pattern can be found on Kiki Crochet Youtube link.
- I chained 32 (in the pattern she says 36 but it just depends on the size of your hand/palm)
- I made 7 rows of crocodile stitch
- each row of crocodile stitch had 5 shells (shell=5DC+ch1+5DC)
- I made 6 rows of "granny squares"
- each row of "granny squares" had 10 2DC-clusters
- at the end I did 1 row of SC+piccot stitch
For more explanation and the actual pattern watch the video tutorial:
www.youtube.com/watch?v=ltmdwXnFUSc

|

|

|
Crochet cat hat #2

I decided to make another Cat Hat and I have pretty much used the same pattern as in my other cat hat. I made this one to fit a toddler (3 year old little girl) so the sizing it a bit different. I also used a different pattern for the ears and I think I like these better:) So, here we go:
Materials:
5.00 mm crochet hook
4.00 mm crochet hook
grey, black, yellow, white yarn, pink yarn
Steps and Procedure:
Basic Hat (fits a toddler)
- with 5.00 mm hook
- I used double strands of yarn (grey)
- ch 2 at the beginning of each Round DOES NOT count as a stitch
R1: Make a Magic Ring, ch 2 and make 11 DC, join to 1st DC, ch 2
R2: Make 2 DC in each stitch around (22 DC), join, ch 2
R3: Make 2 DC in first stitch, 1 DC in the next (Repeat), join, ch 2 (33 DC)
R4: Make 2 DC in first stitch, 1 DC in the next 2 stitches (Repeat), join, ch 2 (44 DC)
R5: Make 2 DC in first stitch, 1 DC in the next 10 stitches (Repeat), join, ch 2 (48 DC)
R6: Make 2 DC in first stitch, 1 DC in the next 11 stitches (Repeat), join, ch 2 (52 DC)
R7-11: Make 1 DC in each stitch around, join, ch 2 (52 DC)
Cat Eyes: (make 2)
- in yellow yarn using 4.00 mm hook
Magic ring, chain 1 and SC 8, join, ch 1 (8 SC)
Round 2: 2 SC in each stitch around, join, ch 1 (16 SC)
Round 3: SC in first stitch, HDC in next, 2 DC, HDC, SC the rest of the way around.
Fasten off leaving long tail to sew onto hat.
Eye Pupil: (make 2)
- in black yarn, using 4.00 mm hook
Chain 6, slip stitch in 2nd chain from hook, SC in next, HDC in next, SC, Slip Stitch in last, Now working on other side of chain, Sl St, SC, HDC, SC, Sl St in last.
Fasten off leaving long tail to sew onto eye.
Cat Nose:
- in pink yarn, using 4.00 mm hook
Magic ring, chain 1 and make 6 SC in ring, join, chain 1
Round 2: 2 DC in first stitch, 2 SC in each stitch the rest of the way around. (the 2 DC will be the “point” at the bottom of the nose)
Fasten off leaving long tail to sew onto hat.
- Stitch on mouth and whiskers with tapestry needle. I used white yarn.
Cat Ears (outer ear) make 2:
- in grey yarn (2 strands) using 5.00 mm hook
chain 9, SC in second chain from hook and rest of the way down chain, ch 1, turn (8 SC)
Row 2: SC decrease, SC in next 4, SC decrease, chain 1, turn
Row 3: SC across (6 SC)
Row 4: SC decrease, SC in next 2, SC decrease, chain 1, turn
Row 5: SC across (4 SC)
Row 6: Make 2 SC decreases, chain 1, turn
Row 7: SC across (2 SC)
Row 8: SC decrease, leave a long yarn to attach the inner ear
Cat Ears (inner ear) make 2:
- in pink yarn (2 strands) using 5.00 mm hook
chain 9, SC in second chain from hook and rest of the way down chain, ch 1, turn (8 SC)
Row 2: SC decrease, SC in next 4, SC decrease, chain 1, turn
Row 3: SC across (6 SC)
Row 4: SC decrease, SC in next 2, SC decrease, chain 1, turn
Row 5: SC across (4 SC)
Row 6: Make 2 SC decreases, chain 1, turn
Row 7: SC across (2 SC)
Row 8: SC decrease
- put the outer ear over the inner ear and SC the two together making sure you make 3 SC at each corner
- sew the ears onto the hat
- embroider the cat whiskers to the face close to the nose
Crochet "Brain" Beanie
A colleague recently commissioned a "brain beanie" from me. I thought long and hard on how to manage such an endeavor, looked all over the internet for a pattern, found some ideas, and came up with my own. It is not essentially a difficult project to make, but it does require some time to make the brain coils/tubing. I have learned a new technique called an i-cord which is relatively easy to make but does require a sort of finger dexterity. Anyways, here is the pattern..... This hat is an teen-adult size (Head Circumference = 22″ – 23″ • Hat Circumference = 20.5″ • Hat Height = 8.25″)
Materials:
4.00 mm and 8.00 mm crochet hooks
pink yarn
needle, scissors
stitch marker
dark contrasting yarn (to divide the beanie in 2 "brain" halves)
Steps and Procedures:
Basic Beanie:
- use a stitch marker, DO NOT sl st at the end
- using 4.00 mm crochet hook
Round 1: Ch 2, make 8 hdc in the 2nd chain from hook (8)
Round 2: Ch 1, make 2 hdc in each stitch around (16)
Round 3: Ch 1, in first stitch *make 2 hdc, hdc in next stitch* repeat around (24)
Round 4: Ch 1, in first stitch *make 2 hdc, hdc in next 2 stitches* repeat around (32)
Round 5: Ch 1, in first stitch *make 2 hdc, hdc in next 3 stitches* repeat around (40)
Round 6: Ch 1, in first stitch *make 2 hdc, hdc in next 4 stitches* repeat around (48)
Round 7: Ch 1, in first stitch *make 2 hdc, hdc in next 5 stitches* repeat around (56)
Round 8: Ch 1, in first stitch *make 2 hdc, hdc in next 6 stitches* repeat around (64)
Round 9: Ch 1, in first stitch *make 2 hdc, hdc in next 7 stitches* repeat around (72)
Round 10 to 19: Ch 1, hdc in each stitch around, join (72)
Round 20-23: FPHDC in first stitch, BPHDC in next, repeat around (84)
I cord:
- using an 8.00 mm crochet hook
- Ch 3. Insert hook into 2nd ch from hook, yarn over and draw up a loop, insert hook into next ch, yarn over and draw up a loop (3 loops on hook).
- Row 1: Drop 2 loops from hook. Hold onto the dropped loops with your non-hook hand so they don’t come undone. Yarn over and draw through remaining loop on hook. Insert hook into first dropped loop, yarn over and draw through (2 loops on hook). Insert hook into second dropped loop, yarn over and draw through (3 loops on hook).
Repeat Row 1 for desired length of i-cord. (I made 2 that were each 2 m long). Cut the yarn, leaving a long yarn end. Draw end through all 3 loops on hook and pull tight to fasten off.
I found this website super helpful to learn how to crochet an i-cord:
www.youtube.com/watch?v=cjXsRkr1oWo
Next time, I would make an i-cord with chaining 4 and still use an 8.00 mm crochet hook. That way it is thicker and looks better.
This is another great website that could be helpful:
mycrafts.com/diy/brain-beanie-hat-crochet-tutorial/
Attaching the tubing to the beanie:
I would recommend you loosely run a line of dark contrasting yarn down the very center of your beanie to divide your “brain” in half and use as a stitching guide. It can be very easy to get off center when you are dealing with very long pieces!
Pick a spot near the back of your hat, just above the brim and attach the yarn tubing. Randomly loop back and forth in rows and loops like the coils on a human brain. One long tube should be attached only on the right side, and the other long tube should be attached only on the left side. The human brain is divided into halves, and they do not visibly cross, that is why there are two separate tubes! Once the entire tube is stitched down, weave the end into the inside of the beanie a few times to ensure it stays in place.


Crochet "Little red hen" hat

Being a Music teacher at my school I am always involved in creating, preparing and rehearsing some kind of a classroom Musical or a performance. This month I have been working on a Musical "Little Red Hen" and have been crocheting hats as a part of the kids costumes. So, here is the simple pattern for the Little Red Hen hat. The inspiration and the basic pattern is from Repeat Crafter Me chick hat, which I have changed to fit my needs. So, here it is....
Materials:
5.00 mm crochet hook
4.00 mm crochet hook
red, white, orange, dark red yarn
googly eyes
hot glue gun
Steps and Procedure:
Basic Hat (fits 5-7 year old child)
- with 5.00 mm hook
- ch 2 at the beginning of each Round DOES NOT count as a stitch
- with yellow yarn
R1: Make a Magic Ring, ch 2 and make 11 DC, join to 1st DC, ch 2
R2: Make 2 DC in each stitch around (22 DC), join, ch 2
R3: Make 2 DC in first stitch, 1 DC in the next (Repeat), join, ch 2 (33 DC)
R4: Make 2 DC in first stitch, 1 DC in the next 2 stitches (Repeat), join, ch 2 (44 DC)
R5: Make 2 DC in first stitch, 1 DC in the next 10 stitches (Repeat), join, ch 2 (48 DC)
R6: Make 2 DC in first stitch, 1 DC in the next 11 stitches (Repeat), join, ch 2 (52 DC)
R7: Make 2 DC in first stitch, 1 DC in the next 12 stitches (Repeat), join, ch 2 (56 DC)
R8: Make 2 DC in first stitch, 1 DC in the next 13 stitches (Repeat), join, ch 2 (60 DC)
R9-14: Make 1 DC in each stitch around, join, ch 2 (60 DC)
Eyes (make 2):
- with 5.00 mm hook and white yarn
- use a stitch marker and do not join in
R1: Magic ring, make 6 SC in ring
R2: 2 SC in each stitch around (12 SC)
R3: 2 SC in first stitch, SC in next (18 SC)
I made an extra 2 SC in the last stitch of round 3 just to give the eye a slightly more oval look. Fasten off leaving long tail to sew onto hat.
Beak:
- with 5.00 mm crochet hook and orange yarn
- chain 7, SC in second and third chain from hook, HDC in next 2 stitches, DC in next 2 stitches
- ch 1 and turn and continue to SC around all edges making a SC + chain 1 + SC in the 3 corners. Fasten off leaving long tail.
Comb
- with 5.00 mm crochet hook and dark red yarn
- Make 3; do not finish off on the last one you make
- ch 6, hdc in third ch from hook and HDC in the next 2 chs
- 4 hdc in next ch
- working now on bottom part of chs, hdc in base of next 3 hdc and in base of beginning ch-2, F/O
Assembling comb
On third section of comb, at last st where you did not finish off, ch 1, 3 sc across bottom of piece. Place second piece next to the one you just finished, and continue with 3 sc across the bottom of it; repeat for third piece.
- make a second row of SC
- F/O with long tail and sew to top of hat
Additional info:
- sew the eyes and the beak onto the hat
- use the hot glue gun to glue the googly eyes on

|
|

Another character in the Musical I am working on in my classroom is the chick. I have 6 chicks in my class, and I have made hats for all of them. The pattern is a version of the pattern I found on Repeat Crafter Me. I have tweaked it a bit, and the chick hats turned out adorably:)
Here is the pattern.....
Materials:
5.00 mm crochet hook
4.00 mm crochet hook
yellow, white, orange yarn
googly eyes
hot glue gun
Steps and Procedure:
Basic Hat (fits 5-7 year old child)
- with 5.00 mm hook
- ch 2 at the beginning of each Round DOES NOT count as a stitch
- with yellow yarn
R1: Make a Magic Ring, ch 2 and make 11 DC, join to 1st DC, ch 2
R2: Make 2 DC in each stitch around (22 DC), join, ch 2
R3: Make 2 DC in first stitch, 1 DC in the next (Repeat), join, ch 2 (33 DC)
R4: Make 2 DC in first stitch, 1 DC in the next 2 stitches (Repeat), join, ch 2 (44 DC)
R5: Make 2 DC in first stitch, 1 DC in the next 10 stitches (Repeat), join, ch 2 (48 DC)
R6: Make 2 DC in first stitch, 1 DC in the next 11 stitches (Repeat), join, ch 2 (52 DC)
R7: Make 2 DC in first stitch, 1 DC in the next 12 stitches (Repeat), join, ch 2 (56 DC)
R8: Make 2 DC in first stitch, 1 DC in the next 13 stitches (Repeat), join, ch 2 (60 DC)
R9-14: Make 1 DC in each stitch around, join, ch 2 (60 DC)
Eyes (make 2):
- with 5.00 mm hook and white yarn
- use a stitch marker and do not join in
R1: Magic ring, make 6 SC in ring
R2: 2 SC in each stitch around (12 SC)
R3: 2 SC in first stitch, SC in next (18 SC)
I made an extra 2 SC in the last stitch of round 3 just to give the eye a slightly more oval look. Fasten off leaving long tail to sew onto hat.
Beak:
- with 5.00 mm crochet hook and orange yarn
Chain 4, SC in second chain from hook, HDC in next, DC in next, continue to SC around all edges making a SC + chain 1 + SC in the 3 corners. Fasten off leaving long tail.
- When weaving in the end from your magic ring (beginning of the hat), loop it through the top 3 times. Just like you would weave in an end, but leave it in a loose loop instead of pulling it tightly through. THEN after you have made the loops, make sure the loose end is securely woven in and fastened off. This creates the little “feathers” on the top of the baby chicks head.
- sew the eyes and the beak onto the hat
- use the hot glue gun to glue the googly eyes on
Crochet Fox Hat

Yes, it is Fox time in my classroom. I have also made a Fox hat as a part of the costumes for my 6-year-olds and their class Musical. The basic pattern is also from Repeat Crafter Me. So, here it is.....
Materials:
5.00 mm crochet hook
4.00 mm crochet hook
orange, white, black yarn
googly eyes
hot glue gun
Steps and Procedures:
- with 5.00 mm hook
Basic Hat (fits 5-7 year old child)
- with orange yarn
- ch 2 at the beginning of each Round DOES NOT count as a stitch
R1: Make a Magic Ring, ch 2 and make 11 DC, join to 1st DC, ch 2
R2: Make 2 DC in each stitch around (22 DC), join, ch 2
R3: Make 2 DC in first stitch, 1 DC in the next (Repeat), join, ch 2 (33 DC)
R4: Make 2 DC in first stitch, 1 DC in the next 2 stitches (Repeat), join, ch 2 (44 DC)
R5: Make 2 DC in first stitch, 1 DC in the next 10 stitches (Repeat), join, ch 2 (48 DC)
R6: Make 2 DC in first stitch, 1 DC in the next 11 stitches (Repeat), join, ch 2 (52 DC)
R7: Make 2 DC in first stitch, 1 DC in the next 12 stitches (Repeat), join, ch 2 (56 DC)
R8: Make 2 DC in first stitch, 1 DC in the next 13 stitches (Repeat), join, ch 2 (60 DC)
- change color to white yarn
R9-14: Make 1 DC in each stitch around, join, ch 2 (60 DC)
Nose Bridge:
- Turn hat upside down. You are going to want to locate the 8 stitches in the middle of the hat. Doesn’t need to be perfect because ANY spot could be the middle since we haven’t attached any other features yet.
- Attach orange yarn along the last row of orange stitches, chain and make 8 SC in the next 8 spots, chain 1, turn
Row 2: make 8 SC, ch 1, turn
Row 3: SC decrease, SC in next 4, SC decrease, chain 1, turn
Row 4: SC in each stitch across, chain 1, turn (6 SC)
Row 5: SC decrease, SC in next 2, SC decrease, chain 1, turn
Row 6: SC in each stitch across, chain 1, turn (4 SC)
Row 7-12: SC in each stitch across (4 SC) - until nose bridge is long enough to reach the base of hat.
Fasten off leaving long tail, sl st all side of the nose bridge to the hat.
Nose:
- With black yarn
Magic Ring, chain 2 and make 2 DC, HDC, 2 SC, HDC, 2 DC, HDC, 2 SC, HDC, and join to first DC. Pull tight and leave long tail to sew onto base of the nose bridge.
Cheek Fluff:
- with white yarn
- Right Side: Attach yarn over the DC on the edge of the last row of hat.
Chain 6, SC in second chain from hook, HDC decrease over next two, DC decrease over next last two, join with a SC to next DC on edge of hat, chain 5, HDC decrease over first two, DC decrease over last two, join with a SC to next DC row on hat, chain 3, HDC decrease and join to next DC on edge of hat. Fasten off, weave in ends.
- Left Side: Starting on the 4th DC row of white from bottom of the hat, attach yarn and chain 3, SC in second chain from hook, HDC in last, join to next DC space on edge, chain 4, SC in second chain from hook, HDC in next, DC in last, join to next DC space on edge, chain 5, SC in second chain from hook, DC in next two, 2 DC in last, join and fasten off, weave in ends.
Large Ears (Make 2):
- Starting with orange yan
Chain 11, SC in second chain from hook and rest of the way down chain, chain 1, turn (10 SC)
Row 2: SC decrease, SC in next 6, SC decrease, chain 1, turn
Row 3: SC in each stitch across, chain 1, turn (8 SC)
Row 4: SC decrease, SC in next 4, SC decrease, chain 1, turn
Row 5: SC in each stitch across, chain 1, turn (6 SC)
Row 6: SC decrease, SC in next 2, SC decrease, chain 1, turn
Row 7: SC in each stitch across, chain 1, turn (4 SC)
- Change to black yarn
Row 8: SC in each stitch across, chain 1, turn (4 SC)
Row 9: SC decrease two times, chain 1, turn
Row 10: SC decrease and continue to SC around edges of ear making sure to change yarn color at the appropriate spots.
Large Inner Ear (Make 2):
- with white yarn
Chain 9, SC in second chain from hook and rest of the way down chain, ch 1, turn (8 SC)
Row 2: SC decrease, SC in next 4, SC decrease, chain 1, turn
Row 3: SC across (6 SC)
Row 4: SC decrease, SC in next 2, SC decrease, chain 1, turn
Row 5: SC across ( 4 SC)
Row 6: Make 2 SC decreases, chain 1, turn
Row 7: SC decrease, and continue to SC around edges of ear.
Fasten off leaving long tail to sew inner ear onto outer ear.
- use the glue gun to glue the googly eyes on the hat. And there you have it - the crochet fox hat:)
Crochet Cow Hat

Another one of the characters in the Musical I am doing with my kiddles at school is a Cow. I used the same basic pattern from Repeat Crafter Me. I changed it to fit my needs, but it served as a great base for my pattern. So, here it is.....
Materials:
5.00 mm crochet hook
4.00 mm crochet hook
white, brown, beige, grey yarn
googly eyes
hot glue gun
Steps and Procedure:
Basic Hat (fits 5-7 year old child)
- with 5.00 mm hook
- ch 2 at the beginning of each Round DOES NOT count as a stitch
R1: Make a Magic Ring, ch 2 and make 11 DC, join to 1st DC, ch 2
R2: Make 2 DC in each stitch around (22 DC), join, ch 2
R3: Make 2 DC in first stitch, 1 DC in the next (Repeat), join, ch 2 (33 DC)
R4: Make 2 DC in first stitch, 1 DC in the next 2 stitches (Repeat), join, ch 2 (44 DC)
R5: Make 2 DC in first stitch, 1 DC in the next 10 stitches (Repeat), join, ch 2 (48 DC)
R6: Make 2 DC in first stitch, 1 DC in the next 11 stitches (Repeat), join, ch 2 (52 DC)
R7: Make 2 DC in first stitch, 1 DC in the next 12 stitches (Repeat), join, ch 2 (56 DC)
R8: Make 2 DC in first stitch, 1 DC in the next 13 stitches (Repeat), join, ch 2 (60 DC)
R9-14: Make 1 DC in each stitch around, join, ch 2 (60 DC)
Cow Ear Outside:
- with brown yarn
- with 4.00 mm crochet hook
Chain 5, SC in 2nd chain from hook and in remaining chains, ch 1, turn (4 SC)
Row 2: 2 SC in first stitch, SC in next two, 2 SC in last stitch, ch 1, turn (6 SC)
Row 3-5: SC in each stitch across, ch 1, turn (6 SC)
Row 6: SC Decrease, SC in next two, SC decrease, ch 1, turn
Row 7: SC in each stitch across, ch 1, turn (4 SC)
Row 8: Make 2 SC decreases, continue to SC around entire ear. Fasten off leaving long tail to sew both ear pieces together.
Cow Ear Inside:
- with white yarn
- with 4.00 mm crochet hook
Chain 5, SC in 2nd chain from hook and in remaining chains, ch 1, turn (4 SC)
Row 2: 2 SC in first stitch, SC in next two, 2 SC in last stitch, ch 1, turn (6 SC)
Row 3-5: SC in each stitch across, ch 1, turn (6 SC)
Row 6: SC Decrease, SC in next two, SC decrease, ch 1, turn
Row 7: SC in each stitch across, ch 1, turn (4 SC)
Row 8: Make 2 SC decreases, change to black yarn and continue to SC around entire ear. Fasten off leaving long tail to sew onto hat.
Cow Horn:
- with beige yarn
- with 4.00 mm crochet hook
Magic Ring, make 4 SC in ring continue in rounds
Round 2: 2 SC in each around (8 SC)
Round 3-6: SC in each around (8 SC)
Continue to SC around if you want longer horn.
Fasten off leaving long tail to sew on. Fill with small amount of poly-fill or cotton.
Cow Spots:
- with brown yarn
- with 4.00 mm crochet hook
Magic ring, make 4 SC in ring, continue to SC in rounds
Round 2: 2 SC in each around.
Round 3: HDC + DC + HDC + SC in first stitch, slip stitch in next stitch, HDC + DC + HDC + SC in next, slip stitch in next, 2 HDC in last 4 stitches. Fasten off leaving long tail to sew onto hat.
- I made 4 spots, and sew them on different parts of the hat.
Cow Snout:
- with beige yarn
- with 5.00 mm crochet hook
Magic Ring, 6 SC in ring. Pull tight but don’t join. You should have a half circle. Chain 1, turn.
Row 2: 2 SC in first stitch, SC in next stitch, repeat to end, ch 1, turn (9 SC)
Row 3: 2 SC in first stitch, SC in next 2 stitches, repeat to end, ch 1, turn (12 SC)
Row 4: 2 SC in first stitch, SC in next 3 stitches, repeat to end, ch 1, turn (15 SC)
Row 5: 2 SC in first stitch, SC in next 4 stitches, repeat to end, ch 1, turn (18 SC)
Row 6: 2 SC in first stitch, SC in next 5 stitches, repeat to end (21 SC)
Row 7: 2 SC in first stitch, SC in next 6 stitches, repeat to end (24 SC)
Row 8: 2 SC in first stitch, SC in next 7 stitches, repeat to end (27 SC)
Row 9: 2 SC in first stitch, SC in next 8 stitches, repeat to end (31 SC)
Row 10: 2 SC in first stitch, SC in next 9 stitches, repeat to end (34 SC)
Continue to SC along bottom. (34 SC) Fasten off leaving long tail to sew into hat.
Cow Nostrils (make 2):
- With grey yarn
- with 5.00 mm crochet hook
Magic Ring, make 6 SC in ring, join and pull tight.
Leave long tail to sew onto mouth.
- use the glue gun to glue the googly eyes onto the hat.
Crochet Cat Hat

Another character in the Musical that I am doing with my kiddles is the cat. So, again I turned to Repeat Crafter Me for a basic pattern and inspiration. I changed it a bit to fit my needs and here it is here:
Materials:
5.00 mm crochet hook
4.00 mm crochet hook
brown/beige, black, yello, white yarn
Steps and Procedure:
Basic Hat (fits 5-7 year old child)
- with 5.00 mm hook
- I used double strands of yarn (brown/beige)
- ch 2 at the beginning of each Round DOES NOT count as a stitch
R1: Make a Magic Ring, ch 2 and make 11 DC, join to 1st DC, ch 2
R2: Make 2 DC in each stitch around (22 DC), join, ch 2
R3: Make 2 DC in first stitch, 1 DC in the next (Repeat), join, ch 2 (33 DC)
R4: Make 2 DC in first stitch, 1 DC in the next 2 stitches (Repeat), join, ch 2 (44 DC)
R5: Make 2 DC in first stitch, 1 DC in the next 10 stitches (Repeat), join, ch 2 (48 DC)
R6: Make 2 DC in first stitch, 1 DC in the next 11 stitches (Repeat), join, ch 2 (52 DC)
R7: Make 2 DC in first stitch, 1 DC in the next 12 stitches (Repeat), join, ch 2 (56 DC)
R8-13: Make 1 DC in each stitch around, join, ch 2 (56 DC)
Cat Eyes: (make 2)
- in yellow yarn using 4.00 mm hook
Magic ring, chain 1 and SC 8, join, ch 1 (8 SC)
Round 2: 2 SC in each stitch around, join, ch 1 (16 SC)
Round 3: SC in first stitch, HDC in next, 2 DC, HDC, SC the rest of the way around.
Fasten off leaving long tail to sew onto hat.
Eye Pupil: (make 2)
- in black yarn, using 4.00 mm hook
Chain 6, slip stitch in 2nd chain from hook, SC in next, HDC in next, SC, Slip Stitch in last, Now working on other side of chain, Sl St, SC, HDC, SC, Sl St in last.
Fasten off leaving long tail to sew onto eye.
Cat Nose:
- in pink yarn, using 4.00 mm hook
Magic ring, chain 1 and make 6 SC in ring, join, chain 1
Round 2: 2 DC in first stitch, 2 SC in each stitch the rest of the way around. (the 2 DC will be the “point” at the bottom of the nose)
Fasten off leaving long tail to sew onto hat.
- Stitch on mouth and whiskers with tapestry needle. I used white yarn.
Cat Ears (outer ear) make 2:
- in brown/beige yarn (2 strands) using 5.00 mm hook
chain 9, SC in second chain from hook and rest of the way down chain, ch 1, turn (8 SC)
Row 2: SC decrease, SC in next 4, SC decrease, chain 1, turn
Row 3: SC across (6 SC)
Row 4: SC decrease, SC in next 2, SC decrease, chain 1, turn
Row 5: SC across (4 SC)
Row 6: Make 2 SC decreases, chain 1, turn
Row 7: SC across (2 SC)
Row 8: SC decrease, and continue to SC around the edges
Cat Ears (inner ear) make 2:
- in pink yarn using 4.00 mm hook
chain 7, SC in second chain from hook and rest of the way down chain, ch 1, turn (6 SC)
Row 2: SC decrease, SC in next 2, SC decrease, chain 1, turn
Row 3: SC across (4 SC)
Row 4: Make 2 SC decreases, chain 1, turn
Row 5: SC across (2 SC)
Row 6: SC decrease
- put the outer ear over the inner ear and sew the ears together and sew them onto the hat
- embroider the cat whiskers to the face
Crochet Pig Hat

Being a Music teacher at a local school I am always working on plays and musicals. I am currently in a process of preparing a Musical - Little Red Hen, with my little 6-year-olds, and have decided to make a hat for each character and students as a part of their costume.
There are 6 different characters and 11 students in that class, so I have been a very busy, dedicated and hardworking teacher. The first hat I made is the Pig Hat and here is the pattern....
The idea and the original pattern is from: www.repeatcrafterme.com/2013/10/crochet-pig-hat-pattern.html
Materials:
5.00 mm hook
4.00 mm crochet hook
pink, dark pink, black yarn
googly eyes
hot glue gun
Steps and Procedure:
Basic Hat (fits 5-7 year old child)
- with 5.00 mm hook
- ch 2 at the beginning of each Round DOES NOT count as a stitch
R1: Make a Magic Ring, ch 2 and make 11 DC, join to 1st DC, ch 2
R2: Make 2 DC in each stitch around (22 DC), join, ch 2
R3: Make 2 DC in first stitch, 1 DC in the next (Repeat), join, ch 2 (33 DC)
R4: Make 2 DC in first stitch, 1 DC in the next 2 stitches (Repeat), join, ch 2 (44 DC)
R5: Make 2 DC in first stitch, 1 DC in the next 10 stitches (Repeat), join, ch 2 (48 DC)
R6: Make 2 DC in first stitch, 1 DC in the next 11 stitches (Repeat), join, ch 2 (52 DC)
R7: Make 2 DC in first stitch, 1 DC in the next 12 stitches (Repeat), join, ch 2 (56 DC)
R8: Make 2 DC in first stitch, 1 DC in the next 13 stitches (Repeat), join, ch 2 (60 DC)
R9-14: Make 1 DC in each stitch around, join, ch 2 (60 DC)
Ears:
- using 4.00 mm crochet hook
Outside Pig Ear (make 2):
- with light pink yarn…
Chain 5, SC in 2nd ch from hook and along the rest of the chain, chain 1, turn
Row 2: SC in each stitch across, chain 1, turn (4 SC)
Row 3: 2 SC in first stitch, SC in next 2 stitches, 2 SC in last stitch, chain 1, turn (6 SC)
Row 4-6: SC in each stitch across, chain 1, turn (6 SC)
Row 7: SC decrease, SC in next 2, SC decrease, chain 1, turn
Row 8: SC in each stitch across (4 SC)
Row 9: Make two SC decreases
Row 10: Make one SC decrease, chain 1 and continue to SC around entire ear. Make 2 SC in the bottom corners.
Fasten off leaving long tail to sew to ear parts together.
Inside Pig Ear (make 2):
- with dark pink yarn…
Chain 5, SC in 2nd ch from hook and along the rest of the chain, chain 1, turn
Row 2: SC in each stitch across, chain 1, turn (4 SC)
Row 3: 2 SC in first stitch, SC in next 2 stitches, 2 SC in last stitch, chain 1, turn (6 SC)
Row 4-6: SC in each stitch across, chain 1, turn (6 SC)
Row 7: SC decrease, SC in next 2, SC decrease, chain 1, turn
Row 8: SC in each stitch across (4 SC)
Row 9: Make two SC decreases
Row 10: Make one SC decrease,
- switch to light pink yarn, chain 1 and continue to SC around entire ear. Make 2 SC in the bottom corners.
- sew inside and outside of ear together with your tapestry needle. Sew finished ear onto hat.
- be sure to sew the entire bottom edge to the hat. If you only sew a small portion of the bottom onto it, it may flop over.
Pig Nose:
- With dark pink…
Magic ring, Make 10 SC in ring, continue to crochet in rounds. Use a stitch marker if needed.
R2: 2 SC in first stitch, SC in next, repeat around (15 SC)
R3: 2 SC in first stitch, SC in next 2, repeat around (20 SC)
R4: 2 SC in first stitch, SC in next 3, repeat around, join with slip stitch (25 SC)
R5: 2 SC in first stitch, SC in next 4, repeat around, join with slip stitch (30 SC)
- Change to light pink…
R6: 2 SC in first stitch, SC in next 5, repeat around, join with slip stitch (35 SC)
R7: SC in each stitch around, fasten off leaving long tail to see onto hat.
- With black yarn stitch on two small nostrils. Do this before you sew snout onto hat.
- use the hot glue gun to glue the eyes on.
This was a quick and easy pattern. Thank you Repeat Crafter Me for the basic pattern.
unicorn ear flap hat

It is a season of giving and good will. I have decided to make another cute Unicorn hat for my neighbor's little 10-year-old girl. I have already given her the Minnie Mouse ear flap hat, and boy, was she happy. Whenever I see her she is always wearing it! She is ever so grateful and thankful when I make things for her, and it makes me very excited to make her happy like this! It truly is a season of giving and being grateful for the gifts we all possess.
I found this awesome pattern on www.5littlemonsters.com/2017/10/crocheted-unicorn-hat-with-flowers.html?m=1
I have used the pattern sparingly, since the size mentioned in the link were meant for a 5-year-old, and I needed it for an 8-year-old. So, to make things easier, I used the same pattern I used for the Minnie Mouse ear flap hat and it works great. The flowers and the horn are from the link above. So, here it is, the pattern......
Materials:
4.00 mm crochet hook
white, pink, blue, green, yellow, purple yarn
scissors, needle
stitch marker
Steps and Procedures:
Size: child (4 to 10 Years)
- use a stitch marker to mark the 1st stitch of the round
Hat:
- using white yarn
- Make a Magic ring
R1: make 8 hdc in the Magic Ring (8)
R2: make 2 hdc in each stitch around (16)
R3: in first stitch *make 2 hdc, hdc in next stitch* repeat around (24)
R4: in first stitch *make 2 hdc, hdc in next 2 stitches* repeat around (32)
R5: in first stitch *make 2 hdc, hdc in next 3 stitches* repeat around (40)
R6: in first stitch *make 2 hdc, hdc in next 4 stitches* repeat around (48)
R7: in first stitch *make 2 hdc, hdc in next 5 stitches* repeat around (56)
R8: in first stitch *make 2 hdc, hdc in next 6 stitches* repeat around (64)
R9 to 22: hdc in each stitch around (64)
Ear Flap # 1:
- continue to crochet in the next round:
R1: hdc in next 11 stitches, turn (11)
R2: Ch 1, hdc in first stitch and each stitch across, turn (11)
R3: Ch 1, hdc together (decrease), hdc in the next 9 stitches, turn (10)
R4: Ch 1, hdc together (decrease), hdc in the next 8 stitches, turn (9)
R5: Ch 1, hdc together (decrease), hdc in the next 7 stitches, turn (8)
R6: Ch 1, hdc together (decrease), hdc in the next 6 stitches, turn (7)
R7: Ch 1, hdc together (decrease), hdc in the next 5 stitches, turn (6)
R8: Ch 1, hdc together (decrease), hdc in the next 4 stitches, turn (5)
R9: Ch 1, hdc together (decrease), hdc in the next 1 stitch, hdc together (decrease), turn (3)
R10: Ch 1, hdc in the next 3 stitches, ch 1 and fasten off (3)
Ear Flap #2:
- Leave 23 stitches unworked across the front of the hat and join in the 24th stitch. Repeat the instructions for Ear Flap #1
Braided Tassels:
Taking your pink, blue, and purple yarn, cut 6 strands of yarn (2 of every color), each 30 inches long. Then make a simple knot into the bottom of the left ear-flap. Make a loose braid as short or long as you like, (Mine was 8 inches) then tie a knot at the end, and cut of any excess yarn. Repeat for the right ear-flap.
Horn:
make 1 with yellow yarn, begin with magic ring
Round 1: in mr, ch 1, 4 sc (4 sc)
Round 2: [2 sc in first stitch, 1 sc in next] repeat (6 sc)
Round 3: 1 sc in each stitch (6 sc)
Round 4: [2 sc in first stitch, 1 sc in next 2] repeat (8 sc)
Round 5: 1 sc in each stitch (8 sc)
Round 6: [2 sc in first stitch, 1 sc in next 3] repeat (10 sc)
Round 7: 1 sc in each stitch (10 sc)
Round 8: 1 sc in each stitch (10 sc)
Round 9: [2 sc in first stitch, 1 sc in next 4] repeat (12 sc)
Round 10: 1 sc in each stitch (12 sc)
Round 11: 1 sc in each stitch (12 sc)
Round 12: [2 sc in first stitch, 1 sc in next 5] repeat (14 sc)
Round 13: 1 sc in each stitch (14 sc)
Round 14: 1 sc in each stitch (14 sc)
Round 15: [2 sc in first stitch, 1 sc in next 6] repeat (16 sc)
Round 16: 1 sc in each stitch (16 sc)
Round 17: 1 sc in each stitch (16 sc)
Round 18: [2 sc in first stitch, 1 sc in next 7] repeat (18 sc)
Round 19: 1 sc in each stitch (18 sc)
Round 20: 1 sc in each stitch (18 sc)
Round 21: 1 sc in each stitch (18 sc)
Round 22: 1 sc in each stitch (18 sc)
- stuff with the stuffing material and leave a long tail for sewing onto the hat
Ears:
make 2 with white yarn and 2 with pink yarn
- ch 10
Row 1: hdc in 3rd ch from hook and each ch to the end (8 hdc)
Row 2: ch 2, turn, hdc2tog, hdc in next 4, hdc2tog (6 hdc)
Row 3: ch 2, turn, hdc in each stitch to the end (6 hdc)
Row 4: ch 2, turn, hdc2tog, hdc in next 2, hdc2tog (4 hdc)
Row 5: ch 2, turn, hdc2tog twice (2 hdc)
Row 6: ch 2, turn, hdc2tog (1 hdc)
- finish off, cut yarn
- place a pink triangle on top of a white triangle and with white yarn SC around the outside through both layers
Flowers:
- make 3 flowers, 1 pink, 1, purple, 1 blue
- ch 30
Row 1: sc in second ch from the hook, [ch 1, skip 1, sc in next] repeat to the end
Row 2: ch 1, turn, [sc in first stitch, hdc in next stitch, 3 dc in next stitch, hdc in next] repeat to the end, sc in any extra stitches
- roll the flower starting with the side that was the beginning of row 2, stitch in place, leave long tail for sewing
Leaves:
- make 5 leaves with green yarn
- ch 8
sl st in first ch from hook, sc in next, hdc in next, dc in next 2, hdc, in next, sc in next, sl st in last stitch, turn leaf to work back down the other side the same way, sl st in first stitch, sc in next, hdc in next, dc in next 2, hdc, in next, sc in next, sl st in last stitch, finish off leaving long end for sewing
Assembly:
Sew the horn to the top middle of the hat just a little in front of the center, sew 1 ear on each side pink side forward, sew the flowers and leaves in place around the horn.
Eyes:
Using black yarn or embroidery floss to stitch eyes below the flowers, a semicircle with 5 eyelashes on the outside edge.
unicorn hoodie
A friend commissioned a Unicorn Hoodie for her little girl the other day. As looked for the patterns on line, I found nothing to my liking. I only found this one for the textured baby hoodie, which I kind of liked, but the size was too small.
www.ochrepome.com/blog/textured-toddler-hood
I changed it a bit to fit the size I wanted and needed and I made the perfect hoodie to fit a 10 year old girl. So here is the pattern:
Materials:
- 7.00 mm crochet hook
- white, blue, pink, purple yarn
- needle, scissors
- stitch marker
Steps and Procedures:
1. Hood
- work with double strands of white yarn
Chain 60
1. 2 dc in 4th chain from hook, skip 2, (sc, 2 dc) in next chain, skip 2. Repeat pattern to end. Sc in last chain. Chain 2. Turn.
2. 2 dc in first stitch, skip 2, (sc, 2 dc) in next stitch. Repeat to end. Sc in last stitch. Chain 2 turn.
3. Repeat row 2 to 22 rows total. Fasten off yarn.
4. Fold in half and slip stitch the top seams together to form a hoodie.
2. Scarf
- work with double strands of white yarn
Chain 84
Work through the same steps as a hoodie until you have worked 9 rows.
Fasten off yarn.
- Count 4 "puffs" in on scarf and, lining up the 4th puff on the scarf with the 1st puff on the edge of the hood, slip stitch scarf to hood.
- Work a row of sc all the way round making sure to make 2 sc in each corner. Fasten off and weave in ends.
3. Ears
- work with double strands of yarn and 7.00 mm crochet hook
- make 4 ears following this pattern:
Chain 5, HDC in 2nd chain from hook and in remaining chains, ch 1, turn (4 HDC)
Row 2: 2 HDC in first stitch, HDC in next two, 2 HDC in last stitch, ch 1, turn (6 HDC)
Row 3-5: HDC in each stitch across, ch 1, turn (6 HDC)
Row 6: HDC Decrease, HDC in next two, HD decrease, ch 1, turn
Row 7: HDC in each stitch across, ch 1, turn (4 HDC)
Row 8: Make 2 HDC decreases
- make 2 ears and connect them together by make SC through both ears. Join to the second SC (this will cause the ear to cup).
Fasten off leaving long tail to sew onto hat. Sew onto hat about one row away from the horn.
4. Horn
- using blue yarn and 4.00 mm crochet hook
Magic Ring, chain 1 and make 4 SC inside ring, do not join, continue to SC in rounds. Use a stitch marker.
R2: SC in each stitch around (4 SC)
R3: 2 SC in first stitch, SC in next, repeat around (6 SC)
R4: SC in each stitch around (6 SC)
R5: 2 SC in first stitch, SC in next 2, repeat around (8 SC)
R6: SC in each stitch around (8 SC)
R7: 2 SC in first stitch, SC in next 3, repeat around (10 SC)
R8: SC in each stitch around (10 SC)
R9: 2 SC in first stitch, SC in next 4, repeat around (12 SC)
R10: SC in each stitch around (12 SC)
R11: 2 SC in first stitch, SC in next 5, repeat around (14 SC)
R12: SC in each stitch around (14 SC)
R13: 2 SC in first stitch, SC in next 6, repeat around (16 SC)
R14: SC in each stitch around (16 SC)
R15: 2 SC in first stitch, SC in next 7, repeat around (18 SC)
R16: SC in each stitch around (18 SC)
R17: 2 SC in first stitch, SC in next 8, repeat around (20 SC)
R18: SC in each stitch around (20 SC)
R19: 2 SC in first stitch, SC in next 9, repeat around (22 SC)
R20: SC in each stitch around (22 SC)
Fasten off leaving long tail to sew onto hat. Stuff with cotton and with your tapestry needle, sew horn onto hat just in front of your first round.
4. Hair
- cut out blue, pink, purple yarn for the hair
- start with the area around the horn and make knots all around the horn
- I also went through the stitches at the seam of the hoodie (where I slip stitched the sides together)
This project was so much fun to make. I wanted to badly to make one for myself, because, let's face it - who does not want a little bit of unicorn magic in their life?

|

|

|

|
"Minnie mouse" EAR FLAP hat and scarf
1. minnie mouse hat

It is Fall/Winter season in my part of the world. Personally, I enjoy it so much more than Summer. Although I do love to wear the flip slops and the warmth of the sun, I enjoy Winter time temperatures more. The other day we had some snowfall and it made me immediately think of crocheting some hats and scarfs for friends and family. So I though of a family in my neighborhood and their little girl who is 8 years old. I wanted to make her something that an 8 year old girl would enjoy. And what little girl does not like Minnie Mouse and her adorable pink bow and mousy ears? I looked everywhere for the pattern but could not find one that fits my needs and desires. So here is the pattern. Crochet it, make it, enjoy it, give it away and make someone happy:) My little 8 year old neighbor thought it was the best thing ever!
Materials:
4.00 mm crochet hook
pink, black, white yarn
scissors, needle
stitch marker
Steps and Procedures:
Size: child (4 to 10 Years)
- use a stitch marker to mark the 1st stitch of the round
- using black yarn
- Make a Magic ring
R1: make 8 hdc in the Magic Ring (8)
R2: make 2 hdc in each stitch around (16)
R3: in first stitch *make 2 hdc, hdc in next stitch* repeat around (24)
R4: in first stitch *make 2 hdc, hdc in next 2 stitches* repeat around (32)
R5: in first stitch *make 2 hdc, hdc in next 3 stitches* repeat around (40)
R6: in first stitch *make 2 hdc, hdc in next 4 stitches* repeat around (48)
R7: in first stitch *make 2 hdc, hdc in next 5 stitches* repeat around (56)
R8: in first stitch *make 2 hdc, hdc in next 6 stitches* repeat around (64)
R9 to 17: hdc in each stitch around (64)
- change to pink yarn
R18 to 22: hdc in each stitch around (64)
Ear Flap # 1:
- continue to crochet in the next round:
R1: hdc in next 11 stitches, turn (11)
R2: Ch 1, hdc in first stitch and each stitch across, turn (11)
R3: Ch 1, hdc together (decrease), hdc in the next 9 stitches, turn (10)
R4: Ch 1, hdc together (decrease), hdc in the next 8 stitches, turn (9)
R5: Ch 1, hdc together (decrease), hdc in the next 7 stitches, turn (8)
R6: Ch 1, hdc together (decrease), hdc in the next 6 stitches, turn (7)
R7: Ch 1, hdc together (decrease), hdc in the next 5 stitches, turn (6)
R8: Ch 1, hdc together (decrease), hdc in the next 4 stitches, turn (5)
R9: Ch 1, hdc together (decrease), hdc in the next 1 stitch, hdc together (decrease), turn (3)
R10: Ch 1, hdc in the next 3 stitches, ch 1 and fasten off (3)
Ear Flap #2:
- Leave 23 stitches unworked across the front of the hat and join in the 24th stitch. Repeat the instructions for Ear Flap #1
- change to white yarn
– make 1 sc in each stitch including the ends of each Ear Flap row
Braided Tassels
Taking your black, white and pink yarn, cut 9 strands of yarn (3 of every colour), each 30 inches long. Then make a simple knot into the bottom of the left ear-flap. Make a loose braid as short or long as you like, (Mine was 8 inches) then tie a knot at the end, and cut of any excess yarn. Repeat for the right ear-flap.
Ears:
- using black yarn
- Make a Magic Ring
R1: Make 6 hdc in the Magic Ring
R2: Make 2 hdc in each stitch around (12)
R3: Make 2 hdc in the first stitch and 1 hdc in the next stitch (repeat around) - (18)
R4: Make 2 hdc in the first stitch and 1 hdc in the next 2 (repeat around) - (24)
R5: Make 2 hdc in the first stitch and 1 hdc in the next 3 (repeat around) - (30)
- make 4 ears and slip stitch 2 together
- sew the ears into the hat
Bow:
- with 4.00 mm crochet hook and pink yarn, ch 50.
R1: Chain 2, skip 2 chains from your hook, then crochet hdc all across the chain
R2 – 8 ~ Chain 2, half double crochet into every stitch across (48 hdc)
When you’ve completed all the rows, connect the two ends of the bow band together to create a rectangle and Slip Stitch the shorter sides together. Once you’ve slip stitched the ends together, flip the slip stitched part to the inside and fasten your yarn off. Leave a long enough tail to wrap around your bow. Start of by slowly yet tightly wrapping the yarn around the center of the bow. When you’ve finished wrapping, knot it to the back of the bow. Then taking your wool/tapestry needle, work the bow onto the top of your hat, right in the middle, between the ears. Fasten off, and weave in loose ends.
White circles for the bow:
- using 3.00 mm hook
- make a Magic Ring, and make 6 sc inside the ring
- make 6 white circles/dots
- sew the white dots onto the bow
2- minnie mouse scarf

This is the simplest version of the scarf. I used black yarn and sc around with the pink yarn.
- using 5.00 mm crochet hook and black yarn
- ch 25
- make a hdc in the 3rd chain from the hook and hdc down the chain, ch 2 and turn (23)
- make a hdc in every chain (23)
- continue making hdc in ever row until you are happy with the length of your scarf (I made 110 rows)
- change to pink yarn
- sc around each side, making sure you make 2 sc in each corner
- make 2 small bows (using the same pattern as above but only with the 3.00 mm crochet hook to make it smaller)
- make 12 small dots (using the same pattern as above but make only 5 sc in the magic ring)
- sew the dots on the bows
- sew the bows to the ends of your scarf
Enjoy, give away, make someone happy:)
Rustic Slouch crochet hat
This hat is a part of a scarf-hat combo found of this website:
littlemonkeyscrochet.com/rustic-slouch-crochet-pattern/
It is a beautiful pattern, and well worth making. I used the variegated yarn, and it turned out pretty cute. Although, I think when I make this hat again (and I definitely will) I will use a different color yarn, non-variegated. But, you can be the judge of it, check out my finished project and the original link posted above.
Materials:
- yarn of your choice (I used medium worsted variegated yarn)
- 6.00 mm hook (for the hat)
- 3.00 mm hook (for the base of the hat around the forehead)
- scissors, yarn needle, button
Steps and Procedures:
- for all the steps and procedures check out the original website where everything is explained in details. Thank you Little Monkeys Crochet for the pattern: littlemonkeyscrochet.com/rustic-slouch-crochet-pattern/

|

|

|
The "Hip hippo hat"

A friend commissioned a hippo hat for her little boy recently. I found this great pattern on Repeat Crafter Me. I made a few changes to fit my needs and here is my version of the pattern:
Materials:
– Worsted weight yarn
– Size 3.5mm Crochet Hook
– Tapestry needle
– 2 small blue buttons
Steps and Procedures:
(remember that the ch2 at the beginning of each round DOES NOT count as a stitch)
R1 - make a Magic ring, ch 2, 11 DC in magic ring, join to first DC
R2 - ch 2, 2 DC in each around, join (22 DC)
R3 - ch 2, 2 DC in first, DC in next, repeat around, join (33 DC)
R4 - ch 2, 2 DC in first, DC in next 2, repeat around, join (44 DC)
R5 - ch 2, 2 DC in first, DC in next 10, repeat around, join (48 DC)
R6 - ch 2, 2 DC in first, DC in next 11, join (52 DC)
R7 - ch 2, 2 DC in first, DC in next 12, join (56 DC)
R8 - ch 2, 2 DC in first, DC in next 13, join (60 DC)
R9 - ch 2, 2 DC in first, DC in next 14, join (64 DC)
R10- ch 2, 2 DC in first, DC in next 15, join (68)
R11-15: ch 2, DC in each around, join (68 DC)
do not fasten off, begin on earflap as written below
Earflap 1:
Chain 1, SC in next 14, chain 1, turn
R2: SC decrease, SC in next 10, SC decrease, chain 1, turn
R3: SC across (12 SC)
R4: SC decrease, SC in next 8, SC decrease, chain 1, turn
R5: SC across (10 SC)
R6: SC decrease, SC in next 6, SC decrease, chain 1, turn
R7: SC across (8 SC)
R8: SC decrease, SC in next 4, SC decrease, chain 1, turn
R9: SC decrease, SC in next 2, SC decrease, chain 1, turn
R10: Make 2 SC decreases, chain 1, turn
R11: SC decrease, fasten off, weave in ends
Follow the same procedure for Earflap 2.
With accent color (I used blue), attach yarn and SC around the entire bottom edge of the hat (including earflaps). Fasten off and weave in ends.
Ears (Make 2):
R1: Chain 6, TC in 3rd chain from hook, DC in next two, SC in last, chain 1, turn
R2: SC around ear making 2 SC in each stitch along the top of ear (18 SC)
Stitch on ears where the hat creases when laid flat. I put mine between the 4th and 5th row from the top.
Eyes (Make 2):
- using white yarn - make a Magic Ring, chain 2 and make 3 DC + 2 SC + 3 DC + 2 SC all in ring. Pull tight and join to first DC.
Leave long tail to sew onto hat.
- using black yarn for the eye centers:
- make a MR and SC 5 inside
Snout:
R1: Chain 12, DC in 3rd chain from hook and the rest of the way down chain. Make a total of 3 DC in last stitch. Now working on other side of chain, DC in each stitch and make 3 DC in last stitch. Join to first DC, chain 2.
R2: (2 DC in first stitch, DC in next stitch)-do that 4 times, 2 DC in next 3 stitches, (2 DC in first stitch, DC in next stitch)- do that 4 times, 2 DC in last 4 stitches. Join to first DC. (38 DC)
R3: ch 2, make 2 DC in the first stitch, make 1 DC in the next stitch (repeat around) (57 DC)
R4: slip stitch in the next 6 stitches, chain 3, DC in last chain, skip one stitch and join to next (this creates the nostril), slip stitch in the next 10 stitches, ch 3, DC in the 3rd chain, skip next stitch and join (creates the next another nostril)
Fasten off leaving long tail to sew onto hat.
Sew buttons for nostril holes onto nostril area. I used blue buttons but you could use black or anything other color. Or you can leave them off completely.
Teeth (make 2):
Magic Ring, chain 3, make 3 DC in ring, chain 3 again and slip stitch to magic ring loop. Pull tight but don’t join.
Sew snout on top of teeth. It helps to make sure the bottom of the snout matches up with the bottom edge of the hat.
This hat was made to fit a child ages 5-10. If you want it thicker, I suggest using double strains of the same yarn. This pattern was super easy to follow. What is written here is my version and changes I made to suit my needs. You can find the original pattern here:
www.repeatcrafterme.com/2014/06/crochet-hippo-hat-pattern.html
Simple Scarf
I wanted to update my list of School Spirit items to display and sell. Since I already have hats, I though it might be appropriate to have scarves as well. So, created this simple pattern that is beginner friendly and easy to do. It did take me a few hours to make it, but the pattern is so super simple to follow. So, here it is:
Materials:
5.00 mm crochet hook
4.00 mm crochet hook
2 different colored yarns
needle, scissors
Procedure:
- using a 5.00 mm hook chain 27
- make a HDC in the 3rd chain from the hook, and continue making 1 HDC in every stitch all the way down the chain (25 HDC), ch 2, turn
- make 1 HDC in every stitch (25 HDC) only in the Back Loop, ch 2 and turn (this creates a nice ridge effect, and makes a scarf pop a little)
- continue making 25 HDC (only in the Back Loop of every stitch), ch 2 and turning in every row (I made 110 rows)
- with a different color yarn and using a 4.00 mm hook make 1 SC in every stitch around, making sure you make 2 SC in each corner stitch.
- weave in the ends
- cut 56 pieces of yarn (15 cm long) using the same color you single crocheted around
- using 2 pieces of string together make a tassel and attach 14 tassels along the shorter edges
- I added my School's emblem to fit my needs. My scarf measures 15 cm x 146 cm. If you want to make it wider (mine is 15 cm) make a longer chain to start with and/or if you want it longer (mine is 146 cm with the tassels) crochet more rows (I made 110 rows)
And this is what my scarf looks like:

|

|
Puff Stitch Slouchy Beanie
I saw this marvelous beanie tutorial and I just had to make it - two beanies to be exact! This lady has a website with the written tutorial, but I suggest a youtube tutorial - it is easier to follow.......
www.youtube.com/watch?v=XvK8FjJ4pBU
This is my version of the pattern - slightly altered to fit my needs..... my suggestion is to watch the video....it helped me a great deal.....
Materials
-One skein of worsted weight yarn
-Size 4.00 mm crochet hook
-Tapestry needle
Headband:
CH 11
SC in second st from hook and all the way across in front loop only, turn, ch 1
SC enough rows for this band to wrap all the way around your head – mine wound up being 72 rows! (don't forget to ch 1 at the end of every row of 10 SC)
SL ST the two ends of the band together to make what looks like a thick headband
Body of the beanie:
SC around entire band – so 72 sts for me, one SC in each row of the band
SL ST to join
CH 2
ROW A : *PUFF ST in first SC, CH 1 & skip next SC*, repeat from * all the way around (36 puffs for me)
SL ST to join
ROW B : Skip first PUFF ST, *PUFF ST in gap where CH 1 lies, CH 1 and skip next SC*, repeat from * all the way around
Alternate rows A & B until you end up 16 rows total.
Finishing off:
Hook it at the center back of your hat (the seam!). SC the front center of your hat to the back center.
Pinch in the sides and SC these to the center, the top of your beanie should start to look like a star shape.
Pinch in each of those “points of the star” (4 of them) and SC these to the center also.
Finish off and sew in all your tails. Turn your hat inside out.
And these are my beanies..... cute, fast, simple, adorable.......

|

|

|

|
Simple Ribbed Beanie

This was the fastest, simplest beanie I have ever made.... and I have made many beanies.......
The pattern is super easy, there are many versions on the internet, and here is mine......the hat is a crocheted rectangle, worked in DC and a rib effect, that’s sewn together along the shorter edges and then gathered at the top!
Materials:
4.00 mm crochet hook
yarn (I have used a double strain of a very thin yarn I have gotten as a gift recently. The yarn is so super fine and thin that this is the only thing I could do to put it to good use - double it and make it into a beanie.... the yarn has some sparkles on it and it makes my beanie extra cute and sweet......)
- Chain 42
- DC into the 3rd chain from the hook and all the way down making 40 DC only in the back loops, ch 2 and turn
- make 40 DC down the row only in the back loops, ch 2 and turn
- continue making 40 DC in each row (in the back loops) until you have 32 rows (or however many fit the circumference of your head)
- slip stitch the shorter sides together
- now you have a rectangle - gather one side of the rectagle together and SC to join the sides starting from the middle and gathering the sides together in the middle (star shape top).
- weave in the ends, turn the beanie inside out so your seam is less obvious.
- I folded the edge so my beanie is not that long, but you do not have to....
Here is the finished result.....

|

|

|

|
Crochet Gloves No. 2
It is winter time.....time for gloves, hats, scarves......so.... I wanted to make some gloves as a Christmas gift for my sister..... I chose this variegated yarn and they turned out beautifully! I followed the same tutorial as in the next post:
www.youtube.com/watch?v=2xyrp6WOKHI
I have used the 4.00 mm crochet hook and they were a bit smaller then the gloves from the next post.....
Check them out.....
www.youtube.com/watch?v=2xyrp6WOKHI
I have used the 4.00 mm crochet hook and they were a bit smaller then the gloves from the next post.....
Check them out.....

|

|

|
Crochet Simple Gloves
These are the first gloves I've ever crocheted! I am so proud of this project! I thought that crocheting gloves would be a more complicated process, but this has turned out to be as painless as possible:)
I used this youtube tutorial:
www.youtube.com/watch?v=2xyrp6WOKHI
I ended up using 5.00 mm hook, and have made more increases then shown in the pattern, but nevertheless, the pattern was AWESOME and definitely worth following.
And this is how my gloves turned out..... A friend I made them for wanted dark blue with no embellishments, so they are super simple....
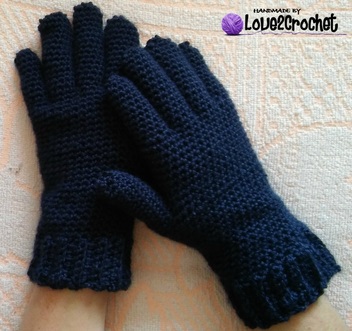

|
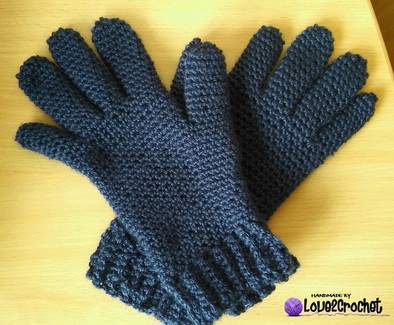
|
Crochet Men's Drivers's Cap
I wanted to make a hat/cap for my father's birthday coming up. I've found this pattern which is entitled "Cast of Crew Crochet Cap". It reminded me a great deal of the types of hats worn by men in the 1920's. I love that sort of a fashion for men, so I decided to make it for my dad. The pattern is from bobwilson123 website, and she even has a youtube tutorial. I followed it completely, but I have a feeling that her hat/cap turned out differently then mine - sigh:(
Nevertheless, I am sure my dad will appreciate and love the cap I made for him. This is the pattern website: www.bobwilson123.org/hats.html
And this is the youtube tutorial: www.youtube.com/watch?v=gEffgaeEbus
And this is how mine turned out - my sweet hubby is modeling the hat:)
Nevertheless, I am sure my dad will appreciate and love the cap I made for him. This is the pattern website: www.bobwilson123.org/hats.html
And this is the youtube tutorial: www.youtube.com/watch?v=gEffgaeEbus
And this is how mine turned out - my sweet hubby is modeling the hat:)

|
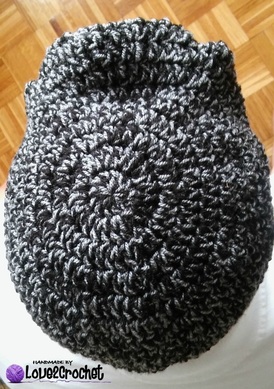
|
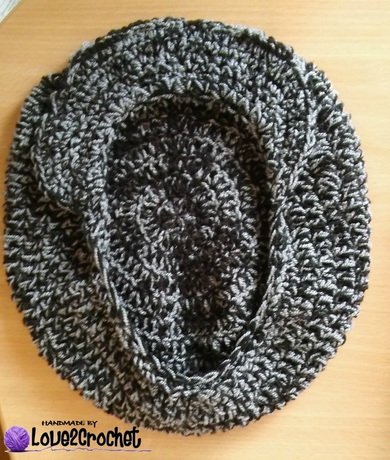
|

|

|
Crochet a Snowman Ear-flap Hat
I loved this project! This is not the first hat I've made (it was pre-blog time, so I have no pictures to prove it though), but this was the most fun hat I've made:)
Maybe it was because I made it for my four-year-old nephew, but it was a joy to complete. The instructions and the pattern was taken completely from Repeat Crafter Me website. This lady is awesome, you should truly check her blog! Thank you Repeat Crafter Me for the pattern. The website is:
www.repeatcrafterme.com/2016/01/crochet-snowman-hat.html
This is how my little Snowman hat turned out.....

|

|

|
Crochet Hello Kitty Ear-flap Hat
I am thinking about Christmas presents already (even though it is August now). Being on Summer vacation and being a teacher I never have time during the school year, so I am using this time of to do some crocheting and lovin' it too!
I have just made this adorable Hello Kitty crochet earflap hat. The size I made is for the toddler and I am sure it will fit my baby niece (if it does not, she'll grow into it fast).
The pattern I used is from Crochet is Color and it is super easy to follow. Instead of making braids to attach to the ear flaps of the hat, I chained 40 and added tassels on the bottom. Equally easy and cute. This is the website with the complete instruction. Thank you Elizabeth from Crochet in Color for the pattern.
crochetincolor.blogspot.ba/2012/03/hello-kitty-hat-pattern.html?m=1
This is how mine turned out.....

|
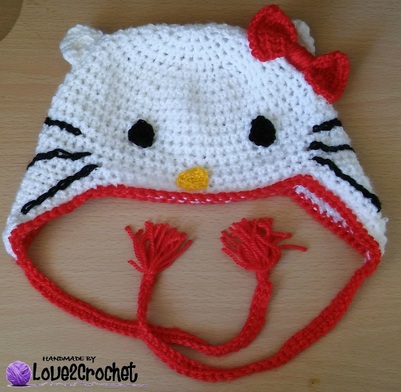
|

|
Crochet Pom Pom Hats
Recently I have been asked to crochet some items to celebrate my School's spirit. Some items were supposed to be wearables, so the teachers, students, parents could display them and wear them to
promote our School. The School's colors are blue and yellow and the mascot is the wolf. I had a long and hard look at what I can make and create. It needed to be something that the kids would want to wear and also some items that were school related paraphernalia. All needed to be a great representation of our School's spirit.
One of the first items I though of was a hat - the winter was coming and I live in a area when the winters are long, cold and there is lot of snow. I found this amazing website with the great and simple instructions and sizing from Preemie to Adult Full Length Half Double Crochet Beanie. This is the website: oombawkadesigncrochet.com/2014/01/free-crochet-pattern-half-double.html
I whipped up three hats in a day..... now all that is left is to see if the students/teachers/parents would love them as much as I do.... This is how they turned out....

|
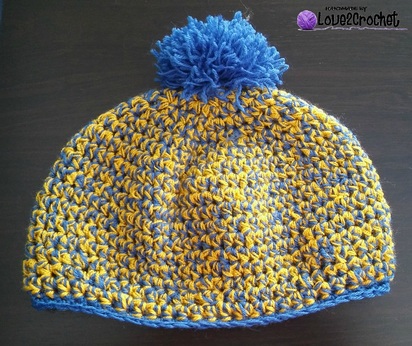
|

|
Crochet a Wolf Hat

Since a wolf is my School's mascot, I thought it might be a great idea to crochet a wolf hat! I could just imagine little 5-year-olds playing on the School's playground all wearing a wolf hat! Adorable:) I was ecstatic when I found this website from Repeat Crafter Me and the complete instructions and the pattern for a fox hat, which was so easily transformed into a wolf..... yeah!..... I just could not wait to make it.....
www.repeatcrafterme.com/2015/06/crochet-fox-hat.html
And this is how my little wolf hat turned out.....
www.repeatcrafterme.com/2015/06/crochet-fox-hat.html
And this is how my little wolf hat turned out.....
Pixie Bonnet Style Hat
A friend of mine recently asked me to crochet a hat for her 1-year-old nephew. She wanted a pixie style bonnet and she had a particular image in mind. When I found this website, I knew I was on the right track, so I decided to make a pixie bonnet following pattern and instructions of Lorene. Thank you Lorene for the pattern, it is awesome!
The original post and the pattern is here:
cre8tioncrochet.com/2015/09/unique-pixie-bonnet-style-crochet-hat/
And this is how mine turned out...
The original post and the pattern is here:
cre8tioncrochet.com/2015/09/unique-pixie-bonnet-style-crochet-hat/
And this is how mine turned out...
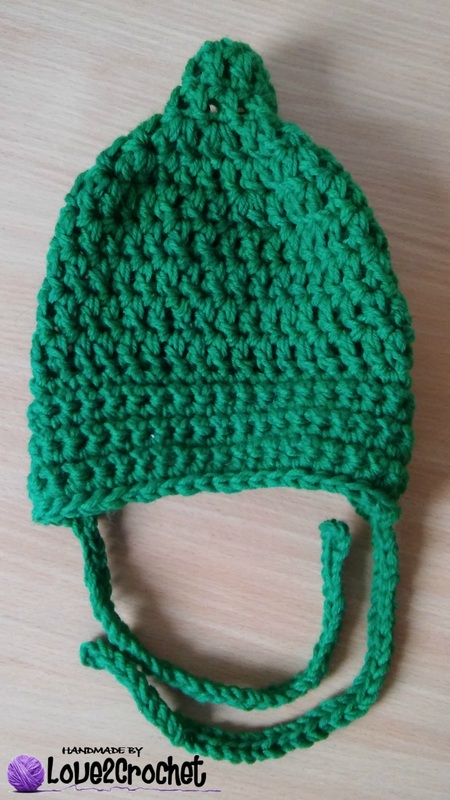
|

|

|
Crochet Ponytail Hat-Neck Warmer
A friend recently asked me to make a ponytail hat for her. There are tons of free patterns on line, but when I found this one I knew it was the right one for me. It took me about one hour to make the hat, and the pattern is so supper easy to follow. It uses DCs, and a 5.00 mm crochet hook, and I only used one skein of yarn. I generally love making Front Post and Back Post DCs and this pattern uses the FP and BP on the edging. The effect is great for the edging. This is the website: www.goddesscrochet.com/2015/02/27/ponytail-hat-neckwarmer-free-crochet-pattern/
And this is how mine turned out... A super easy, quick project... Definitely worth checking out...
And this is how mine turned out... A super easy, quick project... Definitely worth checking out...

|

|
Crochet Beanie Hat
I made this adorable beanie a year ago, but I never posted about it. So, I decided to make it again, post some pictures and give you a link to the pattern. The pattern is found on youtube. The lady who created and posted it does a great job explaining, although she does not use crocheted terminology. This was one of the first projects I made and it was easy to follow. I just followed what she does. This is a very beginner friendly project.
www.youtube.com/watch?v=rk8KjRracLo&index=15&list=PL669561828CFC1C29
This is how my beanie turned out....
www.youtube.com/watch?v=rk8KjRracLo&index=15&list=PL669561828CFC1C29
This is how my beanie turned out....

|

|
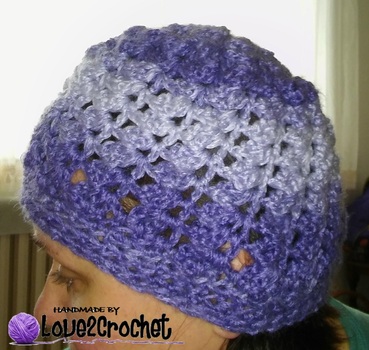
|

|
Crochet Bear Hooded Cowl
A friend of mine commissioned a hooded cowl for her little girl recently. I searched and searched and found this awesome tutorial on line. The tutorial is in Spanish, but it is wonderfully done and easy to follow. I have played with the variety of yarns and hooks, and have finally decided to double the strains of yarn and to use a 6.00 mm crochet hook. I used 4 skeins of purple yarn, and only a bit of pink for the inside of the ears. It turned out wonderfully. I was aiming for a size that would fit a 10-year-old up to teens, and it fitted me perfectly as well. Just follow the instructions in this tutorial and yours will turn out great, I promise:)
www.youtube.com/watch?v=Z4XMwA6jxGo
This is how mine looks.....
www.youtube.com/watch?v=Z4XMwA6jxGo
This is how mine looks.....

|
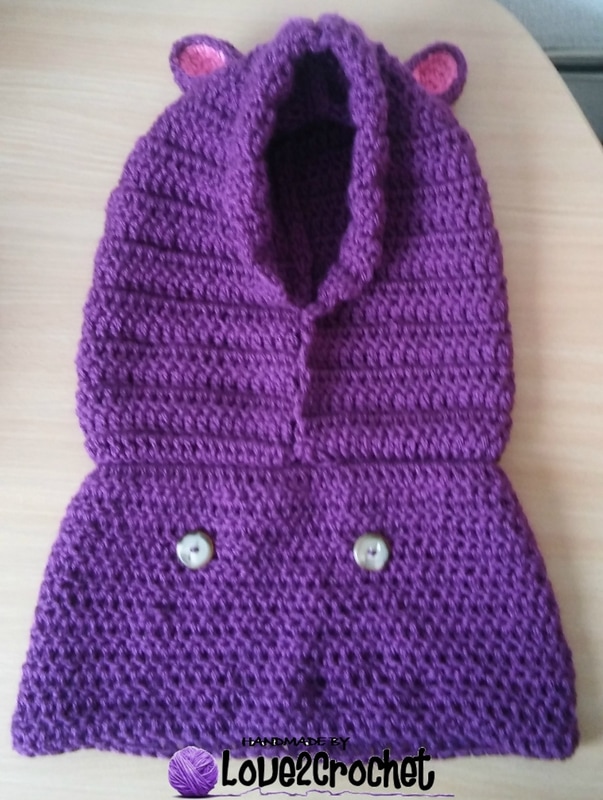
|

|
Pussyhat project
My Boss commissioned a hat from me the other day! Not only was I proud that she wanted to commission a hat from me, but I was also proud to be involved in this particular project - The Pussyhat Project! Pussyhat Project celebrates the women's rights and aimed to create a "sea of pink" at the Women's March on Washington in January 2017. The women from all over the US gathered to show solidarity and support for women's rights. This is an important women empowering action and I am proud to be a part of it...
The following is the link to the actual project and instructions to how you can get involved in.
www.pussyhatproject.com/mission/
The following is the pattern:
Materials
Worsted Weight yarn (I used 2 strains)
6mm crochet hook (or what works well with your yarn)
Yarn needle for weaving in ends
Instructions:
- Ribbing
Leave a long tail for joining and make 17 ch
Row 1- HDC in 3rd chain from hook, HDC in each ch across. (15 HDC)
Row 2 - 2ch (does not count as stitch), HDC across in back loops only. (15 HDC)
Repeat row 2 until work measures 20 in, or fits comfortably round the head (I made 34 rows).
Bring the first row of the ribbing up to join with the last row and slip stitch the two ends together.
- Top of hat
Round 1 - Turn work and place three SC in every row ends (i.e. 1.5 stitches per row end - I ended up with the 52 SC). At end of
round, slip stitch to first stitch, ch1.
Round 2 - HDC into every stitch around (52 HDC)
When you reach the last stitch, just go straight on into the first stitch of the round so that you are working in a spiral with no join.
Continue to work in HDC until the hat measures 8 ins from base to top. (I made 7 rows). Slip stitch to the next stitch to create a smooth line.
Join along top seam by slip stitching the open sides together.
The finished object looks like a flat rectangle, but the ears pop up when you put it on your head.
And this is how my pussyhat turned out:

|

|

|
Bear Hoodie 2

I had another friend commission a hooded cowl for her little girl. I used the same tutorial I found on youtube, followed the exactly and it turned out perfectly. The tutorial is in Spanish, but it is wonderfully done and easy to follow. I have again, used double strands of yarn and a 6.00 mm crochet hook. I went through 4 skeins of red yarn (400 grams in total), and only a bit of beige for the inside of the ears. I was aiming for a size that would fit a 7-year-old up to teens. Just follow the instructions in this tutorial and yours will turn out great, I promise:)
www.youtube.com/watch?v=Z4XMwA6jxGo
I decided to write down the directions from this tutorial, just because I could not find then anywhere, but I suggest watching the tutorial as well. So, here it goes.....
Materials:
6 mm crochet hook
Double strands of red yarn
a bit of beige yarn
scissors and needle
Steps and Procedure:
Hoodie:
- using red yarn, ch 66 (which is enough for a 50 cm head circumference)
- sl st to connect and make a circle
- ch 2, DC in the same stitch, and continue making DC for a whole round (total of 66 DC, not counting ch 2 at the beginning of every row)
- continue making 66 DC and a ch 2 for 10 rows (until you achieve the length of 15 cm), fasten off
- fold your cowl
- chain as many chains to equal the diameter of the folded cowl (I chained 33)
- ch 2 extra chains, and DC in the 3rd chain from the hook
- continue making DCs until you complete the row (33 DC total, not counting the ch 2 at the beginning or the row)
- when you finish the row, ch 2 and turn, make a DC in the same stitch and continue making the DCs all the way down the row (33 DC)
- when you finish the row, make the last DC in the DC from a previous row (always ignore the ch 2), ch 2 at the end and turn
- continue making 33 DC, with the ch 2 at the very beginning of the row, until you achieve the square in which all 4 sides are the same length (for me that was 31 cm and 18 rows)
- make 2 identical squares
- put the squares over each other and slip stitch two sides together starting with the bottom left corner of each square (there will be no exact stitches, but try to look for the appropriate hole to connect both squares).
- when you start slip stitching the second side of the squares, there are obvious stitches (there should be 33) so go through the exact stitches and slip stitch this side together but only 2/3 of it (or 22 stitches)
- when you have finished slip stitching together about 2/3 of this side of the hoodie, fold the left corner towards the inside of the hoodie, and fold the other corner of the second square towards the inside of the hoodie. Now you have four layers of stitches, which you need to slip stitch together (this will create a hem on the front side of the hoodie)
- when you are finished slip stitching ch 1 and fasten off
- now you should have 2 closed sides of the squares, and two opened ones
- join the bottom part (cowl part of the hoodie) to the bottom of the hoodie together, making sure you slip stitch the wrong sides together.
- turn the hoodie inside out
Bear ears:
Using two different colors, one for the inside ear, one for the outside ear
- Make a magic ring
- ch 1 and make 5 HDC inside the magic ring
- slip stitch to the first HDC of the round
- ch 1, and make 2 HDC in every stitch around (10 HDC), sl st to the first HDC of the round
- ch 1 and make 2 HDC in the first stitch, and 1 HDC in the second stitch and repeat this all the way around (15 HDC)
- ch 1 and make 1 HDC in each stitch around (15 HDC)
- make 4 ears, attach the two different colored ears together using SC
- attach the ears to the hoodie by sewing them on the hoodie
Your hoodie is now finished. I have sewn two buttons on the cowl purely as a decoration, the buttons have no function here. And here it is what the finished hoodie looks like...

|

|

