|

|

Among my Ocean Life Amigurumi crochet projects, another beauty has found its place – Olivia, the Octopus! Wow, this was a long, demanding project! I plan to display Olivia in my class as a part of this year classroom theme – Ocean Life. I am sure my kiddles will love to play with her, stroke her and cuddle with her in our “relaxation ocean corner”.
And, here is the pattern! I hope you like it, and are able to make your own Octopus to display and show off😊
Materials:
4.00 mm crochet hook
Grey, dark grey, skin color, pink, yellow, black, white
Stuffing material
Needle, scissors
Glue gun (optional) for gluing the eyes onto the head if desired
Steps and Procedure:
- Making the Head/Body:
1. With 4.00 mm crochet hook and grey yarn - make a Magic Ring and 6 SC inside the Ring. (6 SC)
2. Make 2 SC in every st around (12 SC)
3. (2 SC in the next st, 1 SC in the next st) 6 times. (18 SC)
4. (2 SC in the next st, 1 SC in each of the next 2 sts) 6 times. (24 SC)
5. (2 SC in the next st, 1 SC in each of the next 3 sts) 6 times. (30 SC)
6. (2 SC in the next st, 1 SC in each of the next 4 sts) 6 times. (36 SC)
7. (2 SC in the next st, 1 SC in each of the next 5 sts) 6 times. (42 SC)
8. (2 SC in the next st, 1 SC in each of next 3 sts) 6 times, 1 SC in each of the next 18 sts. (48 SC)
9. (2 SC in the next st, 1 SC in each of next 7 sts) 6 times. (54 SC)
10. 1 SC in the next st, (2 SC in the next st, 1 SC in each of the next 5 sts) 6 times, 1 SC in each of the next 17 sts. (60 SC)
11. (2 SC in the next st, 1 SC in each of the next 9 sts) 6 times. (66 SC)
12. 1 SC in each of the next 2 sts, (2 SC in the next st, 1 SC in each of the next 7 sts) 6 times, 1 SC in each of the next 16 sts. (72 SC)
13-22. 1 SC in every st around (72 SC)
23. 1 SC in each of the next 3 sts, 1 SC DEC, 1 SC in each of the next 7 sts, 1 SC DEC, 1 SC in each of the next 25 sts, (SC DEC, 1 SC in each of the next 7 sts) 3 times, 1 SC DEC, 1 SC in each of the next 4 sts. (66 SC)
24-25. 1 SC in every stitch around (66 SC)
26. (SC DEC, 1 SC in each of the next 9 sts) 6 times. (60 SC)
27-28. 1 SC in every st around (60 SC)
29. 1 SC in each of the next 3 sts, 1 SC DEC, 1 SC in each of the next 6 sts, 1 SC DEC, 1 SC in each of the next 18 sts, (SC DEC, 1 SC in each of the next 6 sts) 3 times, 1 SC DEC, 1 SC in each of the next 3 sts. (54 SC)
30-31. 1 SC in every st around (54 SC)
- Start filling the head with stuffing material, stuff it well, and keep adding more stuffing as you crochet.
32. (1 SC DEC, 1 SC in each of the next 7 sts) 6 times. (48 SC)
33-34. 1 SC in every st around (48 SC)
35. 1 SC in each of the next 4 sts, 1 SC DEC, 1 SC in each of the next 5 sts, 1 SC DEC, 1 SC in each of the next 5 sts, 1 SC DEC, 1 SC in each of the next 11 sts, (1 SC DEC, 1 SC in each of the next 5 sts) 2 times, 1 SC DEC, 1 SC in the next st. (42 SC)
36. 1 SC in every st around (42 SC)
37. (1 SC DEC, 1 SC in each of the next 5 sts) 6 times. (36)
38. 1 SC in next st, 2 SC in next st, 1 SC in each of the next 5 sts, (1 SC DEC, 1 SC in each of the next 4 sts) 3 times, 2 SC in next st, 1 SC in each of the next 5 sts, 2 SC in the next st, 1 SC in each of the next 4 sts. (36 SC)
39. 1 SC in each of the next 2 sts, 2 SC in the next st, 1 SC in each of the next 4 sts, (1 SC DEC, 1 SC in each of the next 4 sts) 3 times, 2 SC in the next st, 1 SC in each of the next 5 sts, 2 SC in the next st, 1 SC in each of the next 4 sts. (36 SC)
40. 1 SC in each of the next 3 sts, 2 SC in the next st, 1 SC in each of the next 4 sts, (1 SC DEC, 1 SC in each of the next 3 sts) 3 times, 1 SC in next st, 2 SC in next st, 1 SC in each of the next 7 sts, 2 SC in next st, 1 SC in each of the next 3 sts. (36 SC)
41. (1 SC in each of the next 8 sts, 2 SC in the next st) 4 times. (40 SC)
42. 1 SC in every st around (40 SC)
- Making the Tentacles:
Continue crocheting around, making a chain for each tentacle and crochet along the back of the chain in a round. The turning chain is not considered a stitch. Continue crocheting around for all 8 tentacles.
43. * 1 SC in the next 3 sts of the head/body, ch 61, 1 SC down the ch line (60 SC), 1 SC in the next 2 SC of the head/body* (65 SC); repeat from * to * for a total of 8 times for 8 tentacles
44. * 1 SC in each of the next 3 sts of the head/body, 1 SC in the next 60 SC, 1 SC in the turning ch, 1 SC in each of the next 60 SC, 1 SC in the next 2 SC on the head/body* (126 SC); repeat from * to * for all 8 tentacles.
45. * 1 SC in next st, 1 SC DEC, 1 SC in each of next 42 sts, (1 SC in each of next 2 sts, 2 SC in next st) 6 times, 1 SC in next st , 2 SC in the turning chain, 1 SC in the next st, (2 SC in next st, 1 SC in each of the next 2 st) 6 times, 1 SC in each of the next 42 sts, 1 SC DEC * (139 SC); repeat from * to * for all 8 tentacles.
- Making the Bottom:
- With 4.00 mm crochet hook and the grey yarn
1. Make a Magic Ring and make 6 SC inside the ring (6 SC)
2. Make 2 SC in every st around (12 SC)
3. (2 SC in next st, 1 SC in next st) 6 times. (18 SC)
- Change to skin color yarn
4. Make a SC in every stitch around, but in the Front Loop only (18 FLSC)
5. In Back Loop Only (2 SC in next st, 1 SC in each of next 2 sts) 6 times. (24 BLSC)
6. (2 SC in next st, 1 SC in each of next 3 sts) 6 times. (30 SC)
7. (2 SC in next st, 1 SC in each of next 4 sts) 6 times. (36 SC)
8. (1 SC in each of the next 8 sts, 2 SC in the next st) 4 times. (40 SC)
9. 1 SC in every st around (40 SC)
The center is now made, now you will start working on the bottom tentacles with the skin color yarn and 4.00 mm crochet hook.
- Making the Bottom Tentacles:
- With 4.00 mm crochet hook and skin color yarn
10. * 1 SC in the next 3 sts of the head/body, ch 61, 1 SC down the ch line (60 SC), 1 SC in the next 2 SC of the head/body*(65 SC) ; repeat from * to * for a total of 8 times for 8 tentacles.
11. * 1 SC in each of the next 3 st (1 SC in the next 3 st), sl st in the next st
- Change to pink yarn, ch 2, make a puff stitch, ch 1 and sl st in the same st
- Change to skin color yarn, ch 1 and make 1 SC in each of the next 3 st (repeat for 14 puff stitches on one side of the tentacle)
- With skin color yarn finish the right side of the tentacle with 1 SC in the last 3 SC, make 1 SC in the next 2 SC, make 2 SC in the turning ch
- On the left side of the tentacle make 1 SC in the next 3 SC
- Change to pink yarn, ch 2, make a puff stitch, ch 1 and sl st in the same st
- Change to skin color yarn, ch 1 and make 1 SC in each of the next 3 st (repeat for 14 puff stitches on this side of the tentacle as well)
- Repeat from * to * for all 8 tentacles
- Make sure you make 1 SC in the 6 st between each tentacle, and make sure you have 14 puff stitches on both right and left side of the tentacle in a zig zag
- continue with skin color yarn
12. * Make 1 SC in the next st, make 1 SC in the next st, make 1 SC in the next 3 st (before the puff st), 2 SC in the ch 1 (of top of the puff st), make 1 SC in the next 3 st (after the puff stitch) (repeat for all 14 puff stitches on the right side of the tentacle), end the Right side of the tentacle with the 1 SC in the last 6 st
- Make 2 SC in the st on top of the tentacle, make 1 SC in next 4 SC on the left side of the tentacle, 2 SC to the ch 1 on top of the puff st, make 1 SC in the next 3 st, make 1 SC in every 6 st between the tentacle*
- Repeat from * to * for all 8 tentacles
- Making the Webbed skin:
- (MAKE 8) to be attached between each Bottom tentacle
1. with grey yarn and 4.00 mm crochet hook, ch 5
2. Make 1 SC down the chain line (4 SC), ch 1 and turn
3. Make 2 SC in the 1st st, make 1 SC in the next 3 st, make 1 SC in the turning chain
4. ch 5, make 1 SC down the chain line (4 SC)
5. make 1 SC in the next st, make 1 SC in the next 3 st, make 2 SC in the last st, ch 1 and turn
6. make 2 SC in the 1st st, make 1 SC in the next 9 st, make 1 SC in the turning chain, ch 5, make 1 SC down the chain line (4 SC)
7. make 1 SC in the next st, make 1 SC in the next 9 st, make 2 SC in the next st, ch 1 and turn
8. make 2 SC in the 1st st, make 1 SC in the next 15 st, make 1 SC in the turning ch
9. make 1 SC in the next 15 st on the other side and finish with the 2 SC in the last st
- make 8 webbed skins
- the webbed skin will be crocheted between each Bottom tentacle
- count 17 SC down the bottom tentacle, place the webbed skin over the bottom tentacle and attach the webbed skin to the bottom tentacle with a row of SC (34 SC)
- Repeat this with all eight tentacles.
- Joining the Head/Body to the Bottom tentacles:
- With 4.00 mm crochet hook and dark grey yarn
- Make sure you align the top with the bottom tentacles making sure that the correct sides are facing together (WS of the Top tentacles should be facing the WS of the Bottom tentacle)
- Make a row of SC to connect the tentacles together, stuffing as you go
- Make a row of SC on the edge of the webbed skin
- You will have to sew the top and the bottom tentacle together (the part between the webbed skin), do not forget to stuff as you sew the top of the tenticles together
- Making the Eyes:
- with black yarn and 4.00 mm crochet hook
1. Make a Magic Ring and make 6 SC inside the ring
2. make 2 SC in every st around (12 SC)
- change the yarn to yellow
3. make 2 SC in the next st, make 1 SC in the next st (repeat around) (18 SC)
4. make 2 SC in the next st, make 1 SC in the next 2 st (repeat around) (24 SC)
- change the yarn to white
5-6. make 1 SC in every st around (24 SC)
7. make 2 SC in the next st, make 1 SC DEC in the next st (repeat around) (18 SC)
8. make 1 SC in the next st, make 1 SC DEC in the next st (repeat around) (12 SC)
- stuff the eyes tightly
9. 1 SC DEC (repeat around) (6 SC)
- embroider the white onto the center of the eyes
- Making the Eyelids:
- with grey yarn and 4.00 mm crochet hook
1. Make a Magic Ring and make 6 SC inside the ring
2. make 2 SC in every st around (12 SC)
3. make 2 SC in the next st, make 1 SC in the next st (repeat around) (18 SC)
4. make 2 SC in the next st, make 1 SC in the next 2 st (repeat around) (24 SC)
5-7. make 1 SC in every st around (24 SC)
- Assembly:
- sew the eyelids around the eyes at a desired angle
- crochet together the head and the top tentacles to the bottom tentacles - do not forget to stuff as you crochet
- make an indentation in the bottom (the mouth of the octopus): with grey yarn and a needle, insert the needle around the mouth along the BL stitches and pull the needle out through to the row 40 on the back of the head, back in through row 40 and out through the mouth tightening the opening to form the indent.
- Glue the eyes to the top of the head


|

|

|
|
Otto, the Octopus is my latest project. It did take a while to make him, but it is so worth it, he is so adorable. Even my bunny Picollina is enjoying his company, as you can see from the pictures attached here:)))))
I have looked everywhere for a suitable pattern, but could not find any that I liked, so here is my version - enjoy! Otto, the Octopus measures about 40 cm from the top of his head to the tip of his tentacles.
Materials:
4.00 mm crochet hook
stuffing materials
stitch marker
light blue, dark blue, white, black yarn
scissors, needle
Steps and Procedure:
1. Making the Head:
- With 4.00 mm crochet hook and dark blue yarn
1. make a Magic ring and 8 sc in the ring.
2. 2 sc in each sc around. (16 sc)
3. 1 sc in next sc. 2 sc in next sc. Rep around. (24 sc)
4. 1 sc in each of next 2sc. 2 sc in next sc. Rep around. (32 sc)
5. 1 sc in each of next 3sc. 2 sc in next sc. Rep around. (40 sc)
6. 1 sc in each of next 4sc. 2 sc in next sc. Rep around. (48 sc)
7: 1 sc in each sc around. (48 sc)
8. 1 sc in each of next 5sc. 2 sc in next sc. Rep around. (56 sc)
9: sc around (56)
10. 1 sc in each of next 6 sc. 2 sc in next sc. Rep around. (64)
11. 1 sc in every st around (64)
12. 1 sc in each of next 7 sc. 2 sc in next sc. Rep around. (72)
13-17: 1 sc in each sc around (72)
18: 1 sc in each of next 7 sc. Sc2tog. Rep around (64)
19,20: 1 sc in each sc around. (64)
21: 1 sc in each of next 6 sc. Sc2tog. Rep around (56)
22, 23: 1 sc in each stitch around (56)
24: 1 sc in each of next 5 sc. Sc2tog. Rep around. (48)
25, 26: 1 sc in each sc around. (48)
27: 1 sc in each of next 4 sc. Sc2tog. Rep around (40)
28-30: 1 sc in each sc around. (40)
31: 1 sc in each of next 4 sc. 2 sc in next sc. Rep around. (48)
32: 1 sc in each of next 5 sc. 2 sc in next sc. Rep around. (56)
33: 1 sc in each of next 6 sc. 2 sc in next sc. Rep around.(64)
34: 1 sc in each of next 7 sc. 2 sc in next sc. Rep around. (72)
2. Making the tentacles:
1: Hdc2tog. 1 hdc in each of next 5 sc. Hdc2tog. Turn. Leave rem stitches unworked.
2,3: Ch 2. 1 hdc in each of next 7 sts. Turn.
4: Ch 2. Hdc2tog. 1 hdc in each of next 3 hdc. Hdc2tog. Turn.
5, 6th: Ch 2. 1 hdc in each of next 5 sts. Turn.
7: Ch 2. 1 hdc in first hdc. Hdc2tog. 1 hdc in each of next 2 hdc. Turn. 4 sts.
8: Ch 34.
3 sc in 2nd ch from hook. (1 sc in next ch. 2 sc in next ch) 4 times.
(1 hdc in next ch. 2 hdc in next ch) 4 times.
(1 dc in next ch. 2 dc in next ch) 4 times.
(1 tr in next ch. 2 tr in next ch) 4 times.
Skip 3 hdc of 7th row. Sl st to top of last hdc. Fasten off.
- Join with the dark blue to the sl st to next missed sc of last rnd. Rep from 1-8 as stated above for the next 7 tentacles.
3. Making the Bottom:
- With light blue
1. make a Magic ring and 8 sc in the ring.
2. 2 sc in each sc around. (16 sc)
3. 1 sc in next sc. 2 sc in next sc. Rep around. (24 sc)
4. 1 sc in each of next 2sc. 2 sc in next sc. Rep around. (32 sc)
5. 1 sc in each of next 3sc. 2 sc in next sc. Rep around. (40 sc)
6. 1 sc in each of next 4sc. 2 sc in next sc. Rep around. (48 sc)
7. 1 sc in each of next 5 sc. 2 sc in next sc. Rep around. (56)
8. 1 sc in each of next 6 sc. 2 sc in next sc. Rep around. (64)
9. 1 sc in each of next 7 sc. 2 sc in next sc. Rep around. (72)
4. Making the Bottom Tentacles:
1: Hdc2tog. 1 hdc in each of next 5 sc. Hdc2tog. Turn. Leave rem sts unworked.
2,3: Ch 2. 1 hdc in each of next 7 sts. Turn.
4: Ch 2. Hdc2tog. 1 hdc in each of next 3 hdc. Hdc2tog. Turn.
5, 6th: Ch 2. 1 hdc in each of next 5 sts. Turn.
7: Ch 2. 1 hdc in first hdc. Hdc2tog. 1 hdc in each of next 2 hdc. Turn. 4 sts.
8: Ch 34.
3 sc in 2nd ch from hook. (1 sc in next ch. 2 sc in next ch) 4 times.
(1 hdc in next ch. 2 hdc in next ch) 4 times.
(1 dc in next ch. 2 dc in next ch) 4 times.
(1 tr in next ch. 2 tr in next ch) 4 times.
Skip 3 hdc of 7th row. Sl st to top of last hdc. Fasten off.
- Join with the light blue to the sl st to next missed sc of last rnd. Rep from 1-8 as stated above for the next 7 tentacles.
5. Making the Eyes (make 2).
With 4.00 mm crochet hook and black yarn, make a magic ring.
1. 6 sc in magic ring
2. 2 sc in each sc around. (12)
Change to white
3. *2 sc in next sc. 1 sc in next sc. Rep around. (18)
4-6. 1 sc in each sc around (18)
7. *1 sc in next sc. Sc2tog. Rep around. (12)
8. Sc2tog. Rep around (6)
- Stuff the eye.
9. Sc2tog. Rep around (3)
Thread yarn through remaining stitches, pull tightly and fasten securely.
6. Making the Eyelids: (make 2).
With 4.00 mm crochet hook and dark blue yarn
1. 6 sc in magic ring
2. 2 sc in each sc around. (12)
3. *2 sc in next sc. 1 sc in next sc. Rep around. (18)
4-6. 1 sc in each sc around (18)
- Fasten off.
- Insert Eye into Eyelid. Glue each Eye to body of Otto, the Octopus using the Hot Glue Gun (or sew it on the head)
7. Finishing and Assembly:
- stuff the head, and stuff the beginning (thicker part of the tentacles as you sc through)
Align tentacles of Head with tentacles of Bottom. Face the tentacles of the bottom and the head together, join lavender yarn at the beginning of tentacle at the bottom/thicker side (make sure that the tentacles are matching -ch to ch, sc to sc) Work through both thicknesses, make 1 sc in each st along the sc side of tentacle all the way to the beg ch (61 sc)
Repeat for all 8 tentacle sets.
Fasten off.
With light blue, sc along the ch side of tentacle (tentacle will curl by itself). (48sc)
- add additional stuffing to the thick top of the tentacles if desired before you sl st it shut.
- Rep for all tentacles.
- glue or sew on the eyes


|

|

|

|

|
|

|

So far, I am loving my Ocean Life Amigurumi collection! I am so very fond of my Jellyfish, that I had to make another one. This one I called Joshua, and I found the original pattern here: www.lalylala.com/?port=jellyfish-mobile
Joshua is 32 cm long (from the top of his cap to the tip of his beaded tentacle).
Materials:
3.5 mm crochet hook
yarn of your choice
scissors, needle
25 jewelry beads
stitch marker
Steps and Procedure:
1. Making a Cap:
- Work the cap in a round, and use a stitch marker to mark the beginning stitch. Start with a magic loop.
1: sc 6 into the magic loop (6 sts)
2: [inc] 6x (12 sts)
3: [1 sc, inc] 6x (18 sts)
4: [2 sc, inc] 6x (24 sts)
5: [3 sc, inc] 6x (30 sts)
6: [4 sc, inc] 6x (36 sts)
7: [5 sc, inc] 6x (42 sts)
8.-11. (= 4 rnds.): sc 42
12: [dec, 5 sc] 6x (36 sts)
13: sl st 36
2. Making the Beaded Tentacles:
- thread the corresponding quantity of beads on the yarn.
Beaded Tentacle 1:
- chain 3
- *pull the bead, ch 1
- ch 2*
- repeat from * to * with all 10 beads
- ch 10, break the yarn
Beaded Tentacle 2:
- chain 5
- *pull the bead, ch 1
- ch 3*
- repeat from * to * with all 15 beads
- ch 15
3. Making the Spiral Tentacles:
- 1st tentacle:
ch 31
- make 2 SC in every chain down the chain line
- 2nd tentacle:
ch 41 ch
- make 3 SC in every chain down the chain line
- 3rd tentacle:
ch 71
- make 2 SC in every chain down the chain line
4. Assembly:
Sew the beaded tentacles and and the spiral tentacles onto the center inside the cap.
I plan on having my jellyfish hang from the classroom ceiling, so I am planning on using the fishing line instead of yarn to hang the jellyfish

|
|
Here we are, my sweet little Sea Horses are here! Presenting, Sylvie & Hortense, the Seahorse Duo Fantastico!
Through a lot of trial and error, the pattern is finally, here...... and here we go...... Both seahorses measure about 19 cm (with their tails curled).
Materials:
- worsted yarn in a color of your choice
- 4 mm crochet hook
- googly eyes
- Polyester stuffing
- 15 cm thick jewelry wire
- needle, scissors
- Stitch marker for working in the round
Steps and Procedure:
- with 4.00 mm crochet hook and color of your choice
1. Making the Head:
R1: Sc 5 in magic ring (5)
R2: sc in each (BLO) (5)
R3-5: sc in each for three rounds. (5)
R6: inc in first, sc in next 4 (6)
- Stuff nose with a small amount of stuffing
R7: inc x 3, sc in last 3 (9)
R8: (inc, sc 1) x 3, sc in last 3 (12)
R9: (inc, sc 2) x 3, sc in last 3 (15)
R10: (inc, sc 3) x 3, sc in last 3 (18)
R11-12: sc in each for two rounds (18)
R13: (INV DEC, 4) x 3 (15)
R14: (INV DEC, 3) x 3 (12)
- Stuff the head.
2. Making the neck:
R15: inc x 3, dec x 4, inc x 1 (12)
R16: inc x 4, dec x 4 (12)
R17: dec x 1, inc x 4, dec x 3 (12)
R18: Repeat R17 (12)
R19: sc in each (12)
- Stuff the neck.
3. Making the body and the tail:
R20: (inc, sc 3) x 3 (15)
R21-22: sc in each for 2 rounds (15)
R23: sc x 7, inc x 3, sc x 5 (18) (the increases on this round are for shaping the seahorse's belly)
R24-27: sc in each for 4 rounds (18)
R28: (dec, sc 4) x 3 (15)
R29-30: sc in each for 2 rounds (15)
R31: (dec, sc 3) x 3 (12)
R32-33: sc in each for 2 rounds (12)
- Stuff the body
R34: (dec, sc 2) x 3 (9)
R35: sc in each (9)
R36: (dec, sc 1) x 3 (6)
R37-40: sc in each for 4 rounds (6)
- Stuff completely. Insert the thick jewelry wire.
- Change to 3.5 mm crochet hook
R41-43: sc in each for 3 rounds (FLO) (6)
R44: dec, sc 4 (FLO) (5)
R45-50: sc in each for 4 rounds (FLO) (5)
- Cut the leftover wire if there is any. Fasten off. Curl the tail. Bend head towards the body and sew in place.
4. Making the Back Fin:
- Find the center of the back (R24, 25)
- Sl st and ch 3, make 3 DC in the same stitch
- Make 3 DC in the next st, ch 3 and sl st to the same st
5. Making the Side fins:
- With C2 yarn and 3.00 mm crochet hook
- Sl st to the side center of the Sea Horse, and ch 3, and 2 DC in the same st
- Go down to the next st, make 2 DC and ch 3, sl st to the same st
- Make another fin on the other side of the belly
6. Making the Back Embellishments:
With color 2 yarn and 3.00 mm crochet hook
- Make a sl st on top of the head (R9)
- Ch 3, and sl st to the 1st ch (pickot), make 1 SC in the next 2 st following the line of the back
- Continue making the embellishment: pickot (ch 3, sl st to 1st ch) and 2 SC until you get to the fin, and continue with the embellishment IN FRONT of the fin until you get to the tail (R35), where you will end with the sl st
- Take the C2 yarn and 3.00 mm crochet hook and make a sl st on the other side of the tail (the side without the embellishment to crochet along the bottom fo the Big fin, and make a pickot (ch 3, sl st to 1st ch) and 1 SC in the next 2 st (repeat 2 times along the bottom of the fin), sl st to the back embellishment and sl st to the st at the very bottom of the tail
- Turn the work around as you will now be crocheting over the tail
- Make a pickot (ch 3, sl st to 1st ch) and 2 SC (5 times until you get to the other side of the tail and sl st to the back embellishment
Assembly:
- Bend the sea horses head towards her body, and glue her face onto her belly with a bit of hot glue
- Glue the googly eyes on her face
And here it is! Your little seahorses are complete.
|
|
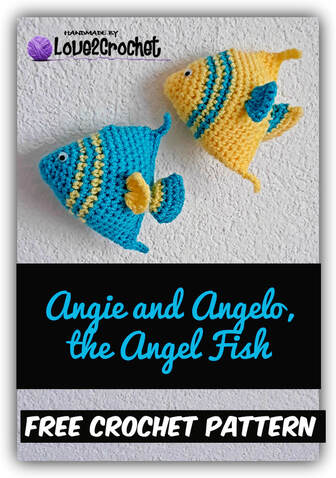
The next sea creature from my Ocean Life collection is Angie and Angelo, the Angel Fish. Both Angel fish measure about 14 cm from the the mouth to the tip of the tail.
The original pattern is from art-pass.blogspot.com/2018/08/rybka-brelok-darmowy-schemat.html
Materials:
4.00 mm crochet hook
Blue and yellow worsted weight yarn
Googly eyes, hot glue gun
Needle, scissors
Stitch marker
Steps and Procedure:
- Crochet in continuous rounds, unless otherwise indicated
1. Making the Body:
- with Color 1
R1: Make a MR and 6 SC (6)
R2: SC, INC around (9)
R3: 9 SC (9)
R4: (2 SC, INC) x3 (12)
R5: (SC, INC) x6 (18)
R6: 18 SC (18)
R7: (2 SC, INC) x6 (24)
- Change to color 2, but do not cut off the color 1
R8: 24 SC, sl st to 1st SC made (24)
- Change back to color 1, do not cut off the color 2
R9: (3 SC, INC) x6, sl st (30)
- Change back to color 2
R10: 30 SC, sl st (30)
- Change back to color 1
R11: (4 SC, INC) x6 (36)
R12-18: 36 SC (36), ends with slip stitch in next st.
- Make 5 chains and sl st down the chain line
- Stuff the body
- Fold the body in half and connect the two edges with 18 SC. Then make 5 ch again, and sl st down the chain line
2. Making the Tail:
- with Color 2
R1: Find the three central stitches (SC 8,9,and 10) at the back edge of the Angel Fish.
Crocheting in a round: Make 3 SC along the edge, working only through the Front Loop, turn the work. Make 3 SC at the same stitches as before, but on the other side, grabbing the Back Loops this time (6)
R2: crocheting in a round make 6 INC (12)
- Change to color 1
R3: 12 SC (12)
R4: (SC, INC) x6 (18)
- Dot’t fill the tail with stuffing. Fold the sides and join with 9 SC.
3. Making the Fins:
- With color 2
R1: In the middle of R14 on the body, make: 3ch, and 5 DC, turn the work.
R2: ch 1, Make 6 SC
- Make another fin at the other side.
- Glue the googly eyes to the top of the head.

|

|
I also made two more fish using the same pattern but with a variegated yarn.

|
|

This small octopus is so cute and adorable. This is a project that took less than 30 minutes to complete - definitely, an easy project.
Since I am working on the Ocean Life amigurumi collection to decorate my classroom, this is a perfect little Octopus to have in the classroom - hanging from my ceiling or "crawling" up my classroom walls - the kids will love him. So, here is the pattern, give it a try, you won't regret it! Olly measures about 23 cm (from the top of his head to the tip of his tentacles).
Materials:
turquoise worsted weight yarn
4.00 mm crochet hook
googly eyes, hot glue gun
stuffing material
scissors, needle
Steps and Procedure:
1. Making the Body:
- with 4.00 mm crochet hook and turquoise yarn
R1: Magic Ring and 6 SC
R2: 2 SC in each ST around. (12)
R3L SC 1, INC. (18)
R4: SC 2, INC. (24)
R5-9: SC around. Repeat four times. (24)
R10: SC 2, INVISIBLE DEC. (18)
R11: SC 1, INV DEC. (12)
R12-15: SC around. Repeat four times. (12)
R16: SC 1, INC. (18)
R17: SC 2, INC. (24)
- do not cut the yarn yet...
2. Making the Tentacles:
- continue making the tentacles
- * ch 30
- in second ch from hook, HDC and repeat down the chain line (29 HDC).
- When you get to the bottom of the chain, SC in next 3ST of last round (R17).*
- Then repeat from *to* around for exactly eight legs. sl st to last leg. Fasten off and weave in ends.
3. Making the Bottom of the Body:
R1: Magic Ring and 6 SC
R2: 2 SC in each ST around. (12)
R3L SC 1, INC. (18)
R4: SC 2, INC. (24)
R5: SC 3, INC (30)
R6: SC 4, INC (356)
- Assembly:
• stuff ONLY the bulky part of the head (R1-15)
• sew on the bottom of the body on the edge where the tentacles end to cover the hole at the bottom.
• Fold head back and sew a few stitches to the back of the squid, so it looks like the head is leaning back. (or you can use the glue gun)
• Glue on the googly eyes
|
|
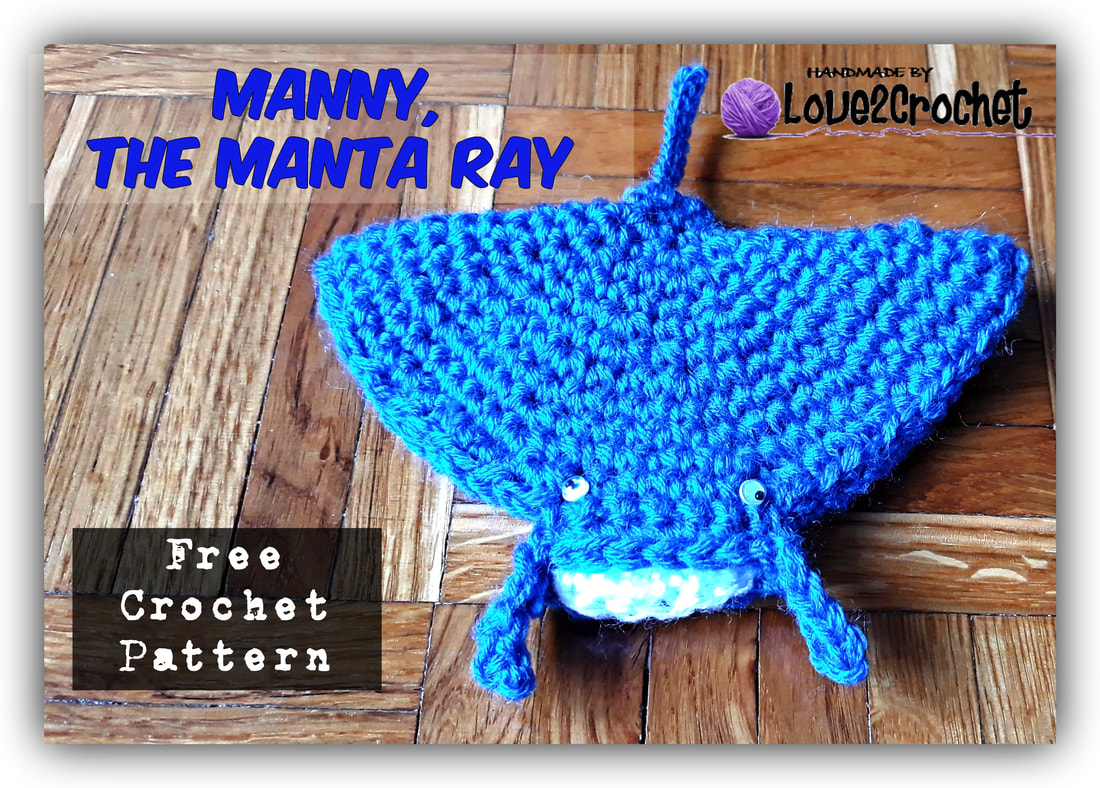
Here we go, another lovely Ocean Life creature crochet pattern. I am, by know, creating a nice little collection which I am super proud of. And, here is the pattern for Manny, the Manta Ray! Manny measures about 15 cm (tail and lobes included), and the span of his wings are 14 cm.
Materials:
Worsted weight blue and white yarn
3.5 mm and 4.50 mm hooks
Stitch markers
Googly eyes
Tapestry needle, scissors
Steps and Procedure:
- Do not sl st, work in continuous rounds and use a stitch marker
- Do not stuff Manny, the Manta Ray
1. Body
Using blue yarn and size 4.50 mm hook
R1: Make a MR and 4 SC in ring
R2: INC in each st (8 sts).
R3: SC in each st (8 sts).
R4: (SC, INC) x4 (12 sts).
R5: (SC, INC) x6 (18 sts).
R6: (SC in next 2 sts, INC) x6 (24 sts).
R7: SC in each st (24 sts).
R8: (SC in next 2 sts, INC) x8 (32 sts).
R9: (SC in next 3 sts, INC) x8 (40 sts).
R10: (SC in next 3 sts, INC) x10 (50 sts).
R11: SC in each st (50 sts).
R12: (SC in next 4 sts, INC) x10 (60 sts).
R13: SC in next 11 sts, INC in next st, SC in next 5 sts, INC, SC in next 11 sts, INC – repeat once more (66 sts).
Round 14: SC in next 13 sts, INC, SC in next 5 sts, INC, ch 1, turn and SC across 7 sts (making the 1st mouth flap), ch 1, turn and SC across, sl st 3 down side and continue to other side – SC in next 26 sts, INC, SC in next 5 sts, INC, ch 1, turn and SC across 7 sts, (making the 2nd mouth flap), ch 1, turn and SC across, sl st 3 down side and sc 13 to end of round. Fasten off and leave a long tail for sewing.
2. Mouth lining
Using white yarn and 4.50 mm hook.
R1: Ch 8, SC in 2nd ch from hook and in each ch across (7 sts).
R2 – 3: Ch 1, turn and SC across.
R4: Ch 1 and SC in BLO. This will create a fold so the lining will bend easily inside the mouth.
R5 – 6: Ch 1, turn and SC across.
Fasten off and leave tail for sewing.
- Fold the body in half, lining the mouth flaps together. Determine which side will be the top and bottom and glue the googly eyes to the top near the sides.
- Sew one side of lining to bottom (inside) of mouth. Sew one side of lining to bottom (inside) of mouth making sure that the side with the FL stitches showing is facing out from the mouth
- Line up the stitches on the folded manta ray body and sew the seams together, when you get to the top of the mouth lining make sure you sew that as well.
3. Cephalic Lobes – Make 2
Using blue yarn and 4.50 mm hook.
Ch 5, SC in 2nd ch from hook and rest of ch. Fasten off and sew to sides of mouth along the edge of the mouth
4. Tail
Using blue yarn and size 3.50 mm hook.
Pick up a stitch on manta ray where tail should go, Ch 11, sl st down the chain line. Fasten off and weave in ends.

|

|

|
|
My recent Ocean Life Amigurumi project are these cute Jellyfish - which I named - Jenny and Jorge. This is a very simple project, which did not take a great deal to make, perfect for toys for kids or as I plan to have it a ceiling decorating for my "Ocean themed classroom" this school year. Both Jelly Fish measure around 30 cm. Here is the pattern:
Materials:
4.00 mm crochet hook
2 colors of your choice yarn (for Jenny I used, purple and magenta, and for Jorge I used blue, light blue and turquoise)
scissors, needle
stuffing material
googly eyes and hot glue gun
stitch marker
Steps and Procedure:
1. Head:
- with 4.00 and Color 1
R1: Make a MR and 8 SC inside the ring, do NOT sl st (8)
R2: Work 2 sc into each stitch around. (16)
R3: *Work 1 sc into next stitch, 2 sc into next stitch.* Repeat around. (24)
R4: *Work 1 sc into each of next 2 stitches, 2 sc into next stitch.* Repeat around. (32)
R5: *Work 1 sc into each of next 3 stitches, 2 sc into next stitch.* Repeat around. (40)
R6: *Work 1 sc into each of next 4 stitches, 2 sc into next stitch.* Repeat around. (48)
R7-8: Work 1 sc into each stitch around. (48)
R9: *Work 1 sc into each of next 5 stitches, 2 sc into next stitch.* Repeat around. (56)
R10-14: Work 1 sc into each stitch around. (56)
R15: *Work 1 sc into each of next 2 stitches. Work 1 sc2tog, 1 sc into next stitch, 1 sc2tog.* Repeat around. (40)
- Fasten off, and weave in ends.
2. Bottom panel:
- with 4.00 mm crochet hook and Color 1
R1: Make a MR and 8 SC inside the ring (8)
R2: Work 2 sc into each stitch around. (16)
R3: *Work 1 sc into next stitch, 2 sc into next stitch.* Repeat around. (24)
R4: *Work 1 sc into each of next 2 stitches, 2 sc into next stitch.* Repeat around. (32)
R5: Ch 2 (does not count as stitch). *Work 1 dc into each of next 3 stitches, 2 dc into next stitch.* Repeat around.(40)
- Fasten off, but leave a long enough tail to sc around.
3. Tentacles:
Tentacle 1: With Color 1 and 4.00 mm crochet hook
- Ch 30, 2 SC in 2nd chain from the hook and down the chain line
Tentacle 2: With Color 2 and 4.00 mm crochet hook
- Ch 40, 3 SC in 2nd chain from the hook and down the chain line
Tentacle 3: With Color 1 and 4.00 mm crochet hook
- Ch 50, 3 SC in 2nd chain from the hook and down the chain line
Tentacle 4: With Color 2 and 5.00 mm crochet hook
- Ch 60, 3 SC in 2nd chain from the hook and down the chain line
Tentacle 5: With Color 1 and 5.00 mm crochet hook
- Ch 70, 3 SC in 2nd chain from the hook and down the chain line
4. Assembly:
1: Glue the googly eyes between rows 12 and 13 on the cap, about 8 stitches apart.
2: Attach the tentacles to the bottom panel by weaving both tails of the tentacles through stitch spaces in the panel, tie a double knot to secure, and weave the ends in. I plan on hanging the hanging my Jelly Fish from the ceiling and I know the kids will pull on the tentacles, so I will make sure I secure them well. 😊
3: Match up the seam stitch of the panel against the seam stitch of the cap. SC around the edges connecting the parts together (go through all 4 loops)
4: Once you’ve gone almost around, stuff the head with fiberfill, then continue working sc around to close up the head. Join to the first sc with a sl st. Fasten off and weave in ends.
|
|
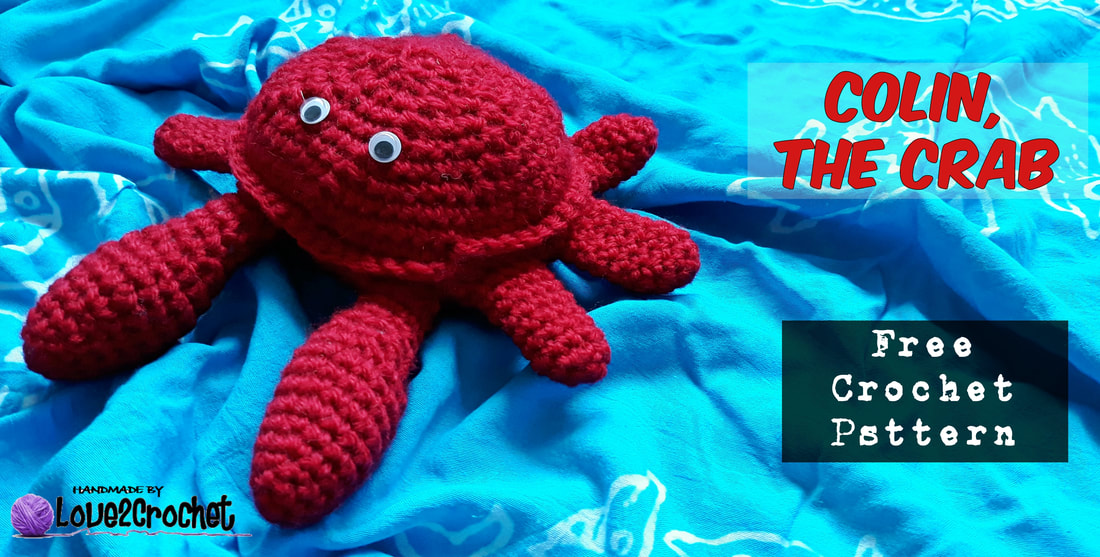
My "Ocean Life" crochet collection is looking rather slim, so I decided to put another member in it – Collin, the Crab. This adorable little crab’s original pattern is from spinayarncrochet.com/scuttles-crab-free-crochet-pattern/
* Collin, the Crab is 22 cm long.
Materials:
red worsted weight yarn
4.00 mm crochet hook
scissors, needle
stuffing
googly eyes
stitch marker
Steps and Procedure:
1. Legs (make 6):
- make all 6 legs and 2 claws and then join them, work in continuous rounds.
R1: Make a MR and 6 SC inside (6 sts)
R2: (SC, INC), repeat around (9 sts)
R3 – 9: SC around (9 sts)
- Do not stuff the legs
Sl st to next st and tie off.
2. Claws (make 2):
R1: Make a MR and 4 SC inside (4 sts)
R2: (INC), repeat around (8 sts)
R3: SC around (8 sts)
R4: (SC, INC), repeat around (12 sts)
R5: SC around (12 sts)
R6: (SC 2, INC), repeat around (16 sts)
R7-9: SC around (16 sts)
R10: (SC 2, INVISIBLE DEC), repeat around (12 sts)
R11: (SC, INV DEC), repeat around (8 sts)
- Stuff the claws. Continue stuffing a little after each next round.
R12-15: SC around (8 sts)
Sl st to next st and tie off.
3. Body:
- join all the legs and claws together.
R1: Starting with a claw - SC 4, ch 6, attach second claw and SC 4, attach first leg and SC 5, attach second leg and SC 5, attach third leg and SC 5, ch 4, attach fourth leg and SC 5, attach fifth leg and SC 5, attach last leg and SC 5 (48 sts, including ch sts)
- Sl st to the 1st SC made on the 1st claw
R2: (SC 7, inc), repeat around (54 sts)
R3: SC around in FLO (54 sts)
R4: Sc around in Back Loops of previous round (54 sts)
- Use the invisible dec
R5: (SC 7, INV DEC), repeat around (48 sts)
R6: (SC 6, INV DEC), repeat around (42 sts)
R7: (SC 5, INV DEC), repeat around (36 sts)
R8: (SC 4, INV DEC), repeat around (30 sts)
R9: (SC 3, INV DEC), repeat around (24 sts)
R10: (SC 2, INV DEC), repeat around (18 sts)
R11: (SC, INV DEC), repeat around (12 sts)
R12: INV DEC around (6 sts)
- Turn Collin, the crab over to crochet the bottom of the shell.
Bottom of shell:
R1: Join yarn at first stitch of first leg. Ch 1. *SC the first 3 sts of the leg, INC* repeat for next 2 legs, SC 4 along chains between back legs, repeat * to * for next 3 legs, SC 4 along first claw, SC 6 along chains between claws, SC 4 along second claw (48 sts)
R2: (SC 6, INV DEC), repeat around (42 sts)
R3: (SC 5, INV DEC), repeat around (36 sts)
R4: (SC 4, INV DEC), repeat around (30 sts)
R5: (SC 3, INV DEC), repeat around (24 sts)
R6: (SC 2, INV DEC), repeat around (18 sts)
- Stuff the Crab, and continue to stuff a little after each round.
R7: (SC 1, INV DEC), repeat around (12 sts)
R8: DEC around (6 sts)
- Glue the googly eyes with the hot glue and your Collin, the Crab is ready for show and display.

|

|

|
|
As you might know, I am a teacher. Being a teacher gives me a bit of my summers off to figure out the setting for my next year’s classroom. That gives me, a creative soul, a reason to dream about the various ways I could decorate and organize my classroom.
This year, I opted for an Ocean Life setting, and it gave me an idea to crochet some lovely Ocean Life creatures to put as decorations in my classroom, or as stuffed toys for the little ones to play with in my “Ho’Omaha Island” (Zen Zone/Relax Area). So, the first one I’d like to start with is this adorable Clown Fish, which I named Clive:) The original pattern is from www.natalinacraft.com/free-crochet-pattern-clownfish-amigurumi-patron-gratuit-poisson-clown/.
Here is my version of the pattern. It turned our super cute, it is worth checking out and making this adorable fish. Clive measures about 20 cm.
Materials:
4.00 mm crochet hook
worsted weight orange, white and black yarn
googly eyes
poly-fill fiberfill stuffing
stitch markers
tapestry needle, scissors
a sharpy (for accentuating the black lines at the crossing between the white and orange parts) - optional
Steps and Procedure:
* SIZE: 20 cm long when made with the indicated yarn and a hook.
1. Head And Body
- Work in rounds, use a stitch marker for the first stitch of each round.
- With the orange yarn and the 4.00 mm hook
R1: make a MR and make 6 SC in a magic ring. (6)
R2: SC INC 6 times. (12)
R3: (SC in next st, SC INC in next st) x6. (18)
R4: (SC in next 2 st, SC INC in next st) x6. (24)
R5: (SC in next 3 st, SC INC in next st) x6. (30)
R6, 7: SC in every st around (30)
R8: (SC in next 4 st, SC INC in next st) x6. (36)
- Change to white yarn:
R9-12: SC in every st around (36)
- Change to orange yarn:
R13: SC in every st around (36)
R14: (SC in next 4 st, INVISIBLE DEC in next st) x6. (30)
R15, 16: SC in every st around (30)
- Change to white yarn:
R17: SC in every st around (30)
R18: (SC in next 3 st, INV DEC in next st) x6. (24)
R19: sc in every st around (24)
- Change to orange yarn:
R20: SC in every st around (24)
R21: (SC in next 2 st, INV DEC in next st) x6. (18)
R22: SC in every st around (18)
- Change to white yarn:
R23,24: SC in every st around (18)
R25: (SC in next st, INV DEC in next st) x6. (12)
- Stuff the body
R26: DEC around. (6)
Close the body and leave a long tail to attach the caudal fin.
2. Caudal And Pelvic Fins:
- Make 3 identical fins as follows:
- Starting with the black yarn and the 4.00 mm hook
R1: ch 7. (7)
R2: 1 SC in 2nd ch from hook, 1 SC in the next 5 chains. (6)
- Change to orange yarn:
R3: Turn, ch 1. 1 SC in the 6 st. (6)
R4: Turn, ch 1. 1 SC in the next 2 st, 1 DEC, 1 SC in the last 2 st. (5)
R5, 6: Turn, ch 1. 1 SC in the 5 st. (5)
R7: Turn, ch 1, 1 DEC, 1 SC in the next st, 1 DEC. (3)
- Attach one fin to the back of the body (it will be the caudal fin).
- Attach the two other fins each side of the body between Rounds 12 and 13.
3. Dorsal Fin :
- Make 1 dorsal fin as follows:
- Starting with the orange yarn and the 4.00 mm hook
R1: ch 10. (10)
R2: 1 SC in 2nd ch from hook, 1 SC in the next 8 chains (9)
R3: Turn, ch 1, 1 SC, 1 HDC, 1 DC, 1 HDC, 1 SC in the next 2 st, 1 HDC in the next 2 st, 1 SC. (9)
- Change to black yarn:
R4: Turn, ch 1, 1 SC, 1 HDC in the next 2 st, 1 SC in the next 2 st, 1 HDC, 1 DC, 1 HDC, 1 SC. (9)
- Turn the work to the side and make 1 SC in the next 2 st on the side
- Attach the dorsal fin at the top center of the body, between rows 12 and 13.
- Glue the google eyes on Clive’s face
- Draw the lines with the black sharpy to divide the orange from white sections (alternatively, you could sew the lines with the black yarn)

|

|

