|

|

I found this cut cat coaster pic online and I searched everywhere for the pattern, but could not find a crochet pattern, just what I suppose is a knitted pattern and some pictures of reference. This is the original pattern that served as a reference:
knittingday.com/4035/cat-stand-under-the-cup
So, I looked at these pictures and decided to figure it out on my own. I think I was pretty close, since my kitty cat coaster, turned out so very cute and I am so proud of it. So, there we, go, here is a free CROCHET pattern for this cute kitty cat coaster. Hope you like it, make it, use it....
Materials:
3.00 and 3.50 mm crochet hook
white, black, grey and pink yarn
glue gun, scissors, sewing needle
ribbon for a kitty cat bow
stuffing material
googly eyes
Steps and Procedure:
- use a stitch marker for a body and a face
- Ch 2 does not count as a stitch
- Body: with grey and 3.50 mm crochet hook – make 1
1. Make a Magic Ring, ch 2 and make 10 DC inside the circle, sl st to 1st DC
2. Ch 2, make an INC in every stitch around (20 DC), sl st to 1st SC
3. Ch 2, make an INC in the next st, 1 DC in the following stitch (repeat around) (30 DC), sl st to 1st DC
4. Ch 2, make an INC in the next st, 1 DC in the 2 following stitches (repeat around) (40 DC), sl st to 1st DC
- Face: with grey and 3.50 mm crochet hook – make 2
1. ch 10, make a DC in the 3rd ch from the hook (put a stitch marker), make a DC in the next 6 ch, make 6 DC in the last ch, make a DC in the next 6 ch (working on the other side of the original chain), make 5 DC in the last ch, sl st to 1st DC made (24 DC)
2. ch 2, 2 DC in the same stitch, DC in the next 6 st, 2 DC in the next 6 st, DC in the next 6 st, 2 DC in the next 5 st, sl st to 1st DC (36 DC)
- Muzzle: with white and 3.50 mm crochet hook – make 1
1. ch 9, make a SC in the 2nd ch from the hook (put a stitch marker), make a SC in the next 6 ch, make 6 SC in the last ch, make a SC in the next 6 ch (working on the other side of the original chain), make 5 SC in the last ch, sl st to 1st SC made (24 SC)
2. ch 2, 2 SC in the same stitch, SC in the next 6 st, 2 SC in the next 6 st, SC in the next 6 st, 2 SC in the next 5 st, sl st to 1st SC (36 SC)
- Outer ear: with grey and 3.50 mm crochet hook – make 2
1. make a slip knot and ch 5
2. make 4 SC down the chain line, ch 1 and turn
3. make 2 DEC, ch 1 and turn
4. make 1 DEC, ch 1 and turn
5. make 1 SC in every stitch around, making sure you put 2 SC in all three corners of the outer ear.
- Inner ear: with pink and 3.00 mm crochet hook – make 2
1. make a slip knot and ch 4
2. make 3 SC down the chain line, ch 1 and turn
3. make 1 DEC and 1 SC, ch 1 and turn
4. make 1 DEC, ch 1 and turn
5. make 1 SC in every stitch around, making sure you put 2 SC in all three corners of the outer ear.
- Front Paws: With grey and 3.50 mm crochet hook – make 2
1. ch 10, make a DC in the 3rd ch from the hook (put a stitch marker), make a DC in the next 6 ch, make 6 DC in the last ch, make a DC in the next 6 ch (working on the other side of the original chain), make 5 DC in the last ch, sl st to 1st DC made (24 DC)
- Front Paws cushions: with white and 3.00 mm crochet hook – make 2
- make a Magic Ring, ch 2 and make 8 DC inside the ring
- do not sl st, pull the yarn
- Back Paws: with grey and 3.50 mm crochet hook – make 2
1. ch 8 and make a DC in the next 4 stitches down the chain line
2. make 6 DC in the last st
3. make 1 DC in the next 4 st on the other side of the chain
4. make 5 DC in the last st (20 DC)
- Back Paws cushions: with white and 3.00 mm crochet hook – make 2
- make a Magic Ring, ch 2 and make 10 DC inside the ring
- sl st to the 1st DC, pull the yarn
- Tail: with grey and 3.00 mm crochet hook – make 1
- ch 16, make 1 SC in the next 3 chains, make an INC in the next 3 chains (repeat down the chain) (21 SC)
- embroider the tip of the tail with the white yarn
Assembly:
- sl st the 2 faces together, stuffing it with the stuffing material tightly
- sew the muzzle onto the face, stuffing it with the stuffing material
- embroider the nose and the whiskers onto the muzzle
- glue the googly eyes onto the face
- sew the inner ears onto the outer ears, and then onto the face
- sew the face onto the body
- sew the paw cushions onto the legs
- sew the front, back legs and tail onto the body
- glue the bow onto the face

|

|
|

|

|
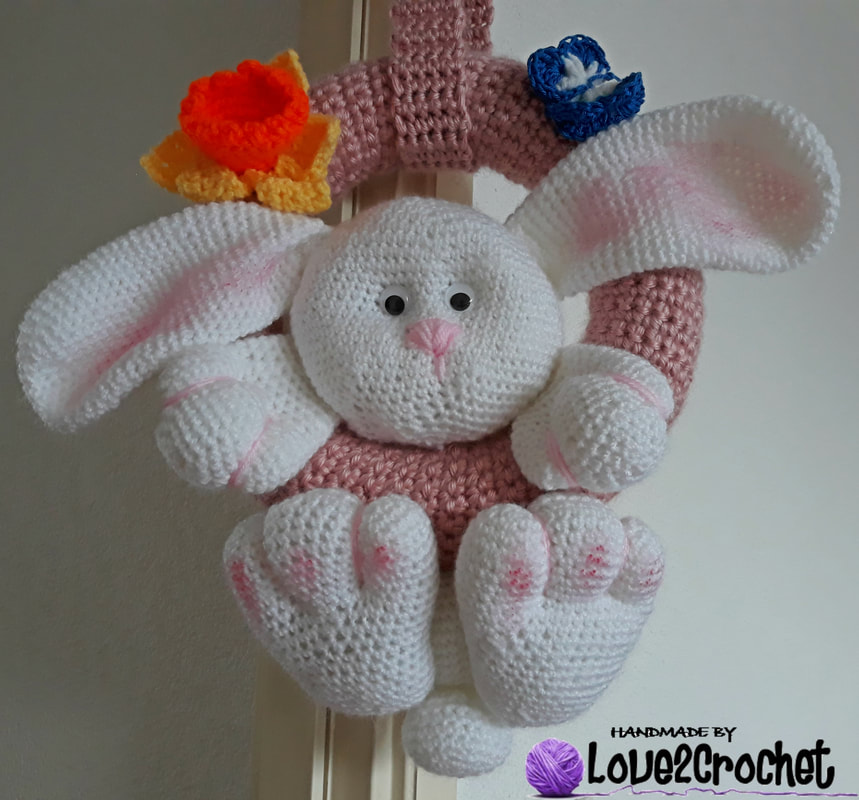
I have had some free time recently and I have decided to make this beautiful "Bunny" wreath. I found this awesome website with the pattern for the Bunny and have decided to give it a go. I did change the pattern to fit my liking a bit. A huge thank you to Zhaya from www.zhaya.de/misc.html for the free pattern! And here is my version....
Materials:
3.00 mm and 5.00 mm crochet hook
dirty pink, yellow, orange, light pink, white, blue yarn
stitch marker, scissor, needle
Styrofoam wreath (27 cm outer diameter, 13 cm width)
googly eyes, glue gun
Steps and Procedure:
1. Making the Body of the Wreath
- with double strands of dirty pink yarn and 5.00 mm crochet hook
1. chain 19, make 1 SC in the 2nd chain and in every chain down the chain line (18 SC), ch 1 and turn
2-96. Make 1 SC in every stitch in the row (18 SC), ch 1 and turn
- sew the longer sides together over the wreath
2. Making the Wreath Handle
- with double strands of dirty pink yarn and 5.00 mm crochet hook
1. chain 6, make 1 SC in the 2nd chain from the hook and down the chain line (5 SC), ch 1 and turn
2-68. Make 1 SC in every stitch in the row, (5 SC), ch 1 and turn
- pull the handle through the loop of the wreath sew the shorter sides together to make the handle
3. Making the Bunny
Thank you Zhaya from www.zhaya.de/misc.html for the pattern.....
1. Making the Bunny Head:
- with 3.00 mm crochet hook and white yarn
1. sc 6 in MR (6)
2. inc x6 (12)
3. (sc 1, inc) x6 (18)
4. (sc 2, inc) x6 (24)
5. (sc 3, inc) x6 (30)
6. (sc 4, inc) x6 (36)
7. (sc 5, inc) x6 (42)
8. (sc 6, inc) x6 (48)
9. (sc 7, inc) x6 (54)
10. (sc 8, inc) x6 (60)
11. (sc 9, inc) x6 (66)
12.-22. [11 Rounds] sc in each st around (66)
23. (sc 9, dec) x6 (60)
24. (sc 8, dec) x6 (54)
25. (sc 7, dec) x6 (48)
26. (sc 6, dec) x6 (42)
27. (sc 5, dec) x6 (36)
28. (sc 4, dec) x6 (30)
29. (sc 3, dec) x6 (24)
Start stuffing the head.
30. (sc 2, dec) x6 (18)
31. (sc 1, dec) x6 (12)
Finish stuffing.
32. dec x6 (6)
Fasten off, close, leave a very long tail for sewing.
- make an indentation for the eye sockets, embroider the pink nose, glue the googly eyes onto the eye sockets
2. Making the Ears (2x):
- with white yarn and 3.00 mm crochet hook
1. sc 6 in MR (6)
2. inc x6 (12)
3. (sc, inc) x6 (18)
4. (sc 2, inc) x6 (24)
5. (sc 3, inc) x6 (30)
6. (sc 4, inc) x6 (36)
7.-12. [6 Rounds] sc in each st around (36)
13. (sc 16, dec) x2 (34)
14.-15. [2 Rounds] sc in each st (34)
16. (sc 15, dec) x2 (32)
17.-18. [2 Rounds] sc in each st around (32)
19. (sc 14, dec) x2 (30)
20.-21. [2 Rounds] sc in each st (30)
22. (sc 13, dec) x2 (28)
23.-24. [2 Rounds] sc in each st (28)
25. (sc 12, dec) x2 (26)
26.-27. [2 Rounds] sc in each st (26)
28. (sc 11, dec) x2 (24)
29.-33. [5 Rounds] sc in each st (24)
Fasten off, do not close, do not stuff, leave long tail for sewing.
3. Making the Front paws (2x):
- with white yarn and 3.00 mm crochet hook
1. sc 6 in MR (6)
2. inc x6 (12)
3. (sc, inc) x6 (18)
4. (sc 2, inc) x6 (24)
5. (sc 3, inc) x6 (30)
6.-10. [5 Rounds] sc in each st around (30)
11. (sc 8, dec) x3 (27)
12. sc in each st around (27)
13. (sc 7, dec) x3 (24)
14. sc in each st around (24)
15. (sc 6, dec) x3 (21)
16. sc in each st around (21)
17. (sc 5, dec) x3 (18)
18.-20. [3 Rounds] sc in each st around (18)
- Lightly stuff just the front of the paw, fold the top edge together and seam using a single crochet along the top edge, crocheting through both stitches. Now sculpt the paws using pink yarn.
4. Making the Back paws (make 2):
- with white yarn and 3.00 mm crochet hook
1. ch 12, sc 1 in 2nd ch from hook, sc 9, sc 3 in last st, continue on the bottom of the chain: sc 9, sc 2 in the last st (24)
2. inc, sc 9, inc x3, sc 9, inc x2 (30)
3. sc 1, inc, sc 9, (sc 1, inc) x3, sc 9, (sc 1, inc) x2 (36)
4. sc 2, inc, sc 9, (sc 2, inc) x3, sc 9, (sc 2, inc) x2 (42)
5.-10. [6 Rounds] sc in each st around (42)
11. (sc 12, dec) x3 (39)
12. (sc 11, dec) x3 (36)
13. (sc 10, dec) x3 (33)
14. (sc 9, dec) x3 (30)
15.-20. [6 Rounds] sc in each st around (30)
21. (sc 3, dec) x6 (24)
22. sc in each st around (24)
23. (sc 2, dec) x6 (18)
24. (sc, dec) x6 (12)
- Stuff and shape the paw, taking care not to overstuff it as you will sculpt the toes later.
25. dec x6 (6)
- Fasten off, close, leave tail for sewing.
- To sculpt the back paws, use the same method as you did for the front paws.
5. Making the Body:
- with white yarn and 3.00 mm crochet hook
1. sc 6 in MR (6)
2. inc x6 (12)
3. (sc 1, inc) x6 (18)
4. (sc 2, inc) x6 (24)
5. (sc 3, inc) x6 (30)
6. (sc 4, inc) x6 (36)
7. (sc 5, inc) x6 (42)
8. (sc 6, inc) x6 (48)
9. (sc 7, inc) x6 (54)
10. (sc 8, inc) x6 (60)
11.-18 [8 Rounds] sc in each st around (60)
19. (sc 8, dec) x6 (54)
20. sc in each st around (54)
21. (sc 7, dec) x6 (48)
22.-24. [3 Rounds] sc in each st (48)
- Stuff the body, taking care not to overstuff. Fold along the top edge and close the seam with a row of single crochet.
- Fasten off, leave tail for sewing
6. Making the Tail:
- with white yarn and 3.00 mm crochet hook
1. sc 6 in MR (6)
2. inc x6 (12)
3. (sc 1, inc) x6 (18)
4. (sc 2, inc) x 6 (24)
5.-8. (4 Rounds) sc in each st around (24)
9. (sc 2, dec) x6 (18)
10. (sc 1, dec) x6 (12)
- Fasten off, do not close, leave long tail for sewing, stuff lightly.
- sewing all the pieces together (ears to the head, tail and the bottom feet to the bottom of the body) and then onto the wreath.
1. Making the butterfly:
- with yarn color of your choice and 4.00 mm crochet hook
1. Make a Magic Ring
2. Ch 3, DC into center of the Magic Ring, *ch 2, DC into center circle* 7 times, ch 2. Insert hook into third chain from the bottom and join with slip stitch. You should have 8 clusters of 2 DC stitches.
3. Change color if desired connecting new color in DC space.
*6 DC into chain 2 space, sl st in DC space* 7 times, 6 DC into ch 2 space, sl st into top of original stitch to connect.
4. ch 8.
- Shaping the butterfly
- Fold the work in half (wrong sides facing) and wrap the chain around the center of the work connecting at the base of the chain with a slip stitch. Tie off.
- Take a piece of yarn about 2 inches in length and tie a knot on each end. Slip the yarn under the chain and move into desired place.
2. Making a daffodil
- with orange and 2.50 mm crochet hook
1. Make a Magic Ring and 6 SC inside the ring
2. Make an INC in every stitch around (12 SC)
3. Make 1 SC in every stitch around but only in the Front Loop (12 FL SC)
4. Make 1 SC in every stitch around (both loops) (12 SC)
5. Make 1 SC in the 1st stitch and an INC in the next (repeat around) (18 SC)
6. Make 1 SC in every stitch around (both loops) (18 SC)
7. Make 1 SC in the next 2 stitches and an INC in the next (repeat around) (24 SC)
8. Make 1 SC in every stitch around (both loops) (24 SC)
9. ch 3, sl st to the bottom of the chain (in the same st) and make 2 sl st in the next 2 stitches of the tube (making the picot) (repeat around 11 more times for 12 picots)
- turn the tube inside out
- connect the yellow yarn to the 1st FL made in R3
1. *ch 8, make the SC in the 2nd stitch from the hook, HDC in the next, DC, TRC, TRC, DC, HDC, make 2 sl st in the next 2 st* of the orange tube (repeat *ch 8...* for 6 petals total)
2. when you get back the 1st petal, you will be working on the other side of the original ch 8 -
in the 1st ch make 1 HDC, DC, TRC, TRC, DC, HDC, SC, make a sl st-ch1-sl st at the top, and continue with the 9 sl st down the other side of the leaf all the way to the base
- continue for the next 5 leaves
Assembly:
- sew the bunny body (with the back paws and tail already sewn on) to the wreath
- sew the front paws to the wreath
- sew the head (with the ears already sewn on) to the wreath
- glue the butterfly to the wreath
- glue the daffodil to the wreath
- add the handle and proudly display for all to see and admire


|

|

|
|

Here is yet another version of the dream catcher - this one I have used the Tunisian stitch pattern for the leaves. So, here is the pattern for the Dream Catcher #4....
Materials:
Embroidery hoop (mine was about 8 cm in diameter)
Worsted weight yarn (colors of your choice)
2.00 mm crochet hook
Tapestry needle
Decorative beads
Steps and Procedures:
1. Making a Doily
- Using any color yarn and 2.00 mm hook
R1: Make a magic ring, ch 3 (counts as first DC), continue with making 9 DC into magic loop. Slip stitch into 3rd chain of beginning ch 3. (10).
R2: Ch 4 (counts as DC and ch 1). Continue making a DC + ch 1 in each stitch around. Slip stitch into 3rd chain of beginning ch 4. (10 DC and 10 ch1s)
R3: Slip stitch into ch 1 space. *ch 4 (counts as DC + ch 1) , DC + ch1 into same ch 1 space. DC + ch 1 in next ch 1 space. DC + ch 1 (2×) in next ch 1 space, DC + ch1 once in the next ch 1 space. Alternate this around. Slip stitch into 3rd ch from the beginning. Fasten off. (15 DC and 15 ch1)
2. Attaching the doily to the hoop
- sl st the doily to the hoop and continue with making 5 SC in each ch 1 space of the doily pulling the yarn through the hoop also. After you have made all 75 SC connecting the hoop to the doily, and have sl st to the 1st SC made, continue making 50 ch to make the handle for the dream-catcher. After you have made 50 ch sl st to the 1st chain made on the doily, cut the yarn and fasten off.
3. Feathers
The feathers I have used for this Dream Catcher are the Tunisian Leaves/Feathers from www.youtube.com/watch?v=axb6CQOyhpY. They are easy to make, check out the tutorial....
4. Assembly
- make a doily
- crochet the hoop to the doily
- crochet the hanging strip by ch 50
- make the peacock feathers
- ch 15, ch 25, ch 35 and add the beads/feathers on the bottom of the chain.
|

|

So, here it is, another Dream Catcher project. I have made changes in this patterns a bit - have incorporated different leaves, and have added more beads on the chain line. I have also decided to make a simple chain off of which I would hang the leaves and beads (rather than sl st up the chain line). Here is the pattern for the Dream Catcher #3.....
Materials:
Embroidery hoop (mine was about 8 cm in diameter)
Worsted weight yarn (colors of your choice)
2.00 mm crochet hook
Tapestry needle
Decorative beads
Steps and Procedures:
1. Making a Doily
- Using any color yarn and 2.00 mm hook
R1: Make a magic ring, ch 3 (counts as first DC), continue with making 9 DC into magic loop. Slip stitch into 3rd chain of beginning ch 3. (10).
R2: Ch 4 (counts as DC and ch 1). Continue making a DC + ch 1 in each stitch around. Slip stitch into 3rd chain of beginning ch 4. (10 DC and 10 ch1s)
R3: Slip stitch into ch 1 space. *ch 4 (counts as DC + ch 1) , DC + ch1 into same ch 1 space. DC + ch 1 in next ch 1 space. DC + ch 1 (2×) in next ch 1 space, DC + ch1 once in the next ch 1 space. Alternate this around. Slip stitch into 3rd ch from the beginning. Fasten off. (15 DC and 15 ch1)
2. Attaching the doily to the hoop
- sl st the doily to the hoop and continue with making 5 SC in each ch 1 space of the doily pulling the yarn through the hoop also. After you have made all 75 SC connecting the hoop to the doily, and have sl st to the 1st SC made, continue making 50 ch to make the handle for the dream-catcher. After you have made 50 ch sl st to the 1st chain made on the doily, cut the yarn and fasten off.
3. Feathers
The feathers I have used for this Dream Catcher are the Peacock Feathers come from TheCurioCraftsRoom. They are easy to make, check it out....
4. Assembly
- make a doily
- crochet the hoop to the doily
- crochet the hanging strip by ch 50
- make the peacock feathers
- ch 10, ch 20, ch 30 and add the beads/feathers on the bottom of the chain
dream catcher #2
Here is my attempt of making a 2nd version of the dream catcher - a new and improved version. For this new dream-catcher, I decided to make some changes - a hoop and a doily patterns are completely different. So, here is the new pattern.....
Materials:
Embroidery hoop (mine was about 8 cm in diameter)
Worsted weight yarn (colors of your choice)
2.00 mm crochet hook
Tapestry needle
Decorative beads
Steps and Procedures:
1. Making a Doily
- Using any color yarn and 2.00 mm hook
R1: Make a magic ring, ch 3 (counts as first DC), continue with making 9 DC into magic loop. Slip stitch into 3rd chain of beginning ch 3. (10).
R2: Ch 4 (counts as DC and ch 1). Continue making a DC + ch 1 in each stitch around. Slip stitch into 3rd chain of beginning ch 4. (10 DC and 10 ch1s)
R3: Slip stitch into ch 1 space. *ch 4 (counts as DC + ch 1) , DC + ch1 into same ch 1 space. DC + ch 1 in next ch 1 space. DC + ch 1 (2×) in next ch 1 space, DC + ch1 once in the next ch 1 space. Alternate this around. Slip stitch into 3rd ch from the beginning. Fasten off. (15 DC and 15 ch1)
2. Attaching the doily to the hoop
- sl st the doily to the hoop and continue with making 5 SC in each ch 1 space of the doily pulling the yarn through the hoop also. After you have made all 75 SC connecting the hoop to the doily, and have sl st to the 1st SC made, continue making 50 ch to make the handle for the dream-catcher. After you have made 50 ch sl st to the 1st chain made on the doily, cut the yarn and fasten off.
3. Feathers
I have made 3 feathers (Small, Medium and Large). Here are the patterns for each....
- Small feather:
- using 2.00 mm crochet hook and a yarn of your choice - ch 15
- sl st to the 5th ch and sl st into the next 3 chains
1. (in 9th ch) make 3 ch and sl st down the ch line (2 sl st), sl st to the original (long) chain
2. (in 10th ch) make 5 ch and sl st down the ch line (4 sl st), sl st to the original (long) chain
3,4. (in 11th ch) make 7 ch and sl st down the ch line (7 sl st), sl st to the original (long) chain
5,6. (in 13th ch) make 5 ch and sl st down the ch line (4 sl st), sl st to the original (long) chain
7. (in last, 15th ch) make 3 ch and sl st down the ch line (2 sl st), sl st to the original (long) chain
(in the same 15th ch) make another 3 ch and sl st down the ch line (2 sl st), sl st to the original (long) chain
8. working on the other side of the original chain line - make 3 ch and sl st down the ch line (2 sl st), sl st to the original (long) chain
9,10. make 5 ch and sl st down the ch line (4 sl st), sl st to the original (long) chain
11,12. make 7 ch and sl st down the ch line (7 sl st), sl st to the original (long) chain
13. make 5 ch and sl st down the ch line (4 sl st), sl st to the original (long) chain
14. make 3 ch and sl st down the ch line (2 sl st), sl st to the original (long) chain
- fasten off
- Medium feather:
- using 2.00 mm crochet hook and a yarn of your choice - ch 20
- sl st to the 5th ch and sl st into the next 3 chains
1. (in 9th ch) make 5 ch and sl st down the ch line (4 sl st), sl st to the original (long) chain
2. (in 10th ch) make 7 ch and sl st down the ch line (6 sl st), sl st to the original (long) chain
3-5. (in 11th ch) make 9 ch and sl st down the ch line (8 sl st), sl st to the original (long) chain
6,7. (in 14th ch) make 7 ch and sl st down the ch line (6 sl st), sl st to the original (long) chain
8,9. (in 16th ch) make 5 ch and sl st down the ch line (4 sl st), sl st to the original (long) chain
10-12. (in 18th ch) make 3 ch and sl st down the ch line (2 sl st), sl st to the original (long) chain
(in the same 20th ch) make another 3 ch and sl st down the ch line (2 sl st), sl st to the original (long) chain
13-15. working on the other side of the original chain line - make 3 ch and sl st down the ch line (2 sl st), sl st to the original (long) chain
16,17. make 5 ch and sl st down the ch line (4 sl st), sl st to the original (long) chain
18,19. make 7 ch and sl st down the ch line (6 sl st), sl st to the original (long) chain
20-22. make 9 ch and sl st down the ch line (8 sl st), sl st to the original (long) chain
23. make 7 ch and sl st down the ch line (6 sl st), sl st to the original (long) chain
24. make 5 ch and sl st down the ch line (4 sl st), sl st to the original (long) chain
- fasten off
- Large feather:
- using 2.00 mm crochet hook and a yarn of your choice - ch 25
- sl st to the 5th ch and sl st into the next 3 chains
1. (in 9th ch) make 7 ch and sl st down the ch line (6 sl st), sl st to the original (long) chain
2. (in 10th ch) make 9 ch and sl st down the ch line (8 sl st), sl st to the original (long) chain
3-7. (in 11th ch) make 11 ch and sl st down the ch line (10 sl st), sl st to the original (long) chain
8-10. (in 16th ch) make 9 ch and sl st down the ch line (8 sl st), sl st to the original (long) chain
11-13. (in 19th ch) make 7 ch and sl st down the ch line (6 sl st), sl st to the original (long) chain
14-17. (in 22th ch) make 5 ch and sl st down the ch line (4 sl st), sl st to the original (long) chain
(in the same 25th ch) make another 5 ch and sl st down the ch line (4 sl st), sl st to the original (long) chain
18-21. working on the other side of the original chain line - make 5 ch and sl st down the ch line (4 sl st), sl st to the original (long) chain
22-24. make 7 ch and sl st down the ch line (6 sl st), sl st to the original (long) chain
26-28. make 9 ch and sl st down the ch line (8 sl st), sl st to the original (long) chain
29-33. make 11 ch and sl st down the ch line (10 sl st), sl st to the original (long) chain
34. make 9 ch and sl st down the ch line (8 sl st), sl st to the original (long) chain
35. make 7 ch and sl st down the ch line (6 sl st), sl st to the original (long) chain
- fasten off
4. Attaching the Feathers to the dream-catcher
- Make a chain line from the doily/hoop however long you'd like and sl st a feather or a bead to the bottom
- sl st up the chain line until you reach the hoop and sl st the beginning of the ch

|

|

|

|
Crochet Dream-catcher #1
I love Dreamcatchers! They are mystical, magical, and super easy to crochet. I found this pattern on craftbits.com/project/how-to-make-a-crochet-dreamcatcher/. I did not use the whole pattern, since my hoop was only about 8 cm (about 3 inches) diameter, so I crochet only to the round 3. In the original pattern they go up to round 5. So, here it is, my first attempt of making a Dream Catcher......
What you need:
Embroidery hoop (mine was about 8 cm diameter)
Worsted weight yarn
2.00 mm & 4.00 mm crochet hooks
Tapestry needle
Decorative items (I used beads, but you can use fabric scraps, ribbon, lace, cords, yarn...)
Instructions: 1. Hoop
First I have crocheted around the hoop. Using any color yarn and 4.00 mm hook, single crochet around the hoop, slip stitch to the first single crochet, to join. Ch 60 and slip stitch, to join and to create the hanger. Fasten off.
2. Doily
Using any color yarn and 2.00 mm hook make a magic ring.
Round 1: Ch 3 (counts as first double crochet), 11 double crochet into magic loop. Slip stitch into 3rd chain of beginning ch 3. (12 stitches).
Round 2: Ch 5 (counts as double crochet, ch 2). (Double crochet, ch 2) in each stitch around. Slip stitch into 3rd chain of beginning ch 5. (12 double crochets and 12 loops)
Round 3: Slip stitch into ch 2 space. *(Double crochet, ch 2) twice into ch 2 space. Double crochet, ch 2 in next ch 2 space. Repeat from * around. Slip stitch into first double crochet. Fasten off. (18 double crochets and 18 loops)
Assembly:
Using the 2.00 mm crochet hook attach the doily to the hoop. I did a single crochet on every loop (18 loops).
Make up:
To make mine nicer I also crocheted two feathers (link to follow) and used beads to attach to the hoop. Chain as many as you's like depending on how long you want the chains to be.
The following link is the explanation of how to make the dreamcatcher with the pictures and all:
craftbits.com/project/how-to-make-a-crochet-dreamcatcher/
This link is for the feathers that I used to embellish my dreamcatcher:
thecuriocraftsroom.blogspot.ba/2015/09/french-mini-peacock-feather-free-pattern.html
And this is how my dreamcatchers turned out. I made two....
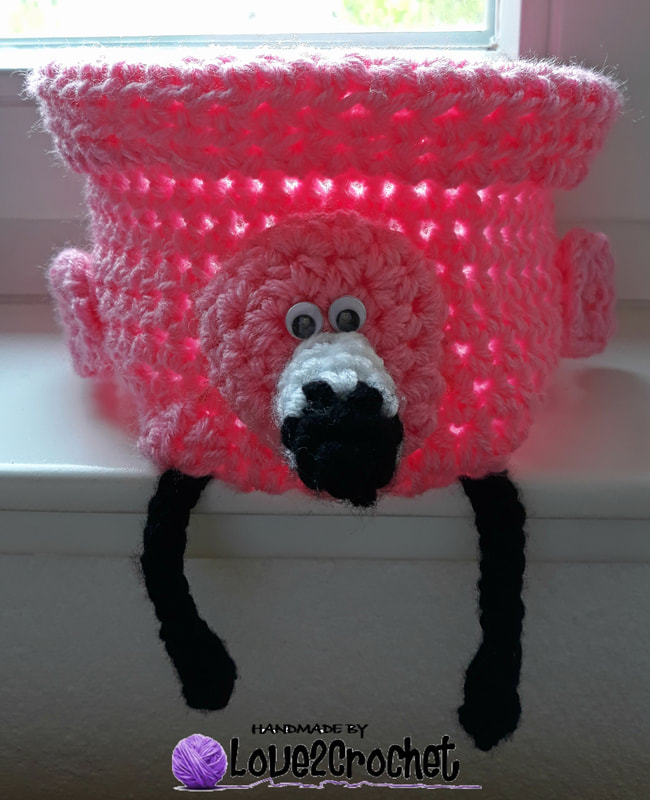
"Flamingo" basket

I wanted to make a quick gift for a friend's birthday, and I thought that this Flamingo Basket could put a smile on her face, since it is so darn cute! I found the original pattern on this website:
blackstone-designs.com/bird-baskets/
Thank you Sonya from Blackstone Designs for a free pattern!
I did change the pattern a bit, since I did not have the bulky yarn, so I tripled my worsted weight yarn and that seemed to do the trick. I also made a basket a big bigger, so the chain and stitch count is a bit different than the original. Anyways, here are my changes......
Materials:
Pink, white, black yarn
7.00 mm crochet hook
Glue gun
Googly eyes
Scissors, needle, stitch marker
Steps and Procedures:
- BASKET:
- with triple strands of pink yarn, and 7.00 mm crochet hook - chain 16
R1. HDC in 2nd ch from hook and in each ch across, ch 1 and turn (15 HDC)
R2. HDC across, turn (15 HDC)
R3-9. HDC across, ch 1 and turn (15 HDC)
R10. Make 14 HDC – HDC Dec (at the corner) - turn to the side to make 7 HDC – HDC Dec (at the corner) - turn to the side to make 13 HDC – HDC Dec – turn to the side to make 7 HDC – HDC Dec – sl st to the 1st HDC made (45 HDC)
R11. Mark the 1st stitch with a stitch marker and continue making 1 HDC in each st around (45 HDC)
R12-22. 1 HDC in each st (45 HDC)
R23. SC Crab stitch around (45 SC Crab stitch), sl st to 1st, fasten off
- Fold down to the R20, and use the glue gun to keep the fold in place
- HEAD:
- with triple strands of pink yarn, and 7.00 crochet hook
R1. Make a Magic ring, ch 1, 6 HDC in ring (6 HDC)
R2. Make 2 HDC in each st around (12 HDC)
R3. Make 1 HDC in1st st, make 2 HDC in the next st (repeat around – 1 HDC-2 HDC) (18 HDC)
R4. Make 1 HDC in every stitch around (18 HDC)
- LEGS: (Make 2)
- with triple strands of black yarn, and 7.00 crochet hook
1. Ch 15, sl st in 2nd ch from hook and in each ch across (13 sl st)
2. in the last st make 2 HDC, turn to the other side of the chain and make 2 HDC in 1st st (13 sl st, 4 HDC)
- WINGS: (Make 2)
- with triple strands of pink yarn, and 7.00 crochet hook
1. Ch 5
2. Make 2 HDC in 2nd ch from hook - 1 HDC – 1 HDC – 2 HDC in last ch, ch 1, turn (6 HDC)
2. 1 HDC – 2 HDC in the next 4 st – 1 HDC (10 HDC)
3. HDC in the same st, turn and continue to make 1 HDC along the beginning chain (5 HDC), sl st to the 1st st made
- TAIL FEATHER:
- with triple strands of pink yarn, and 7.00 crochet hook
- Ch 6, (HDC, ch 3, HDC) in 2nd ch from hook, *sl st, (HDC, ch 3, HDC)* repeat 2 more times; (3 feathers made)
- fold along the long side and sew (glue) onto the basket
- BEAK:
- with triple strands of black yarn, and 7.00 crochet hook
R1. Make a Magic ring, ch 1, 3 SC in ring (3 SC)
R2. Make 2 SC in each st around (6 SC)
- Change to white yarn
R3-5. SC in every stitch around (6 SC)
Assembling the Flamingo basket:
- use the glue gun to glue the tail to the back of the basket
- slightly stuff the head and using the glue gun, glue the head to the front of the basket
- slightly stuff the beak and glue it to the head
- glue the googly eyes onto the head
- glue the wings to the sides of the basket
- glue the legs along the bottom of the basket
- You can definitely choose to sew all of the body parts onto the basket, I just thought that it is easier and faster to use the glue gun to glue this all on.
Again, thank you to Sonya from Blackstone Designs for a free pattern, which is the basis of this written pattern!

|


|

|

|
|

|
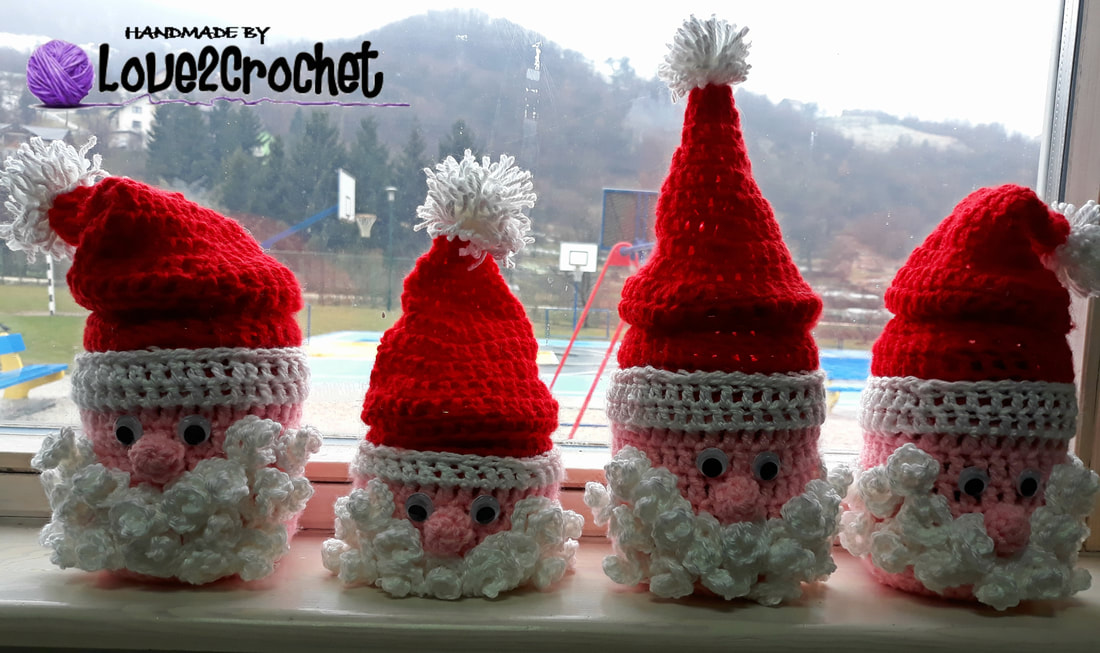
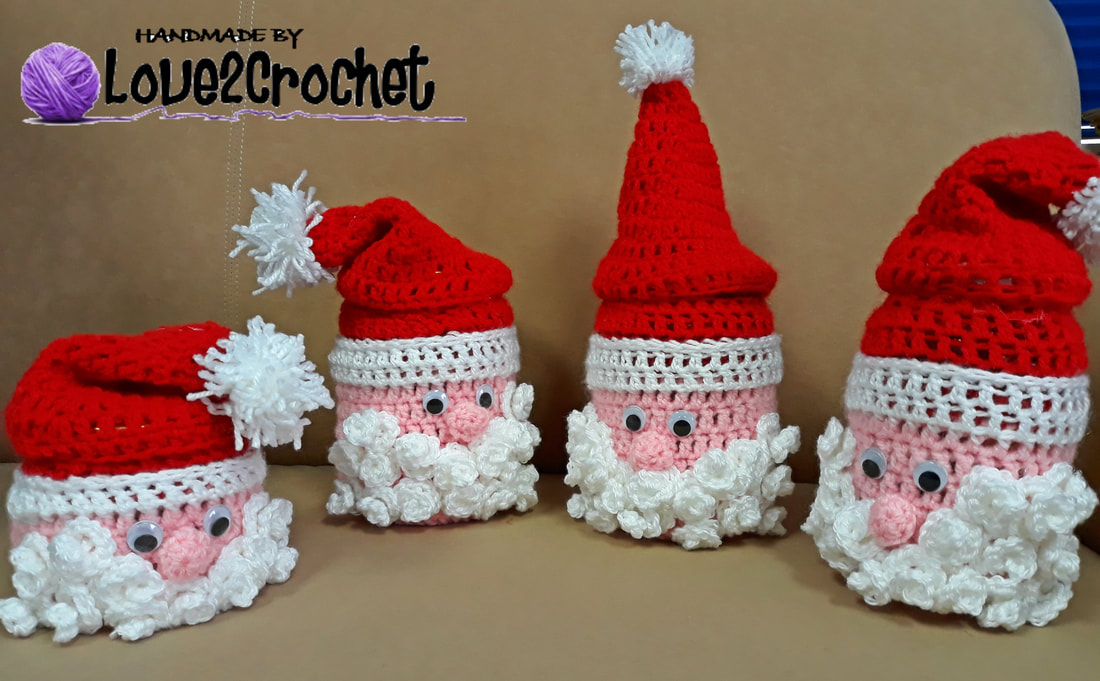
crochet "santa" basket

Wow! What a great pattern and a gift idea. I made this adorable basket in 2 hours, super easy, fun and cute. The pattern is from Yarnspirations! Thank you Yarnspirations for the free pattern!
www.yarnspirations.com/row-en/bernat-santas-gift-basket/BRC0517-001646V.html
The basket works up super fast, I did use triple strands of yarn, and an 8.00 mm crochet hook (which is different then stated in the pattern).
It is worth the try and effort, and it turns out great. Here are a few pics of my Santa basket...
The only thing I did differently is the Belt Buckle and this is the pattern I have used:
Making a Belt Buckle:
- with double strands of yellow yarn and 5.00 mm crochet hook
- ch 15
- start crocheting from the 2nd stitch from the hook, making a SC in next 2 stitches, and 3 SC in the 4th stitch from the hook
- make a SC in next 3 st, make 3 SC in the next stitch
- make a SC in next 2 stitches, make 3 SC in the next stitch
- make a SC in next 3 st, make 3 SC in the next stitch
- cut the yarn, and sew the beginning of the chain to the end of the chain making a rectangle shape
- sew the rectangle (buckle) to the middle of the basket (on the 2 rows of the black stripe)

|

|

|

|
Crochet "ELF" Led tea light holder

I love crocheting decorative items especially for Christmas. This project and a pattern proved to be the perfect gift giving idea for my mother and sister. I bought 2 LED tea lights, and included them with the Elf holders - so cute!
This is the original pattern, which I have changed a bit, since it turned out that it was much bigger and bulkier that I wanted it to.
mydiy.se/2017/10/15/christmas-lightholder/
So, the following is my version. Nevertheless, thank you to myDIY for the free pattern that I have used as a basis of my pattern.
Materials:
3.00 mm crochet hook
pink, white, red, green yarn
LED tea light
scissors, needle, stitch marker
Steps and Procedure:
1. Body:
-with 3.00 mm crochet hook and red yarn
1. Make a Magic Ring and make 6 SC inside the ring
2. Make 2 SC in every stitch around (12 SC)
3. Make 1 SC in first stitch, and make 2 SC in 2nd stitch, repeat around (18 SC)
4. Make 1 SC in next 2 stitches, and make 2 SC in next stitch, repeat around (24 SC)
5. Make 1 SC in next 3 stitches, and make 2 SC in next stitch, repeat around (30 SC)
6. Make 1 SC in next 4 stitches, and make 2 SC in next stitch, repeat around (36 SC)
7. Make 1 SC in every stitch around, only in Back loops (36 SC)
8-10. Make 1 SC in every stitch around (36 SC)
- change to white yarn
11, 12. Make 1 SC in every stitch around (36 SC)
- change to red yarn
13. Make 1 SC in every stitch around (36 SC)
14. Make 1 SC in next 4 stitches, and make 2SCtog in next stitch, repeat around (30 SC)
15. Make 1 SC in every stitch around (30 SC)
16. Make 1 SC in next 3 stitches, and make 2SCtog in next stitch, repeat around (24 SC)
17. Make 1 SC in every stitch around (24 SC)
18. Make 1 SC in next 2 stitches, and make 2SCtog in next stitch, repeat around (18 SC)
19. Make 1 SC in every stitch around (18 SC)
20. Make 1 SC in next stitch, and make 2SCtog in next stitch, repeat around (12 SC)
21. Make 1 SC in every stitch around (12 SC)
- stuff the body with the stuffing material
- change the yarn to pink
22, 23. Make 1 SC in every stitch around (12 SC)
24. Make 1 SC in first stitch, and make 2 SC in the next stitch, repeat around (18 SC)
25. Make 1 SC in next 2 stitches, and make 2 SC in next stitch, repeat around (24 SC)
26. Make 1 SC in next 3 stitches, and make 2 SC in next stitch, repeat around (30 SC)
27-29. Make 1 SC in every stitch around (30 SC)
30. Make 1 SC in next 3 stitches, and make 2SCtog in next stitch, repeat around (24 SC)
31. Make 1 SC in next 2 stitches, and make 2SCtog in next stitch, repeat around (18 SC)
32. Make 1 SC in next stitch, and make 2SCtog in next stitch, repeat around (12 SC)
- stuff the head with the stuffing material
33. Make 6 SCtog (6 SC)
34. Make 3 SCtog (2 SC)
- sew in the ends
2. Arms: (make 2)
- with 3.00 mm crochet hook and green yarn
1. Make a Magic Ring, and make 4 SC inside the ring
2. Make 2 SC in every stitch around (8 SC)
3,4. Make 1 SC in every stitch around (8 SC)
- change to white yarn
5,6. Make 1 SC in every stitch around (8 SC)
- change to red yarn
7-15. Make 1 SC in every stitch around (8 SC)
16. Make 4 SCtog (2 SC)
- cut the yarn, sew in the ends
3. Tea Light holder:
- with white yarn
1. Make a Magic Ring, and 6 SC inside the ring
2. Make 2 SC in every stitch around (12 SC)
3. Make 1 SC in the 1st st, and 2 SC in the next st, repeat around (18 SC)
4. Make 1 SC in the next 2 stitches, and 2 SC in the next st, repeat around (24 SC)
5. Make 1 SC in every stitch around, but in the Back Loop only (24 SC)
6-9. Make 1 SC in every stitch around (24 SC)
- cut the yarn, sew in the ends
4. Elf Hat:
- with red yarn
1. Make a Magic Ring, and 6 SC inside the ring
2-5. Make 1 SC in every stitch around (6 SC)
6. Make 1 SC in the 1st st, and 2 SC in the next st, repeat around (9 SC)
7-9. Make 1 SC in every stitch around (9 SC)
10. Make 1 SC in the next 2 st, and 2 SC in the next st, repeat around (12 SC)
11. Make 1 SC in every stitch around (12 SC)
12. Make 1 SC in the next 3 st, and 2 SC in the next st, repeat around (15 SC)
13. Make 1 SC in every stitch around (15 SC)
14. Make 1 SC in the next 4 st, and 2 SC in the next st, repeat around (18 SC)
15. Make 1 SC in every stitch around (18 SC)
16. Make 1 SC in the next 5 st, and 2 SC in the next st, repeat around (21 SC)
17. Make 1 SC in every stitch around (21 SC)
18. Make 1 SC in the next 6 st, and 2 SC in the next st, repeat around (24 SC)
19. Make 1 SC in every stitch around (24 SC)
20. Make 1 SC in the next 7 st, and 2 SC in the next st, repeat around (27 SC)
21. Make 1 SC in every stitch around (27 SC)
- change to white yarn
22,23. Make 1 SC in every stitch around (27 SC)
- cut the yarn, sew in the ends
Assembly:
- sew the elf hat to the top of the head
- make a pom pom and sew it to the tip of the hat
- embroider the nose with the pink yarn
- glue the googly eyes to the face
- sew on the arms
- glue the tea light holder to the belly and the hands
- make a row of SC on the very edge of the face-body for a 3D look
I have made 2 elves with different color schemes, your imagination is the limit when it comes to the color combinations, what I have put here is just an idea. And here are my two elves, they look so cute with that LED tea light.

|

|

|

|
"Santa" jar cover

Since it is Christmas time here in my part of the world, this project is a perfect gift. It is easily made, and it works up really fast. You will need a standard size glass jar to start crocheting around. When you are finished, fill the Santa jar with candy for a cool gift for friends and family. Here is the pattern and instructions....
Materials:
4.00 mm crochet hook
white, pink, red yarn
googly eyes
glue gun
Steps and Procedure:
BODY:
- with 4.00 mm crochet hook and pink yarn
1. Make a Magic Ring, ch 2 and 12 DC inside the ring, sl st to the 1st DC made, ch 2
2. Make 2 DC in each stitch around (24 DC), sl st to the 1st DC made, ch 2
3. Make 2 DC in the 1st st, and 1 DC in the next stitch (repeat around) (36 DC), ch 2
4. Make 1 DC in each stitch around only in the Back Loop (36 DC)
5-9. Make 1 DC in each stitch around in both loops (36 DC)
- change to red yarn
10-12. Make 1 DC in each stitch around (36 DC)
13. Make 1 HDC in each stitch around to create a rim (36 HDC)
- cut the yarn and sew in the ends
HAT:
- using 4.00 mm crochet hook and red yarn
1. Make a Magic Ring, ch 2 and 6 DC inside the ring, sl st to the 1st DC made, ch 2
2. Make 2 DC in the 1st st, make 1 DC in next st, repeat around (9 DC)
3. Make 2 DC in the 1st st, make 1 DC in next 2 stitches, repeat around (12 DC)
4. Make 2 DC in the 1st st, make 1 DC in next 3 stitches, repeat around (15 DC)
5. Make 2 DC in the 1st st, make 1 DC in next 4 stitches, repeat around (18 DC)
6. Make 2 DC in the 1st st, make 1 DC in next 5 stitches, repeat around (21 DC)
7. Make 2 DC in the 1st st, make 1 DC in next 6 stitches, repeat around (24 DC)
8. Make 2 DC in the 1st st, make 1 DC in next 7 stitches, repeat around (27 DC)
9. Make 2 DC in the 1st st, make 1 DC in next 8 stitches, repeat around (30 DC)
10. Make 2 DC in the 1st st, make 1 DC in next 9 stitches, repeat around (33 DC)
11. Make 2 DC in the 1st st, make 1 DC in next 10 stitches, repeat around (36 DC)
12. Make 1 DC in each stitch around (36 DC)
- connect to the body by making 22 sl st to the too rim of the body, making sure it is loose yet tight enough to fit over the jar lid.
HAT CUFF:
- using 4.00 and white yarn
1. sl st the white yarn to the Row 9 of the body, make 1 SC around the body (37 SC), sl st to the 1st SC made
2,3. Make 1 DC in each stitch around (36 DC)
4. Make 1 SC in each stitch connecting the cuff to the Row 11 of the body (37 SC)
NOSE:
- with 4.00 mm crochet hook and pink yarn
1. Make a Magic Ring and 6 HDC inside the ring
2. Make 1 HDC in each stitch around (6 HDC)
- cut the yarn, use the glue gun to glue the nose onto the face
BEARD CURLS:
- using 4.00 mm crochet hook and white yarn
- ch 8, 3 SC in each chain down the chain line (21 SC)
- make 20 beard curls, use the glue gun to glue them tightly next to each other onto the face right bellow the nose
- use the glue gun to glue the googly eyes to the face just above the nose
- make a white pom pom and sew it into the top of the hat
|

|

|
crochet "Koala" Basket

It is my sister's birthday soon and I wanted to make her something cute that she will want to display at her home or office. I found this awesome, and I mean awesome. pattern from Yarnspirations. They always have amazing patterns that are super easy to follow and it is a true joy to make items following their patterns. The complete link for the pattern is here:
www.yarnspirations.com/row-en/bernat-koala-crochet-basket/BRC0504-002277M.html
And here is how my little Koala turned out.... I used the double stranded yarn and a 7.00 mm crochet hook. I also used the red yarn for the basket instead of the emerald green as suggested in the pattern. I also added the Crab Stitch SC at the top of the basket for a cooler finish; I tied a red bow around my Koala's neck, and I glued the googly eyes on.....

|

|

|
crochet "spring" wreath
I have always loved wreaths! I have always been in awe of how intricate, delicate, colorful and fun they looked and have always admired the amount of work that was put into them. So, I have been circling around the idea of making one for quite some time, but never found the actual time of doing one. So, this past summer, since I was on my Summer Break, was the perfect occasion for me to actually sit down and make one. The process of making this particular one was slow and intricate but it is definitely worth it! It turned out beautifully and I am so proud of it! So, here is the complete pattern....
Materials:
3.00 mm, 4.00 mm, 5.00 mm crochet hooks
Styrofoam wreath (mine was 20 cm in diameter, and 9.5 cm wide)
yarn of your choice (I used blue, white, yellow, green, orange, dark pink, light pink, red)
needle, scissors
glue gun
Steps and Procedure:
- Making the wreath:
R1. With the 5.00 mm crochet hook, and double stranded yarn - chain 14
R2. SC in 2nd stitch from the hook and down the chain line making 13 SC, chain 1 and turn
R3-R82. make 1 SC in each stitch (total of 13 SC), ch 1 and turn
- wrap your creation around the wreath and sl st to connect the long sides together (forming a long cover around the wreath)
- make sure you match the stitches on both sides, so that you connect the sides equally in length
- sew the shorter ends together when you finish
Making wreath decorations:
1. Daisy Flowers:
1. with yellow yarn and 3.00 mm crochet hook make a magic ring and make 6 SC inside the ring
2. make 2 SC in each stitch around (12 SC)
3. with white yarn and 3.00 mm crochet hook - ch 6, SC in the 2nd ch from the hook, 4 HDC down the chain line, sl st into the next SC (at the center)
4. continue with making 12 petals
- I made 3 daisy petals
2. Big Leaf:
1. with green yarn and 3.00 mm crochet hook, ch 9
2. SC in the 2nd chain from the hook, HDC in the next, DC in the next 4 chains, HDC in the next, 2 SC in the next (same, last) chain
3. working on the other side of the chain - SC in the 1st chain, HDC in the next, DC in the next 4 chains, HDC in the next chain, SC in the last chain, and sl st to the 1st SC you made
- Small leaf:
1. with green yarn and 3.00 mm crochet hook, ch 7
2. SC in the 2nd chain from the hook, HDC in the next, DC in the next 2 chains, HDC in the next, 2 SC in the next (same, last) chain
3. working on the other side of the chain - SC in the 1st chain, HDC in the next, DC in the next 2 chains, HDC in the next chain, SC in the last chain, and sl st to the 1st SC you made
3. Big Blossom Flowers:
1. with yellow yarn and 2.5 crochet hook make a magic circle
2. make 6 SC inside the circle, sl st to the 1st SC of the row
3. change to orange yarn and make a - ch 2-DC-HDC - in each SC from the yellow center, sl st to the next SC and repeat (with ch2-DC-HDC)
- Small Blossom Flowers:
1. with orange yarn and 2.5 crochet hook make a magic circle
2. make 5 SC inside the circle, sl st to the 1st SC of the row
3. change to dark pink yarn and make a - ch 2-DC-HDC - in each SC from the yellow center, sl st to the next SC and repeat (with ch2-DC-HDC)
4. Roses:
- using 3.00 mm crochet hook and color of your choice, chain 21.
1. Make 1 SC in the second chain from hook. Chain 2, skip next chain, SC in next chain. Repeat down the chain line (sc, chain 2, skip sc, sc in next chain across), chain 1 and turn.
2. In chain 2 space from the previous row - make a sl st+ch 1+3 HDC+chain 1+slip stitch (all in chain 2 space). Slip stitch in next chain 2 space, make - chain 1+3HDC+chain 1+slip stitch. Continue like this (sl st+ch1+3 HDC+ch 1+sl st) until you come to the last 6 ch2 spaces. In next 3 chain 2 spaces make a slip stitch, chain 1+4 HDC+chain 1, slip stitch in the next ch2 space. In remaining 3 chain2 spaces make a slip stitch, chain 1+5 HDC+chain 1, all the way across until end of row. Fasten off and weave in the ends.
- Curl the rose from the center to the end and sew in place.
- I made 3 different sized roses - changing the number of ch at the very beginning (21 or 31 or 41)
5. Butterfly:
- using 4.00 mm crochet hook and pink yarn, make a magic ring
- Ch 3, DC into the center of the circle, *ch 2, DC into the center of the circle* 7 times, ch 2. Insert hook into the top of ch 3 at the beginning and join with slip stitch. You should have 8 clusters of 2 DC stitches.
- change to white yarn
*6 DC into chain 2 space, ss in DC space* 7 times, 6 DC into ch 2 space, ss into top of original stitch to connect.
ch 8.
- Making the butterfly
Fold the work in half (wrong sides facing) and wrap the chain around the work connecting at the base of the chain with a slip stitch. Tie off.
Take a piece of yarn about 2 inches in length and tie a knot on each end. Slip the yarn under the chain and move into desired place.
Assembling the wreath:
- I used the glue gun to glue the pieces to the wreath - roses, blossoms, daisies, leaves and a butterfly.
Wreath hanger strip:
R1. with 5.00 and double strands of blue yarn, ch 101
R2. make 1 SC in the 2nd ch from the hook and down the chain line (100 SC), ch 1 and turn
R3-5. make 1 SC down the line, ch 1 and turn
- making sure that you put the wreath in the center of the hanger strip, sl st the shorter sides of the strip together.

|

|

|

|

|

|

|

|
Santa Mug Cozy
Oh, how happy I was when I saw this free pattern for this Mug Cozy. It was not originally made as Santa Mug Cozy, but I change it a bit and made it suited for this Winter/Christmas season:)
Here is the original link: www.littlethingsblogged.com/2013/12/crochet-hug-mug-coffee-cozy.html
So, here is my version - of course:
Materials:
4.00 crochet hook
white, red and black yarn
Steps and Procedures:
Cozy:
- with red yarn, ch 14
- SC in the 2nd ch from the hook and down the chain (13 SC), ch 1 and turn
- make a row of SC only in the Back Loop (13 SC), ch 1 and turn
- continue making rows of 13 SC (Back Loop only) until you reach the mug handle (I had 8 rows)
- ch 13 and slip stitch to last stitch. Ch 1 and continue crocheting - make 12 SC in the chain
- continue to make 12 SC in back loops until the two parts of the body reach each other.
- with white yarn
- attach white yarn and crochet with white yarn around entire body top and bottom. Repeat once more in order to have two rows of white.
- attach the two ends with a row of SC with white yarn
- instead of the buttons, I made 4 X with the black yarn, where the buttons are supposed to be.
Arms:
-with red yarn
R1: Ch 2 then make 6 sc in second ch from hook (6)
R2-9: sc in each st around (6)
- attach white yarn
R10: sc in each st around (6)
R11: 1 sc, sk 2 sts, 3sc (4)
R12-14: sc in each st around (4)
R15: *dec*, repeat from * 1 time (2)
Fasten off.
Mitten Thumb:
Attach white yarn to R11 where you skipped 2 sts.
R1: sc in each st around (4)
R2: dec, (2)
Fasten off and sew open end closed.
Attach the arms to left and right of the mug body and enjoy your hot chocolate/hot cider in your new Santa Mug Cozy!
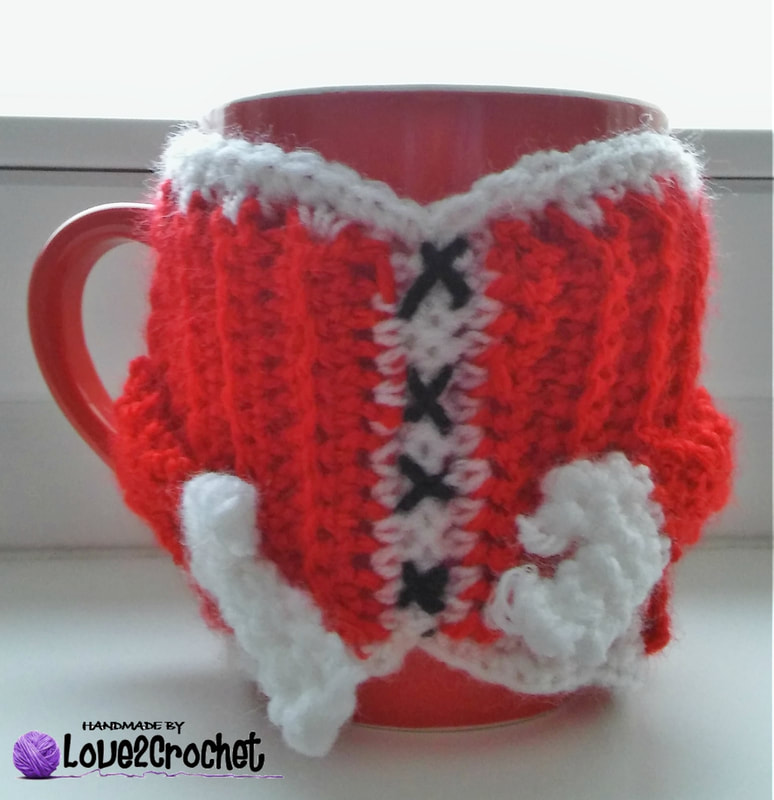
|

|

|

snowman mug cozy
I found this free pattern on Red Heart website. I changed it a bit to fit my needs. Here is the original pattern:
www.redheart.com/free-patterns/snowman-mug-hug
I have changed a few things on this pattern, so here is my own version......
Materials:
3.5 mm crochet hook
blue, white, orange, black yarn
needle and scissors
Steps and Procedures:
Cozy:
With white, ch 14.
Row 1: Sc in second ch from hook and each remaining ch across, ch 1; turn – 13 sc.
Rows 2 – 34: Working in back loops only, sc in each sc across, ch 1; turn. At end of Row 34, ch 10, slip st to last
sc of Row 34 (button loop made). Connect the Row 1 with the row of chains by making 1 SC in each chain. Fasten off.
Nose:
With orange, ch 5, slip st in second ch from hook, sc next ch, hdc in next ch, dc in last ch. Fasten off.
Scarf:
Connect the cozy with blue yarn to make the scarf.
- R1: make 1 Hdc in each stitch on the bottom of the white part (34 HDC)
- R2: make 1 HDC in each stitch around (34 HDC)
Do not fasten off......
Tie:
With blue, ch 11.
Row 1: Hdc in second ch from hook and each remaining ch across, ch 1; turn – 10 hdc.
- ch 11 on the other side and make 1 HDC down the chain (10 HDC)
Assembly:
- Sew nose in place
- Make 3 sc in a MR with black yarn. Make 2 eyes and 6 dots for the mouth, sew it on in place of the eyes and the mouth.
- "tie" the tie of the scarf
Weave in ends.

|

|
"Cat butt" coasters
I have seen these adorably funny coasters on Pinterest, but have totally disregarded them until recently. A friend commissioned a few for me, and I searched for a pattern. There are loads of patterns online, variations after variations, so I decided to make my own version. Some crocheters on line thought that the pink for the "butt h..." is too graphic, but I think it is adorably funny, so I included it in my pattern. Why not, it is all for laughs anyways..... So, here it goes:
Materials:
- pink yarn (the only one that's "necessary")
- white, gray, any other "cat" color, I wish I had variegated browns and grey, instead I used double strands (white+grey and crocheted with 5.00 mm hook)
- 4.00 mm crochet hook
- stitch marker
Steps and Procedures:
- the circle was crocheted in rounds, you you should use a stitch marker (I actually always use a paper clip instead of a stitch marker, it does what it's supposed to do, so I never bothered getting an actual stitch marker)
R1: using pink yarn - Make a Magic Circle and make 7 SC inside the circle
R2: using any color of your choice – slip stitch into the 1st SC of the Magic Circle and make 2 SC in each stitch around (INCREASE) (14 SC)
R3: make 1 SC in the 1st stitch, 2 SC in the next stitch (INC) (1 SC-2 SC all the way around) (21 SC)
R4: 1 SC in the next 2 stitches, 2 SC in the next stitch (INC) (1 SC-1 SC-2 SC all the way around) (28 SC)
R5: 1 SC in the next 3 stitches, 2 SC in the next stitch (INC) (1 SC-1 SC-1 SC-2 SC all the way around) (35 stitches)
R6: 1 SC in the next 4 stitches, 2 SC in the next stitch (INC) (1 SC- 1 SC- 1 SC- 1 SC - 2 SC all the way around) (42 stitches)
R7: chain 11 (this is the how you make the tail), SC 2nd chain from hook and continue with the SC until you reach the body again (10 SC)
- SC in the next stitch, and make 1 SC in the next 4 stitches, make an INC in the next stitch (2 SC in one stitch)
- make 1 SC in the next 5 stitched and make an INC (2 SC in the next stitch)
- make 1 SC in the next 5 stitched and make an INC (2 SC in the next stitch)
- ch 4 (this is how you make a leg), DC in the 3rd chain from the hook, and DC in the 4th chain from the hook
- slip stitch in the next 5 stitches
- ch 4 (this is how you make the next leg), DC in the 3rd chain from the hook, and DC in the 4th chain from the hook
- make 1 SC in the next 5 stitched and make an INC (2 SC in the next stitch)
- make 1 SC in the next 5 stitched and make an INC (2 SC in the next stitch)
- make 1 SC in the next 4 stitches and slip stitch to the base of the tail
- fasten off and weave in ends using a yarn needle
I love this project. It is so very cute and simple, and it brings many smiles to people's faces:)
Enjoy and make your own:)

|


|
Crochet flower valance
I fell in love with this Crochet Flower Valance project! :) It took me a few weeks to complete this entire item. It was loads of fun crocheting, organizing, planing and figuring our where each flower would go.
Here is the original pattern: onceuponapinkmoon.blogspot.ba/2013/05/flower-power-valance-tutorial.html
and here is my version:
Materials:
5.00 mm crochet hook
Tapestry needle
Scissors
6 different colored yarns
Steps and Procedures:
1. Making a full flower:
R1: With Color 1 - Make a magic loop. CH 3 (counts as first DC) 11 DC in magic loop. Join with SL ST to 3rd CH of beginning CH 3. 12 stitches.
Fasten off.
R2: Join the C2 in any DC. Ch4 (counts as your first DC & CH 1). DC CH 1 around in each ST. Join with SL ST in the 3rd ch of the beginning CH 4 to close round. Do not fasten off. 12 DC with a ch 1 space in between.
R3: With the same C2 - SL ST into the first CH 1 space. CH 3, 2 DC in the same CH 1 space. 3 DC in each CH 1 space around. SL ST to the 3rd CH of the beginning CH 3 to close round. Fasten off. 36 DC (3 in each space).
R4: Join C3 in any DC. CH 3 DC in same stitch CH 4, *skip over one DC, 2 DC in next ST, 2DC in next ST chain 4*. Repeat from * to * around until last 2 ST, SK 1 ST, 2DC in last ST. Join with SL ST to 3rd CH of beginning CH 3. Your ending join will be between the 2 sets of DC. 12 CH 4 spaces. Do not fasten off.
R5: With the same C3 - make 8 DC in chain 4 SP. Skip 2 DC, SL ST in between the 2 sets of DC. SK 2DC, 8 DC in next CH 4 SP. Repeat around. To end round SL ST in beginning ST and fasten off.
2. Making a half flower:
This is the original post and a pattern about making the half flower:
onceuponapinkmoon.blogspot.ba/2013/05/flower-power-valance-tutorial.html
The original pattern says to always "draw up a loop in 3rd ch1 space of previous row". This seemed to complicated and not clear to me, so I just chose to turn the work around, and it made no difference and it looked great. You choose what works best for you:)
This is my version:
- R1 - With Color 1 - Make a magic loop, Chain 3 (counts as first DC), DC 6 in loop, close the loop, ch 1 and turn the work around (7 DC)
- R2 - Connect Color 2 - Chain 4 (counts as DC ch 1), DC ch 1 in each stitch, ch 1 and turn the work around (7 DC ch 1 spaces)
- (just like with the full flower) for R3 stay with C2, chain 3(counts as first DC), 2 DC in same ch 1 space, 3 DC in each chain 1 space across, ch 1 and turn the work around (18 DC)
- R4 - connect C3 - chain 3 (counts as 1st DC), DC in same stitch, chain 4, skip next stitch, *2 DC in next stitch, 2 DC in next stitch, chain 4*
repeat from * until you reach the last 2 stitches, skip stitch, 2 DC in last stitch, ch 1 and turn the work around
- R5 - with C3 - 8 DC in ch 4 sp, *skip 2 DC, slip stitch, skip 2 DC, 8 DC in chain 4 space*, repeat * across until the last 2 DC group,
SC between last 2 DC, fasten off
Assembling the valance:
To assemble the valance I have made 32 full flowers and 6 half flowers.
Row 1: 7 full flowers
Row 2: 1 Half flower, 6 full flowers, 1 half flower.
Row 3: 7 full flowers
Row 4: 1 half flower, 2 full flowers on each side
Row 5: 2 full flowers on each side
Row 6: 1 half flower, 1 full flower on each side
Row 7: 1 whole flower on each side
And this is what it all came down to..... I am very proud of what it looks like and it adds come color to my kitchen window...

|

|

|

crochet candle light jars
crochet candle light jar #1
I recently found some empty glass jars of various dimensions in my pantry. I wanted to recycle and reuse them, and I thought this might be the perfect way to do so. I am planning on displaying these jars during my next Crafts Fair:)
Materials:
- 2.5 mm crochet hook
- color and weight yarn of you preference
Steps and Procedure:
- ch 2 at the beginning of each row DOES NOT count as a stitch
R1: Make a magic ring, ch 2 and make 10 DC, slip stitch to the 1st DC
R2: ch 2, and make 2 DC in each stitch around (20 DC)
R3: ch 2, make 2 DC in the first stitch and 1 DC in the next (repeat around) (30 DC)
- you have now made the bottom for the jar, now start making the sides:
R4: ch 2, make 1 SC around only in the Back Loops (30 SC)
R5: ch 3 + 1 TRC in the same stitch - *skip 3 stitches – (3 TRC, ch 1, 3 TRC) all in the following stitch, skip 3 stitches – 1 TRC (in the following stitch)* – repeat around**, and join to the 1st TRC you made in this row
R6, 7: ch 3 + 1 TRC in the same stitch– (3 TRC, ch 1, 3 TRC) all in ch1 space from the previous row - 1 TRC - repeat around, slip stitch to the top of 1st TRC you made
- if your jar is taller you can continue to repeat row6 until you reach the neck of the jar:
- ch 2, 2 SC, slip 2 stitches, 2 SCtog (repeat around for a total of 30 SC)
- ch 2, make 1 DC in the next 4 stitches and make a 2DCtog all the way around. Finish with the two DC decreases (total of 25 DC)
- ch 2, and make 25 DC around
- ch 1 and make 25 Crab stitches (reversed SC) for a border finish
- string the ribbon around the top of the jar
- put the tea candle light inside you jar and enjoy your handy craft work. Remember to never leave a lighted candle unattended:)

|

|
crochet candle light jar #2
For this Summer Candle Light Jar I used a bigger crochet hook and a bit thicker yarn. I used this pattern on the jars with the following proportions: 32 cm wide and 15 cm tall, and
Materials:
- 3.5 mm crochet hook
Steps and Procedure:
Base:
- for this first step when you are crocheting the base of the jar you will be crocheting in continuous rounds, so NO slip stitching or joining, just use a marker to keep count of your stitches
- in Color 1
R1: Make a magic ring, and make 6 SC inside the ring
R2: Make 2 SC in each stitch (12 SC)
R3: Make 2 SC in the first stitch and 1 SC in the next (repeat around) (18 SC)
R4: Make 2 SC in the first stitch, 1 SC in the next, and 1 SC in the third stitch (repeat around) (24 SC)
R5: Make 2 SC in the first stitch and make 1 SC in the next three stitches (repeat around) (30 SC)
R6: Make 2 SC in the first stitch and make 1 SC in the next four stitches (repeat around) (36 SC)
R7: Make 1 SC in each stitch around but only in the Back Loops (36 SC), remove the marker, slip stitch and fasten off
Body:
- change color
- in the next rows you will be making a ch 2 at the beginning of each row. The ch 2 at the beginning DOES NOT count as a stitch.
R8, 9: Ch 2 and make 36 SC around
- change color
R10: Ch 2 and make 36 DC around
- change color
R11: Ch 2 and make 36 HDC around
- change color
R12: Ch 2 and make 36 SC around
- change color
R13: Ch 2 and make 1 DC, skip the next stitch. Make 2 DC in the next stitch and repeat around (36 DC)
- change color
R14: ch 2 and make 2 DC. Make 2 DC in each DC cluster from the previous row
- change color
R15, 16: Ch 2 and make 36 SC around
- from here on I just repeated the pattern (DC-HDC-SC two times-DC cluster two times.....)
- the choice or the color is yours, these are just the suggestions.
Top and Border #1:
- I worked the border in the Back Loops only:
- 1 SC, *skip 1, HDC - TRC+DC+TRC, slip stitch to the next stitch* - repeat around (**)
- string a ribbon through the tip
Top and Border #2:
This is the alternative border if you'd like to try this one:
- *4 DC, slip stitch to the next stitch, skip the nest stitch and repeat around* (**)
- string a ribbon through the tip


|


|

|

|

|

|
Crochet Jar Cover

I wanted to make some homemade Christmas gifts this year. I also had a huge amount of empty glass jars that I wanted to put the goodies into..... so, I decided to make some cute jar covers to decorade the jars......
I used the same pattern I used for making the jewlery bowl....
Materials:
Yarn in any color
Crochet hook 4.00 mm
Tapestry Needle
Making the body of the jar cover
1. Make a magic circle
2. Ch 1, make 12 HDC in the center of the magic circle, sl st in ch1
3. Ch 2, make 2 DC in each stitch of this row (you will have a total of 24 DC)
4. Ch 2, make 2 DC in the next stitch, 1 DC in the next stitch (36 stitches around)
5. Ch 1, make 36 SC around
6. Ch 1, make 36 SC working only through the back loop of each stitch
7. Ch 1, make 36 SC, working through both loops of each stitch
8. Ch 2, make 36 DC around
9. Ch 1, make 36 SC around
- Repeat steps 8 and 9 until you have enough
10. Finish with the row of SC, join and weave in the ends
Making a shell edging
You can add a shell edning to the top of the base of the jar cover
- 1 DC in next stitch, skip 1 SC, 6 DC in the next stitch, skip 1 SC (repeat around)
- ss to join
Making a lid
1. 1. Make a magic circle
2. Ch 1, make 12 HDC in the center of the magic circle, sl st in ch1
3. Ch 2, make 2 DC in each stitch of this row (you will have a total of 24 DC)
4. Ch 2, make 2 DC in the next stitch, 1 DC in the next stitch (36 stitches around)
5. Ch 1, make 36 SC around
6. Ch 1, make 36 SC working only through the back loop of each stitch
7. Ch 1, make 36 SC, working through both loops of each stitch
8. Ch 2, make 36 DC around
9. Ch 1, make 36 SC around, join and weave in the ends
10. I added a pom pom at the top of the lip
And this is how my adorable jar looks like now..... My hubbie hot glued the jar cover to the jar so it would not slip of.....
Crochet Jewelry Bowls
My newest project is this lovely jewelry bowl. I plan to make more and give them to my lady friends and family members. I did, however, find that when you crochet items such as these they do not tend to stay in the desired shape but they just fold, since they are made out of yarn:( And it does not matter how thick or thin the yarn is, it just will not stay in shape:( So, for the stripped one, my lovely, talented and handy Hubby decided to put the bottom of a small plastic water bottle to fit its shape and it worked wonders:) We did the same for the lid:) Oh, what a joy!
The patterns, again, are not mine, so I give the gratitude and the credit to CrochetHooksYou. Thank you!:)
www.youtube.com/watch?v=XVS7O3a8nkg
And this is what my bowls look like. I did two, the big one and the small one and plan to do many more:)
The patterns, again, are not mine, so I give the gratitude and the credit to CrochetHooksYou. Thank you!:)
www.youtube.com/watch?v=XVS7O3a8nkg
And this is what my bowls look like. I did two, the big one and the small one and plan to do many more:)
Crochet Apple Coasters
Oh, my Goodness.... How easy and satisfying this next project was. I can already see it - the last minute housewarming gift, and it will definitely go on my Christmas gift list.
The pattern is entirely from HappyBerry Crochet and it is super easy to follow! Thank you HappyBerry Crochet:)
www.youtube.com/watch?v=j6K9YGxbTzk
And this is how mine have turned out. It makes me want to sink my teeth into this juicy red apple. And I am a teacher too!
The pattern is entirely from HappyBerry Crochet and it is super easy to follow! Thank you HappyBerry Crochet:)
www.youtube.com/watch?v=j6K9YGxbTzk
And this is how mine have turned out. It makes me want to sink my teeth into this juicy red apple. And I am a teacher too!

|

|
Crochet Coffee Pot Coasters
Since I am already on a subject of coasters I decided to make a new batch. This time it in not apples, it is the cutest coffee pot coasters ever! I fell instantly in love when I saw the pattern on Kitty's Kreations Boutique youtube channel video:
www.youtube.com/watch?v=ppLotZ1mwV0
I did them in a different set of colors, but I followed her patterns and instructions, and they turned out GREAT!:) I am definitely putting this on my Christmas list of items to make and give as gifts:)
www.youtube.com/watch?v=ppLotZ1mwV0
I did them in a different set of colors, but I followed her patterns and instructions, and they turned out GREAT!:) I am definitely putting this on my Christmas list of items to make and give as gifts:)

|

|
"Holly Golightly" Sleeping Mask
from Breakfast at Tiffany’s
It is a gift giving occasion! I had an opportunity to send something to a cousin who lives in a different country and who recently had a birthday! I decided to make this LOVELY Sleeping Mask that is a replica of the mask from the famous movie Breakfast at Tiffany's. So, I found this great blog of this lovely girl name Twinkie Chan and have used her pattern. Thank you Twinkie Chan!
blog.twinkiechan.com/2015/01/24/holly-golightly-sleeping-mask-from-breakfast-at-tiffanys/
She also has a youtube video tutorial of the same:
www.youtube.com/watch?v=oPFmPwwuZdM
See how mine turned out. I have also found these simple sleeping mask, that I have sewn my crocheted mask on and it looks great!
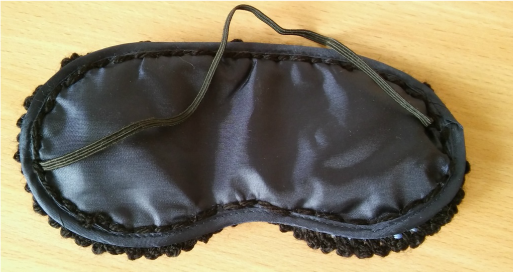
|

|

Crochet Face Scrubbie
I love these reusable, washable face scrubbies! I have made a bunch of them lately, some for me and some to give as gifts! I have used the pattern from Bay-O-Day-Crochet and this youtube video is the whole tutorial.
www.youtube.com/watch?v=FuDkv_c57ic
When I did mine, I added one more row (round) to make them a bit bigger. A super easy, washable, re-usable, face scrubby, make up remover pad.
www.youtube.com/watch?v=FuDkv_c57ic
When I did mine, I added one more row (round) to make them a bit bigger. A super easy, washable, re-usable, face scrubby, make up remover pad.

|

|
Crochet Bath and Shower Mittens
I have been wanting to make a blog post about these crochet bath mittens for some time. This is such an easy and fun project, and I am putting it on my Christmas "gifts-to-make" list pronto!:) I have already made some to give as gifts, but have also made one for me to use.
I have based these mitten on this tutorial. Thank you Ruby Stedman for the pattern:
www.youtube.com/watch?v=JQnOJGSGn0M
My pattern is slightly different then hers, and here it goes. I apologize I do not have any "work-in-progress" pictures, but the pattern is super simple and you'll be able to follow it. Enjoy!
What you need:
crochet hook 4.00 mm
light worsted yarn
scissors
yarn needle
Steps:
1. Make a magic circle.
2. Chain 2 and make 11 half double crochets inside the magic circle. Connect by slip stitching in the top of the chain 2.
3. Chain 2, make 2 HDC in the next stitch, following by the 1 HDC in the next stitch all the way around. (18 stitches including the ch 2 you made at the beginning)
4. Chain 2, make 1 HDC in the next stitch, following by the 1 HDC in the next stitch, following by the 2 HDC in the next stitch all the way around. (23 stitches, including the ch 2 at the beginning of the row)
5. Chain 2, make 1 HDC in the next stitch, following by the 1 HDC in the next stitch, following by the HDC in the next stitch, following by the 2 HDC in the next stitch all the way around. (28 stitches)
6. Chain 2, make 28 HDC around.
5. Continue to make HDCs for 19 rows. (don't forget to ch 2 at the beginning of every row)
6. Ch 2, make 1 SC in every stitch in this row. (I changed the color yarn, it is optional of course)
7. Slip stitch to the top of ch 2, ch 10 and slip stitch to the beginning of the chain to for a handle)
8. Sow in the end, and voila - your bath mitt is ready to be used:)
Notes:
1. Every hand is different, so if you need more or less rows of increase, fit it to your needs.
2. If you use a thicker yarn you might not need to make 20 rows.
3. I used the HDC, because I wanted it to be thicker, but you could used the DC and it'll go much faster.
This is how mine turned out.....
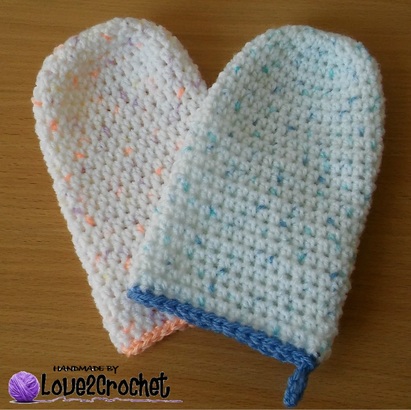
|
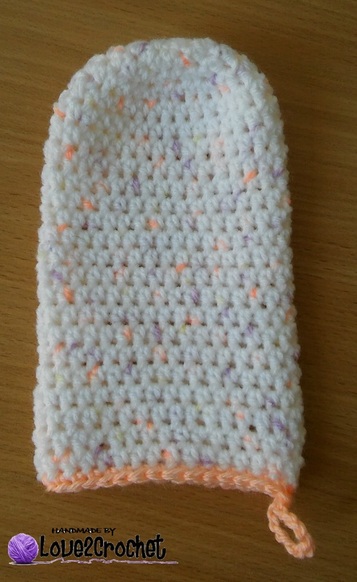
|

|

|
Crochet Fruit Coasters
Crocheting these fruit coasters was loads of fun! I finished them in a few hours, and decided to put them on the blog immediately! What a fun project! I already did a few blog posts about crochet coasters (the apple coasters, and the coffee cup coasters), but when I saw these on Repeat Crafter Me, I absolutely had to make them. They will not go unused, and will find a good home, I promise:)
The pattern is straight from Repeat Crafter Me blog. I followed it word by word and the coasters turned out great. I used the light worsted yarn, and a crochet hook 5.00 mm (for the leaves and the stems I used the 4.00 mm crochet hook).
The pattern is here, it is very straight forward and easy to follow. Thank you Sarah for the pattern!
www.repeatcrafterme.com/2013/04/crochet-fruit-coasters-pattern.html
And this is how mine turned out:

|
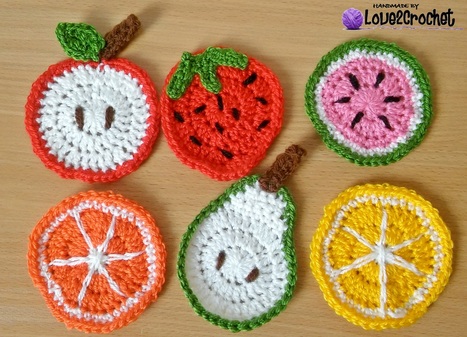
|

|

|
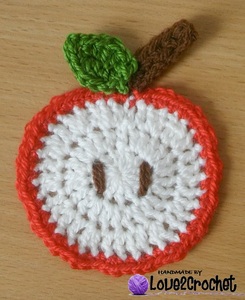
|
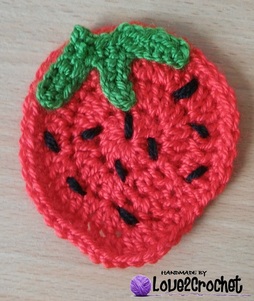
|

|
Crochet Jewelry Bowl
This is my second attempt of making a crochet Jewelry Bowl. This one was more successful, it involved less stress and less starting over..... Worth a try...
Materials:
Yarn in any color
Crochet hook 4.00 mm
Tapestry Needle
Making a bowl
1. Make a magic circle (I used to be so "afraid" of a magic circle, but it is worth learning how to make one, they are so much batter to make and use when crocheting in a round)
2. Ch 1, make 12 HDC in the center of the magic circle, sl st in ch1
3. Ch 2, make 2 DC in each stitch of this row (you will have a total of 24 DC)
4. Ch 2, make 2 DC in the next stitch, 1 DC in the next stitch (36 stitches around)
5. Ch 1, make 36 SC around
6. Ch 1, make 36 SC working only through the back loop of each stitch
7. Ch 1, make 36 SC, working through both loops of each stitch
8. Ch 2, make 36 DC around
9. Ch 1, make 36 SC around
- Repeat steps 8 and 9 until you have enough (I repeated it 2 times)
10. Finish with the row of SC, join and weave in the ends
Making a lid
1. 1. Make a magic circle (I used to be so "afraid" of a magic circle, but it is worth learning how to make one, they are so much batter to make and use when crocheting in a round)
2. Ch 1, make 12 HDC in the center of the magic circle, sl st in ch1
3. Ch 2, make 2 DC in each stitch of this row (you will have a total of 24 DC)
4. Ch 2, make 2 DC in the next stitch, 1 DC in the next stitch (36 stitches around)
5. Ch 1, make 36 SC around
6. Ch 1, make 36 SC working only through the back loop of each stitch
7. Ch 1, make 36 SC, working through both loops of each stitch
8. Ch 2, make 36 DC around
9. Ch 1, make 36 SC around, join and weave in the ends
Making a handle
- Place your needle anywhere on the second row (HDC row) with the slip stitch. Ch 10 and join on the other side of the row to make it even. Join and weave in the ends.
I reused a large plastic container (from the cotton q-tips) and it fit these directions perfectly. I hot glued the material to the container and it looks great:) I will definitely be making this again - next time I will use two colors, and put one color of SC and one on DC rows. I am sure it will look great, Check out the finished product.....

|

|

|

|

